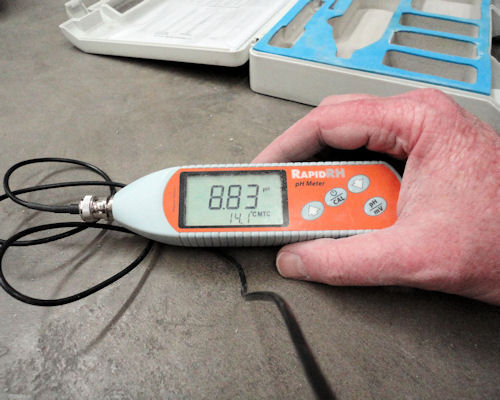
 Audio for slide 2 (mp3)
It's a good feeling when the client thanks you for a job well done and tells you how pleased they are with the finished floor. Happy clients are also good for your business - they pay their bills on time and recommend your services to others.
 Audio for slide 3 (mp3)
But it's what the client doesn't see that will really make a difference to their long term enjoyment of the floor. The effort you've put into preparing the subfloor and fixing any problems that might cause trouble later are central to the floor's performance in the coming years.
 Audio for slide 4 (mp3)
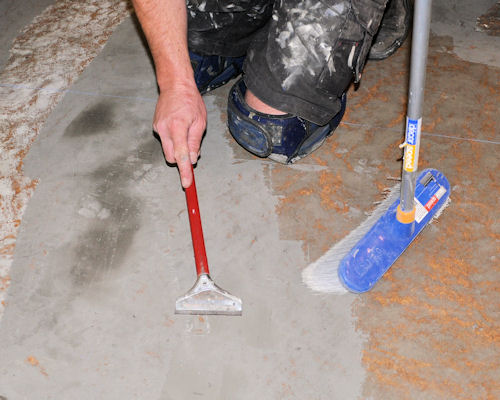
This is what sets professional installers apart from the fly-by-nights. Anyone who puts a new floor covering down on a poorly prepared subfloor is about to prove the truth of the old saying: 'Beauty is only skin deep, but ugliness goes right to the core'. Because when the ugliness starts - such as blistering, rutting, stains, delaminating layers and other forms of damage - there is nothing they'll be able to do at a 'cosmetic' level to stop it.
 Audio for slide 5 (mp3)
In this unit, we'll look at the crucial importance of subfloor inspection and moisture testing when you're carrying out a site assessment before starting a new installation project. We'll also examine the structure of subfloors and the types of material they are made from.
 Audio for slide 8 (mp3)
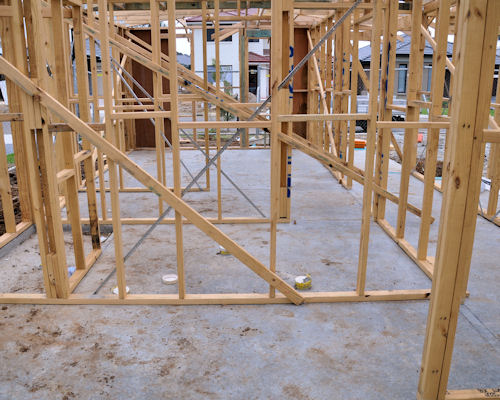
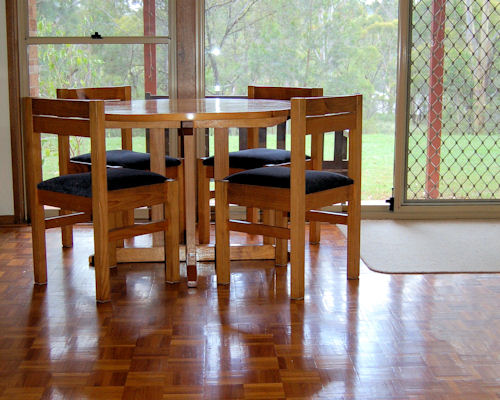
A subfloor is the structural layer of flooring in a building. It needs to be strong enough to support the walls and any other structural elements built on top of it. Sometimes the structural floor is used as the finished floor surface in the building - such as with polished concrete or exposed particleboard sheets.
 Audio for slide 9 (mp3)
But generally it's covered with a flooring product that suits the purpose of that part of the building and meets the client's needs for durability and appearance. In this section we'll discuss the main types of subfloor systems and the materials used to construct them.
 Audio for slide 11 (mp3)
The two most common types of subfloors are: concrete slab - which may be on-ground or suspended above the ground timber or steel framed - which use floor joists to support structural sheet flooring, such as particleboard or plywood.
 Audio for slide 12 (mp3)
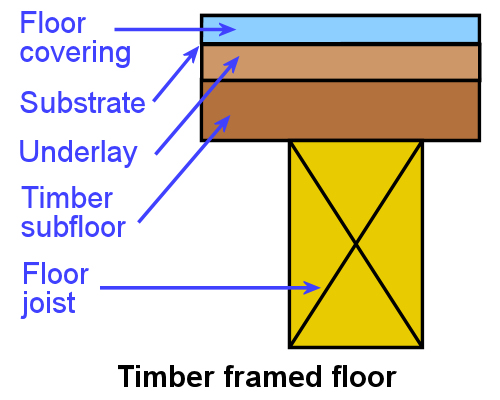
In some cases, the surface of the subfloor is suitable for a floor covering to be placed directly on top. However, where the surface is rough or has other imperfections in it, an underlay or underlayment is placed in between the subfloor and the covering. Underlay is used to provide a smooth even surface for the floor covering to lay on. It sits on top of the subfloor and can be made from either a soft cushioning material or a board product.
 Audio for slide 13 (mp3)
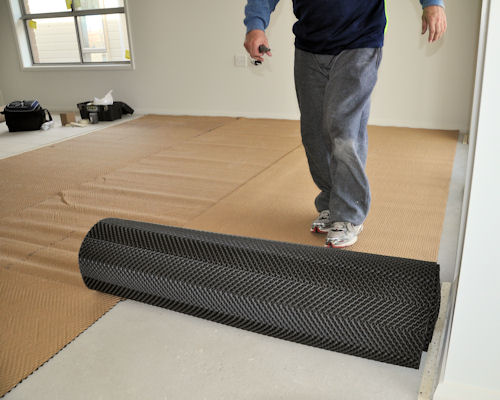
When the covering is carpet or other textile materials, a soft underlay is used, such as sponge rubber or foam. For vinyl and other resilient floor coverings, a hard underlay is generally better, made from hardboard, plywood, MDF or fibre cement.
 Audio for slide 14 (mp3)
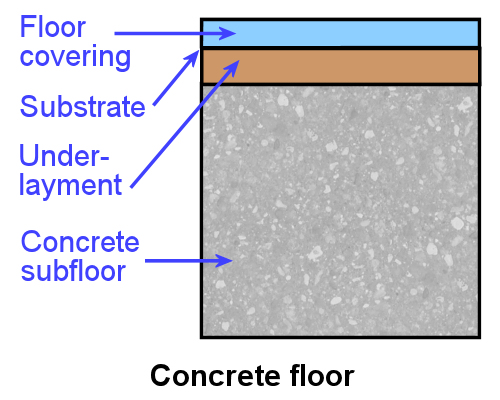
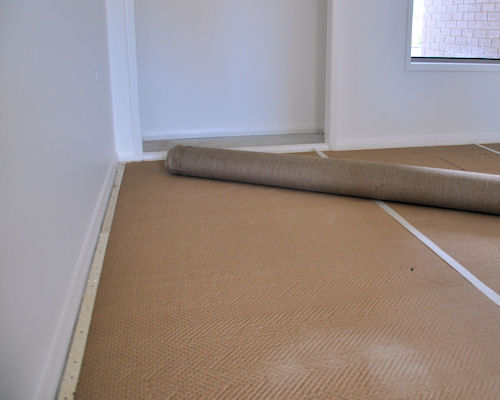
Underlayment performs the same job as underlay, but consists of a smoothing compound or cement-based levelling compound that's spread on top of a concrete subfloor. The substrate is the layer immediately under the floor covering. If the covering is being installed directly onto the subfloor, the substrate is the subfloor. If an underlay is going in between them, the substrate is the underlay.
 Audio for slide 15 (mp3)
See if you can name a suitable floor covering and underlay or underlayment for the following two situations. State the brand name and describe the type of product it is for each item you choose. Vinyl tiles to go on a concrete floor Carpet to go on a particleboard sheet floor.
 Audio for slide 17 (mp3)
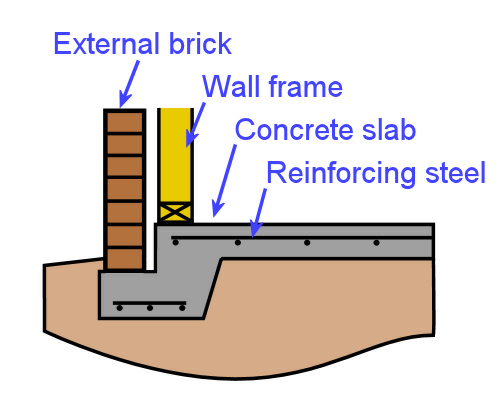
Concrete slabs are very popular in project homes and commercial buildings, especially in ground floor construction. This drawing shows a cross section of a typical on-ground slab for a brick veneer building. You can see that there's an external skin of brickwork and an internal wall frame in timber or steel. Because brickwork is porous and absorbs moisture, there is a cavity between the external and internal skins to stop moisture from seeping through and reaching the inside wall.
 Audio for slide 18 (mp3)
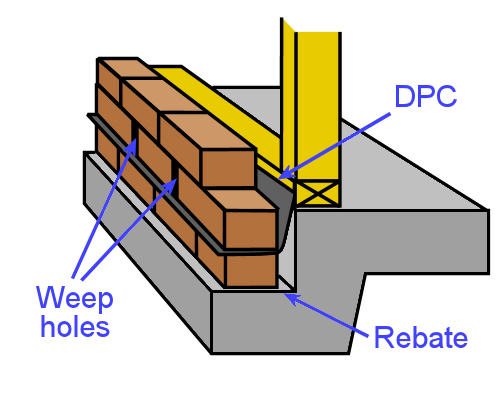
Near the bottom of the cavity is a damp proof course (DPC), also called flashing, which runs around the full perimeter of the building. Any moisture that does seep in through the bricks is caught by the DPC and channelled back outside through weep holes. The brickwork sits on a rebate in the concrete, which helps to protect the inside floor from moisture penetration.
 Audio for slide 19 (mp3)
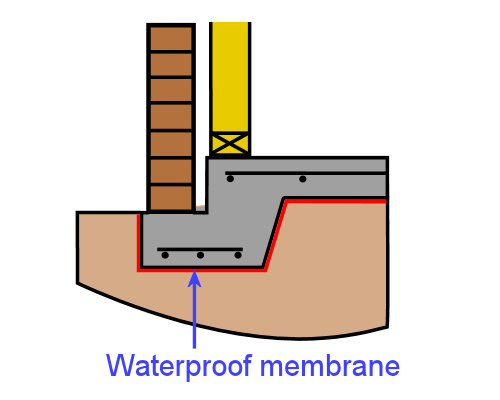
Underneath the slab is a waterproof membrane, also called a vapour barrier. Its purpose is to stop moisture in the soil from being drawn into the underside or sides of the slab. If moisture was allowed to enter, it would slowly rise to the top of the slab and cause moisture problems in the floor. In residential construction, on-ground slabs are generally 100 mm thick, with increased thickness at the edges and wherever extra strength is required internally.
 Audio for slide 20 (mp3)
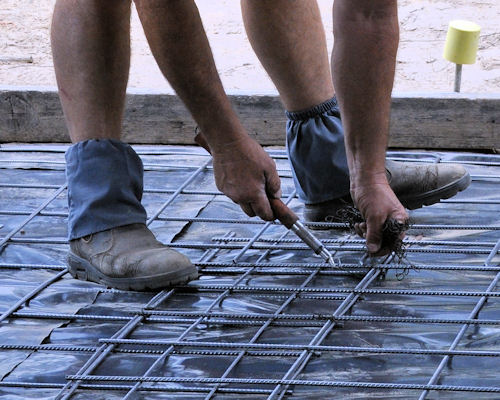
All structural slabs are strengthened with reinforcing steel, often called 'reo' by concreters. The steel is a combination of square mesh across the body of the slab and trench mesh in the footings and beams. They are joined together with tie wire.
 Audio for slide 21 (mp3)
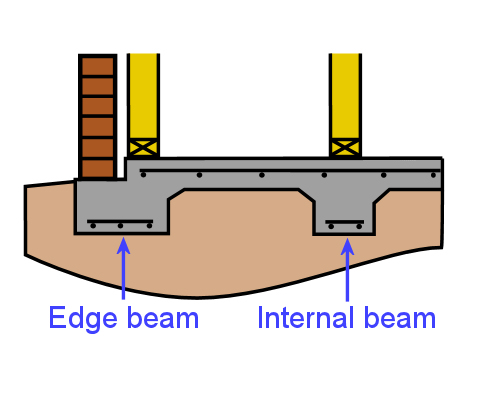
One of the most common designs for an on-ground slab is the stiffened raft slab. It is 'stiffened' by the beams, and is a 'raft' in the sense that it floats directly on the soil, without the need for piers or other deep footings.
 Audio for slide 22 (mp3)
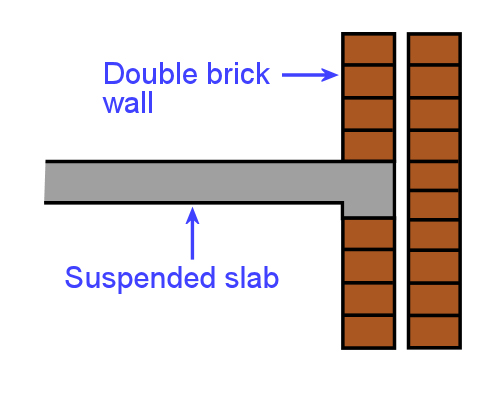
Suspended slabs are often used in upper floors of buildings. Because of their weight, the internal supporting wall needs to be stronger than a timber frame, so they're generally supported by brickwork. This drawing shows a cavity brick or double brick wall, with the slab protected from moisture by the cavity between the two 'leaves'.
 Audio for slide 23 (mp3)
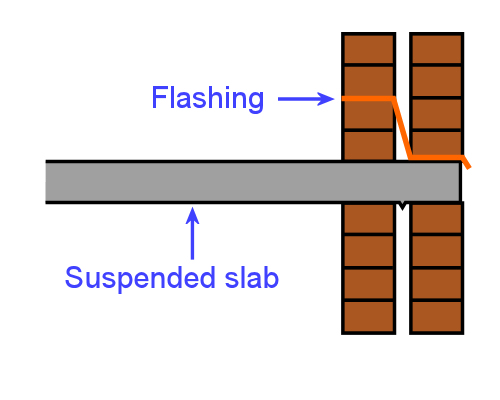
Sometimes in commercial buildings or multi-storey flats, the suspended slab is supported by both leaves of the double brick wall. In this case, flashing is used to collect any moisture that runs down the inside of the external wall. There is also a 'V' in the underside of the slab to stop water from running across to the internal wall.
 Audio for slide 24 (mp3)
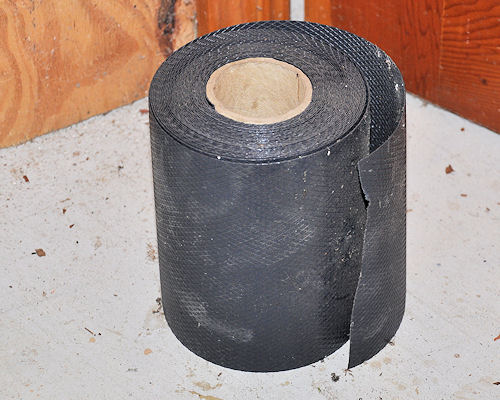
Flashing is sold in rolls and comes in a variety of materials. It's not only used at floor level in a wall, but is built into the structure under window sills, on roofs (especially around chimneys, skylights and vents) and in various other places where joints might allow water to penetrate. Do you know what materials flashing is made from? See if you can name at least three different types of materials. Which one is most common around the base of an external brick wall?
 Audio for slide 26 (mp3)
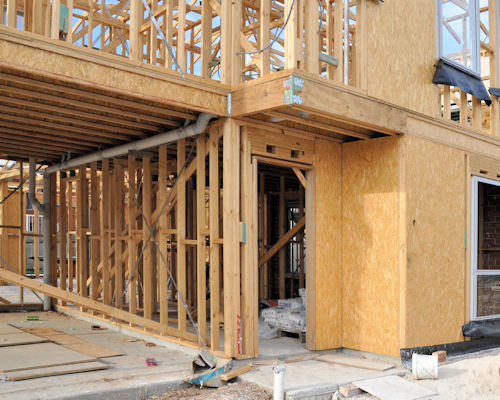
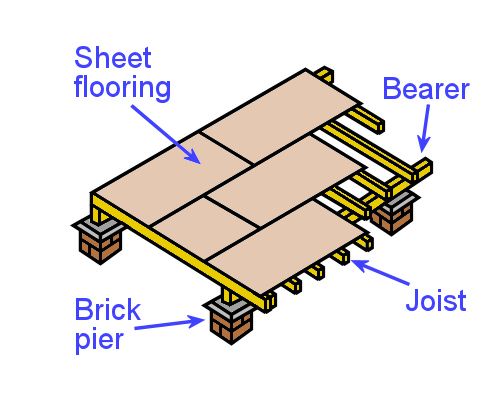
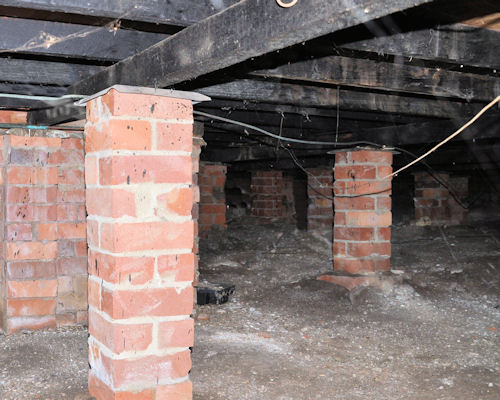
Most raised floors in domestic buildings use plywood or particleboard sheets as structural flooring, supported by a frame of timber joists. In ground floor construction the joists rest on bearers, which in turn are supported by brick piers, timber stumps or some other column or wall. Occasionally steel framing is used for the bearers and joists, but the same structural principles apply.
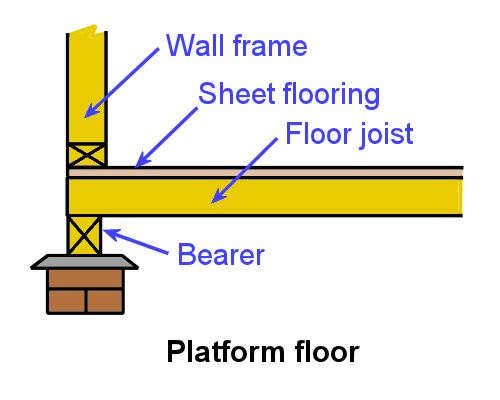 Audio for slide 27 (mp3)
This method is called platform flooring, because it allows the builders to work on a platform while they stand up the wall frames and fix them in position.
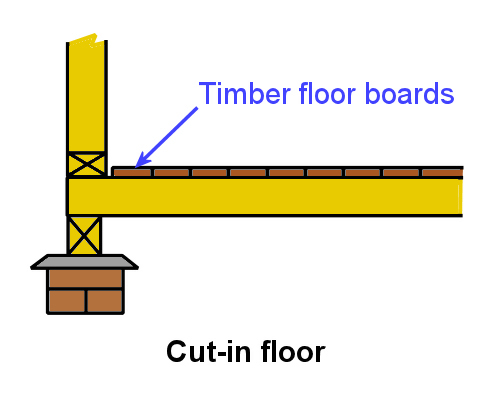 Audio for slide 28 (mp3)
An alternative to platform flooring is called the cut-in or fitted floor. This is the traditional technique used in cottage construction when floors were generally made of tongue and groove timber boards. The walls sit directly on the floor joists and are erected before the floor boards are installed. Although it's harder work for the builders, it has the advantage of allowing the roof to be covered and the building waterproofed before the floor boards go down. So the technique is still used for tongue and groove strip flooring that's fixed directly to the joists.
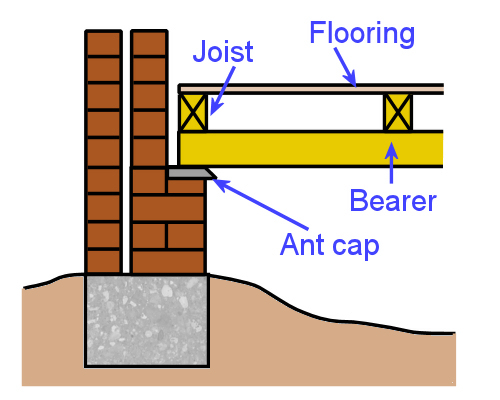 Audio for slide 29 (mp3)
If the supports under the bearers are in direct contact with the soil, they need a termite shield placed on top. This is often called an ant cap (although it's worth mentioning that termites aren't really ants, even though they're sometimes referred to as 'white ants').
 Audio for slide 30 (mp3)
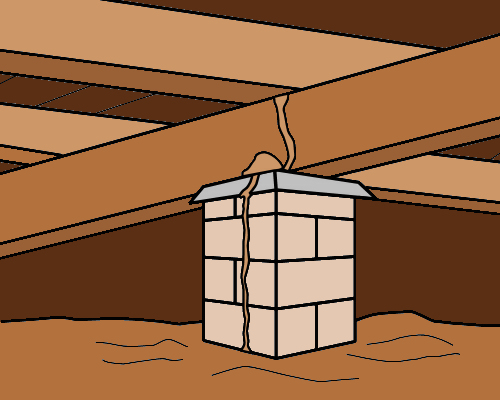
The ant cap is designed to make any termite mud tubes that run up a wall or pier more visible, because when the termites get to the ant cap they need to build the tube around the edge to get to the timber above. Ant caps are made from galvanised steel or some other durable metal. However, they are also protected from corrosion by a layer of DPC that's placed immediately underneath, on top of the brick pier or wall.
 Audio for slide 31 (mp3)
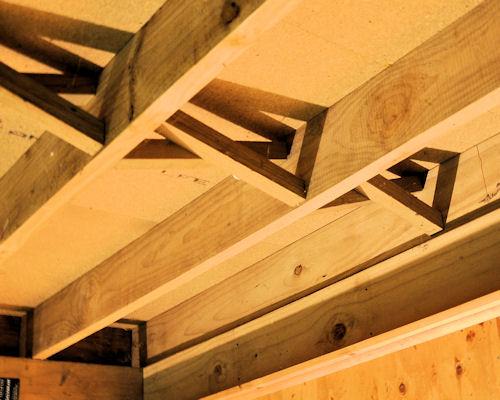
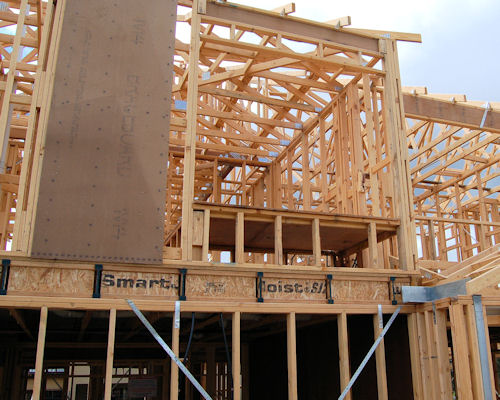
Joists in upper floors often need to span further than ground floor joists, because the supports only occur wherever there are load-bearing walls or internal columns in the building. That's why these joists are generally 'deeper' (that is, have a greater size across the width of the piece), or are made from engineered products. They also become the ceiling joists for the rooms below, which means they can be closed in on the underside with plasterboard or other types of sheet products.
 Audio for slide 32 (mp3)
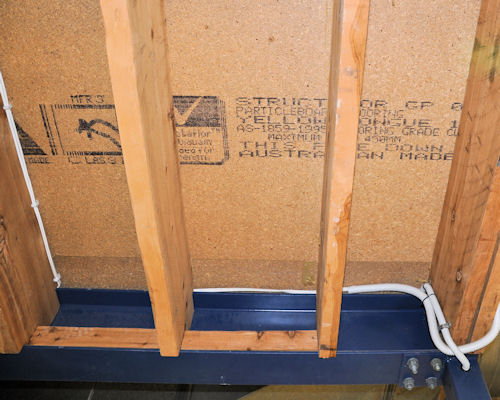
Traditionally, bearers and joists in timber framed buildings were always solid timber. Ground floors typically used hardwood, and upper floors used oregon (also called Douglas fir) because of its excellent strength-to-weight ratio. These days, however, the availability of timber species has changed a lot. Australian hardwoods and imported oregon are much more expensive and in shorter supply, while plantation pines have become readily available and more economical. In addition, there are many engineered products now on the market that are suitable for use as joists or beams. Can you name three different engineered products used as floor joists? What materials are they made from and what components are used in their structure? (If you have trouble coming up with the names of three products, have a look at the website for the Engineered Wood Products Association of Australia. This site contains a lot of information on these types of products.)
 Audio for slide 34 (mp3)
In the last lesson we mentioned that structural sheet flooring is usually made from particleboard or plywood. Here are some more details on these two products.
 Audio for slide 35 (mp3)
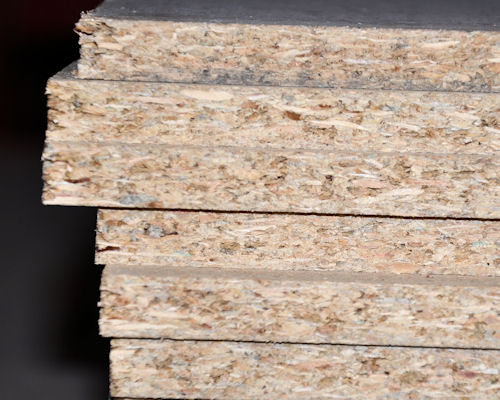
Particleboard Particleboard is also called chipboard, because it's made from small chips of wood glued together and compressed in a high-temperature press. Different types of formaldehyde glue are used in different grades of particleboard, depending on the end use of the product and the performance that's expected of it. In the case of flooring, the glue is high strength phenol formaldehyde.
 Audio for slide 36 (mp3)
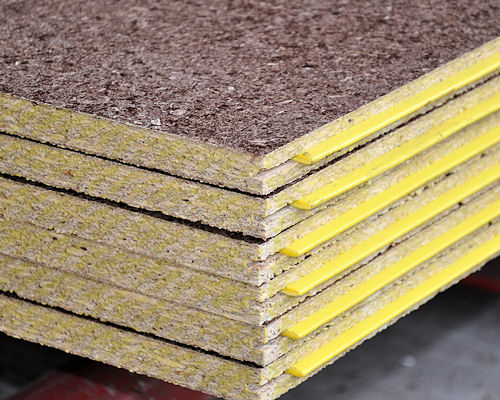
There are also various additives available, such as fungicides, termiticides and fire retardants, which can be specified if there's a higher than normal risk of attack or damage. Some manufacturers also seal the edges of the sheet to protect it further from moisture.
 Audio for slide 37 (mp3)
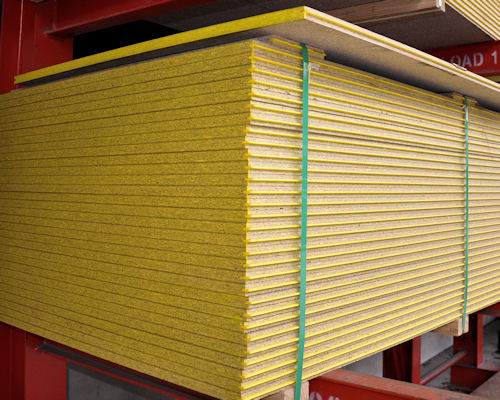
The sheets have a groove along the two long sides, with a plastic tongue in one of the grooves. Manufacturers tend to colour-code the tongue to identify the thickness of the sheet - so you'll often hear people refer to particular products as 'yellow tongue', 'red tongue' and so on.
 Audio for slide 38 (mp3)
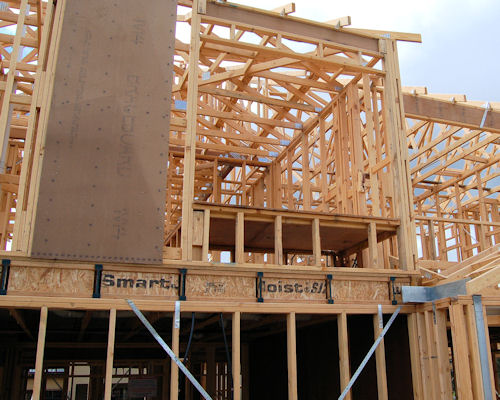
Particleboard flooring is designed to withstand exposure to the weather for three months. This gives the builder time to put down a platform floor and then install the wall frames, roof trusses, cladding and roof covering. The flooring is glued to the joists and nailed to help secure the sheets while the glue sets.
 Audio for slide 39 (mp3)
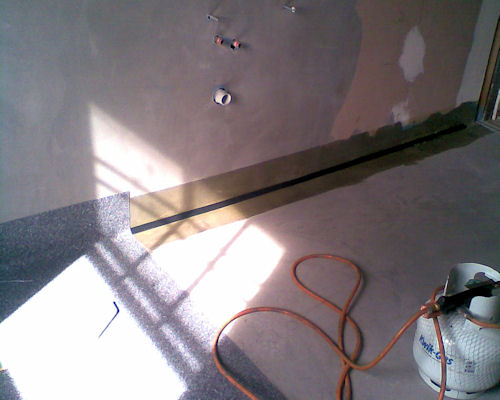
In some cases the sheets are used right across the entire floor, including in wet areas such as bathrooms and laundries. However, for the flooring to be successful in wet areas it needs to be well protected from moisture with the use of flashing, surface sealants and careful building techniques. An alternative product in wet areas is compressed fibre cement, which is much more resistant to water.
 Audio for slide 40 (mp3)
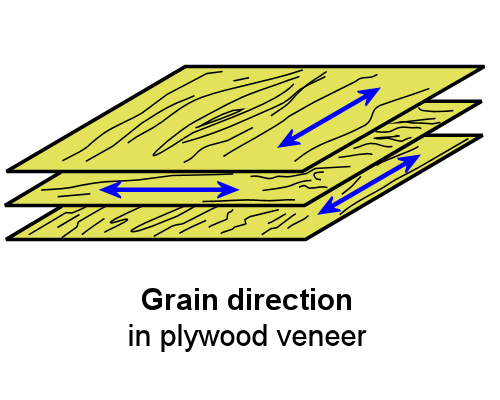
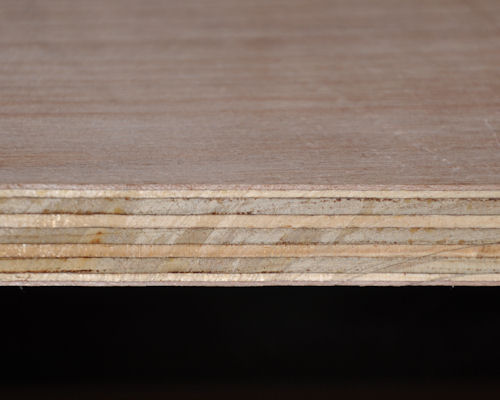
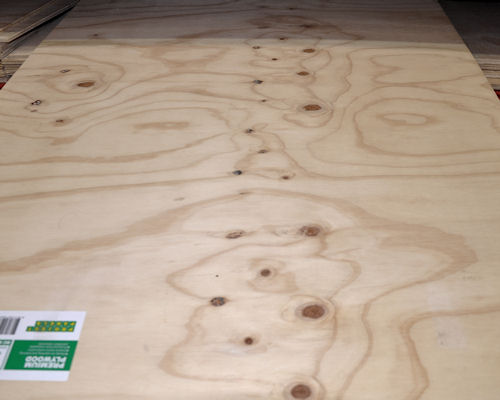
Plywood Plywood is made up of several 'plies', or layers of wood veneer, glued together and bonded in a high temperature press. The direction of the grain in each layer runs at right angles to the layer above and below it. This makes it stronger than particleboard, because timber fibres are very strong in the direction of their grain, and by alternating the layers the strength is spread in all directions.
 Audio for slide 41 (mp3)
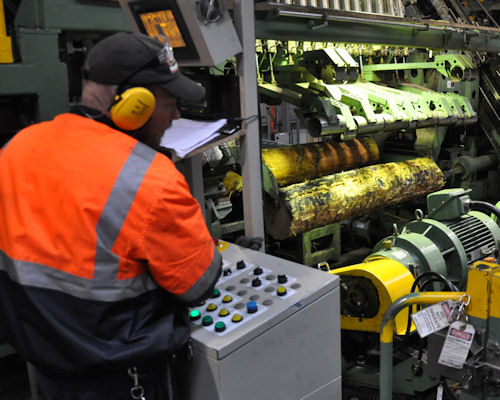
The veneer is rotary cut on a lathe, and comes away in a long continuous sheet. It is then re-cut into sizes suitable for laying up into plywood and coated with a phenol formaldehyde glue. Once it has been pressed and allowed to cool, the sheets are trimmed to size. Like particleboard flooring, plywood flooring has a groove machined into both long sides, with a plastic tongue inserted into one side.
 Audio for slide 42 (mp3)
Plywood is more durable than particleboard, and it can be treated with a light organic solvent preservative (LOSP) for extra resistance to insect attack and fungal decay. However, it still needs to be protected from constant exposure to moisture, so normal 'wet area' building practices still apply.
 Audio for slide 43 (mp3)
The veneer grade of plywood flooring is 'CD' - meaning a C grade top face and D grade back. C grade means that any knot holes or splits must be filled, and D grade means that knot holes, splits and other imperfections may be left open.
 Audio for slide 44 (mp3)
For more information on particleboard and plywood, go to the Engineered Wood Products Association of Australia (EWPAA) website. If you click on the 'Library' menu link, you will see a wide range of downloadable technical guides, fact sheets and video clips. Have a look now at the topics available and follow up on the ones that interest you.
 Audio for slide 46 (mp3)
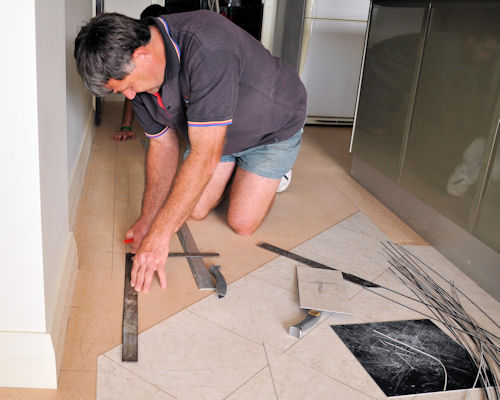
Strictly speaking, the underlay is not part of the subfloor, because it doesn't perform a structural function. However, it does form the substrate underneath certain types of floor covering, and there may be times when you need to assess it as part of your subfloor inspection. The main board products used as underlay are hardboard, plywood, MDF and fibre cement.
 Audio for slide 47 (mp3)
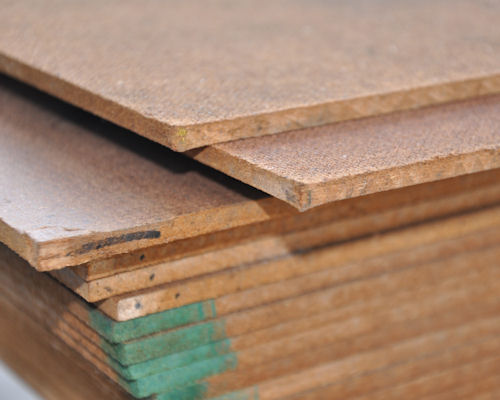
Hardboard Hardboard is made from wood fibres compressed into a sheet in a high temperature press. In principle, the bonding is achieved entirely through the 'felting' process of the fibres and the natural glue, or lignin, already present in the wood. However, other chemicals can be added to improve the board's strength and resistance to moisture, insect attack and decay.
 Audio for slide 48 (mp3)
Hardboard is often referred to by the trade name 'Masonite', which comes from the Mason gun used to produce the wood fibres. In this process, the wood chips are steam heated in a high-pressure cylinder and then released into a cyclone, which causes the chips to explode into fibres.
 Audio for slide 49 (mp3)
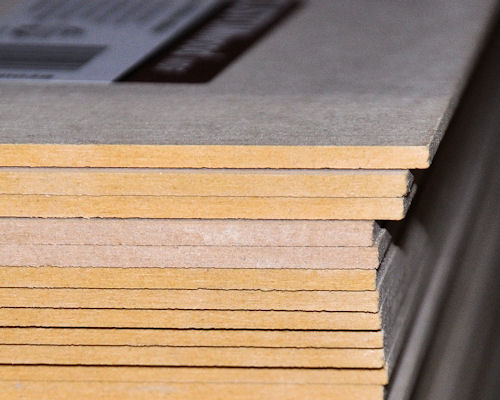
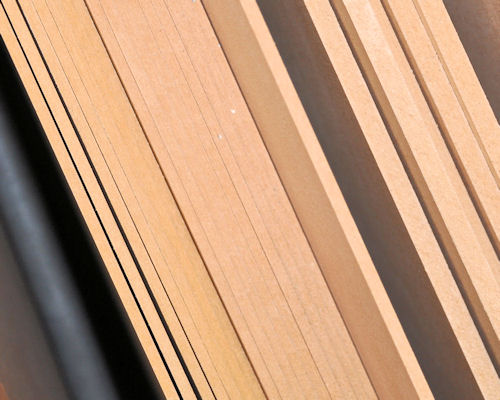
Medium density fibreboard (MDF) Medium density fibreboard, or MDF, is manufactured in a similar way to particleboard, using the same sorts of glues and additives. The big difference is in the way the wood fibres are treated before they're pressed.
 Audio for slide 50 (mp3)
The wood is heated under pressure until the fibres and natural glues that bond them together soften, and then the fibres are rubbed apart to produce a much finer material for pressing. The end result is a sheet with a higher density and more even consistency than particleboard.
 Audio for slide 51 (mp3)
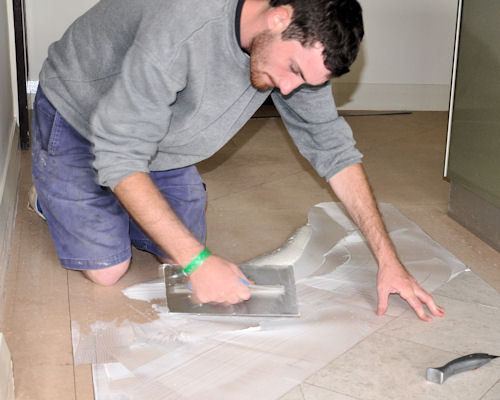
MDF underlay uses melamine and urea formaldehyde glue to make it more resistant to moisture than standard grade MDF. However, it still needs to be protected from moisture to stop it from rotting or swelling over time.
 Audio for slide 52 (mp3)
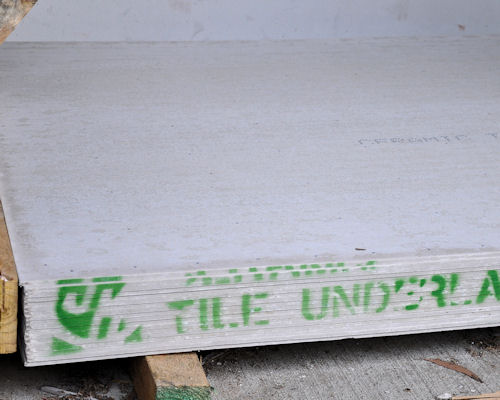
Fibre cement Fibre cement is made by bonding cellulose fibres with cement, sand and water. Traditionally asbestos was used as the fibre reinforcement in 'fibro' products because of its excellent durability and low cost. However, asbestos fibres were found to cause serious health problems in people who breathed in the dust, and it is no longer used in Australia. Fibre cement underlay is highly resistant to swelling, shrinkage, fungal decay and insect attack.
 Audio for slide 53 (mp3)
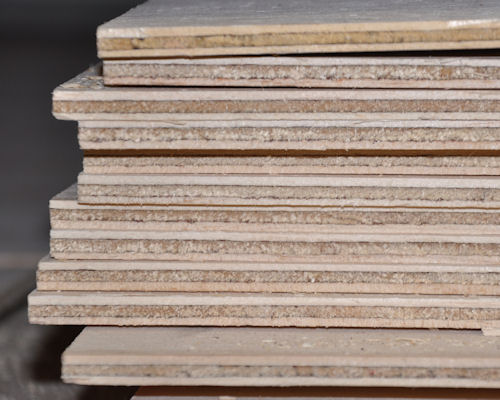
Plywood Plywood underlay is made in the same way as other types of plywood, using rotary cut veneers. The top face is free from knots and other defects that may cause problems with the floor covering.
 Audio for slide 54 (mp3)
When you're inspecting subfloors in older homes, it's likely that you'll come across asbestos fibro sheeting from time to time. Some homes also used asbestos-backed vinyl tiles and carpet underlay. These products are safe while they're left undisturbed, but you need to take special precautions if you plan to pull them up or do any work that might damage them. We'll look in more detail at how to work safely around asbestos-based products in the unit: Safety at work. But for now, see if you can answer the following questions: What types of safety precautions are needed to remove asbestos-based products? Where should these products go once they have been removed?
 Audio for slide 57 (mp3)
Everyone knows how destructive water can be when it penetrates a building during a storm or flood. But most people don't realise that moisture is permanently present in just about all building materials, and is constantly moving in and out of them through the process of absorption.
 Audio for slide 58 (mp3)
In this section, we'll discuss the essential role that water plays in the formation of particular materials, such as wood and concrete. We'll also examine the ways moisture moves from one medium to another as it tries to find a balance, or 'equilibrium', wherever it is present. And we'll look at the effect that these moisture changes can have on the building materials used in subfloors.
 Audio for slide 60 (mp3)
Moisture is the presence of a liquid in small amounts. Generally the liquid is water, sometimes with trace elements dissolved in it. Water is a very special substance, because it can exist as a solid, liquid or gas.
 Audio for slide 61 (mp3)
In its solid form, it turns to either ice or snow, depending on how closely the ice crystals are packed together. As a gas, it becomes vapour or steam. In between these two states it is a liquid, and one of the essential ingredients of life - in fact, humans are made up of about 70% water.
 Audio for slide 62 (mp3)
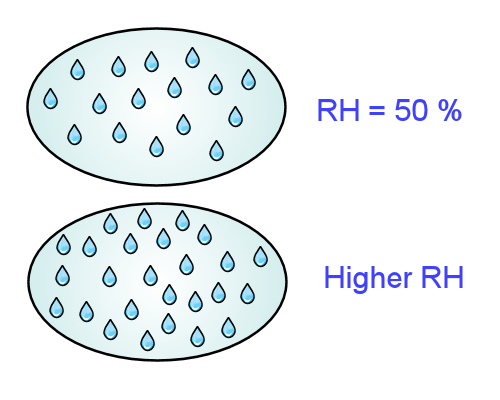
Relative humidity The amount of moisture - or water vapour - suspended in the air is called relative humidity, often abbreviated to RH. It is expressed as a percentage and is 'relative' to the maximum amount of water vapour that the air can absorb at that temperature. For example, if the RH is 50%, it means that the air is holding half of the total amount possible at that temperature. As the RH approaches 100%, the closer it gets to being fully saturated. Once it reaches saturation point, any additional moisture will result in condensation, or 'dew'.
 Audio for slide 63 (mp3)
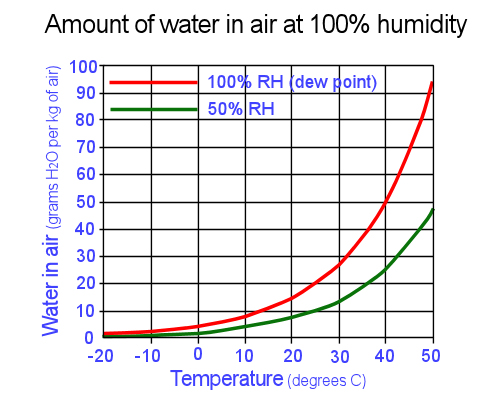
Because warm air can hold more water vapour than cool air, the actual amount of moisture present at any given RH level will be higher on a hot day than on a cold day. This graph shows the amount of water that the air can carry between -20° C and 50° C. You can see that at 50% RH (shown by the green line), every kilogram of air will contain nearly 50 grams of water when the temperature is at 50°, but once the temperature drops below zero, there is hardly any moisture at all.
 Audio for slide 64 (mp3)
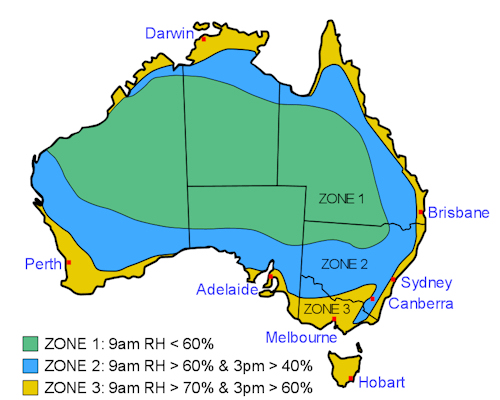
The average relative humidity in different countries also varies, depending on the size and location of the landmass and surrounding oceans. Because Australia is such a big continent, it too has big variations in average levels. This map shows the average annual RH readings around the country at various times of the day. It's based on a map from the Building Code of Australia. You can see a more detailed version of this map on the Australian Bureau of Meteorology (BOM) website.
 Audio for slide 66 (mp3)
Living trees use an enormous amount of water to manufacture food and convert it into wood fibre. As a rough average, for every one tonne of wood produced, a tree will take about 1000 tonnes of water from the soil and transport it up to the leaves, where the process of photosynthesis takes place.
 Audio for slide 67 (mp3)
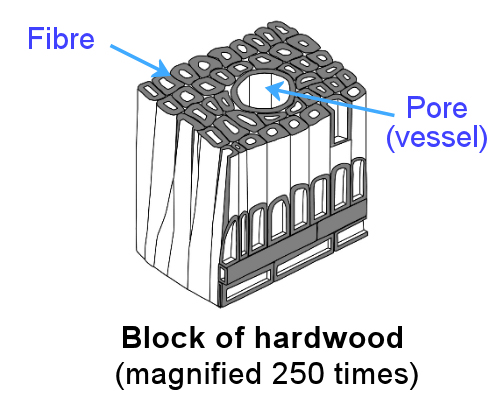
Hardwoods, such as the eucalypts, have pores (also called 'vessels') which join together to form pipes for transporting the sap. Strength is provided by the fibres, which have thick cell walls and make up the bulk of the wood.
 Audio for slide 68 (mp3)
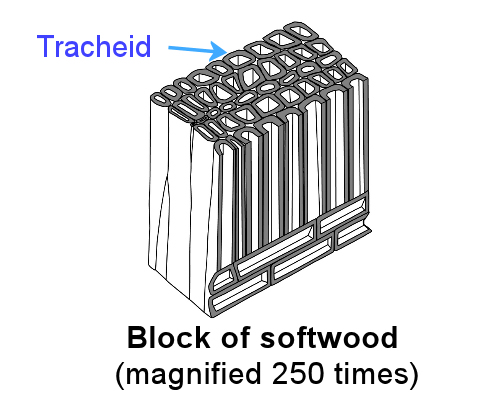
Softwoods, such as the pines, don't have pores in their cell structure. Instead, most of the woody tissue is made up of long narrow cells called tracheids, which transport the sap and also provide strength to the stem.
 Audio for slide 69 (mp3)
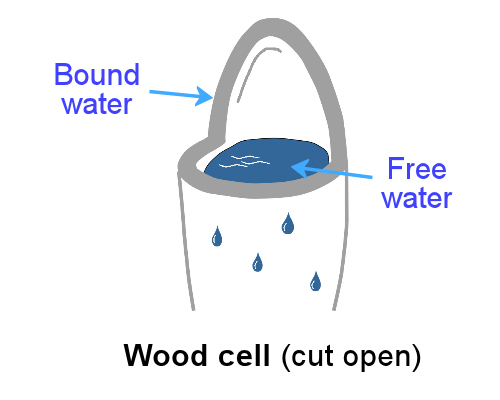
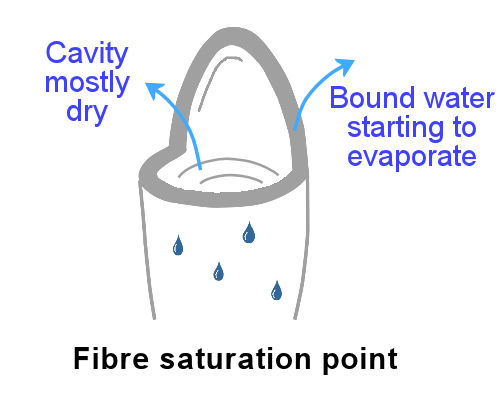
How wood dries When a log is freshly cut, the fibres contain a great deal of water, both in the cell cavities and the cell walls. Since the moisture in the cavities is free to evaporate once a cell has been cut, it is termed free water. As the wood dries, the free moisture continues to evaporate until the cavity nearly dries out. Once that happens, the bound water, or moisture bound up in the cell walls, begins to evaporate.
 Audio for slide 70 (mp3)
This point is called fibre saturation point, because the fibres are still saturated, even though the cell cavities are now almost dry. Until fibre saturation point is reached, the biggest change in the timber is that it gets lighter as the free moisture is lost. After fibre saturation point, however, the cell walls begin to shrink and get stiffer. This is the process of seasoning.
 Audio for slide 71 (mp3)
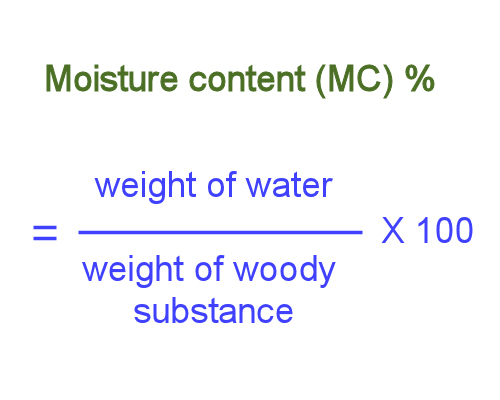
Calculating moisture content in wood The moisture content (MC) of wood is usually expressed as a percentage. This simply represents the weight of the water contained in the piece, compared with the weight of the woody substance itself. That is: Moisture Content (MC) % = weight of water x 100 weight of woody substance The fraction part gives you the proportion of water to wood fibre, and multiplying it by 100 converts the fraction into a percentage.
 Audio for slide 72 (mp3)
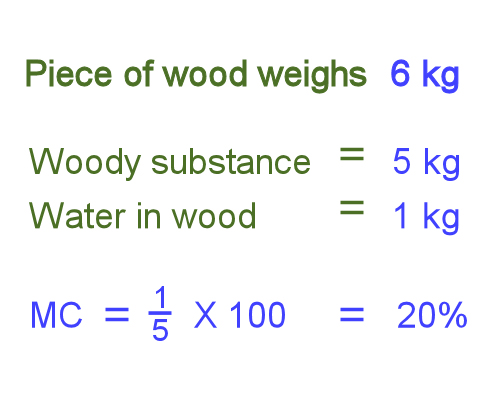
For example, let's say a piece of tongue and groove baltic pine flooring weighs 6 kg. Now let's say that the woody substance itself makes up 5 kg of the total weight. What is the moisture content of the piece? MC = 6 - 5 x 100 5 = 1 x 100 5 = 20 % The equation shows that if the woody fibres weigh 5 kg and the water weighs 1 kg, then the moisture being held in the wood will add 20% to the weight of the fibres.
 Audio for slide 74 (mp3)
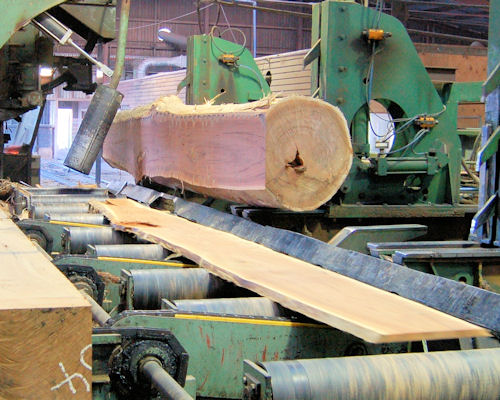
All timber starts off green, that is, full of sappy moisture from the growing tree. Once the tree is harvested and processed into timber, it will begin to dry naturally - quickly at first, and then more and more slowly as the moisture content drops down below fibre saturation point. This point is around 30% MC in most species.
 Audio for slide 75 (mp3)
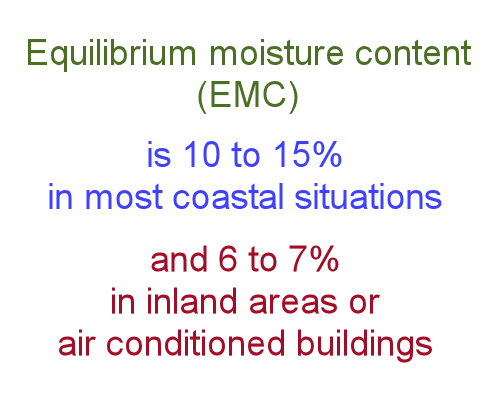
Eventually, the moisture in the timber will reach a level where it's in balance - or 'equilibrium' - with the humidity in the surrounding air. This is called equilibrium moisture content (EMC). In most indoor coastal situations, EMC is between 10% and 15%. In dry inland areas, or inside air conditioned buildings, it may be as low as 6 or 7%.
 Audio for slide 76 (mp3)
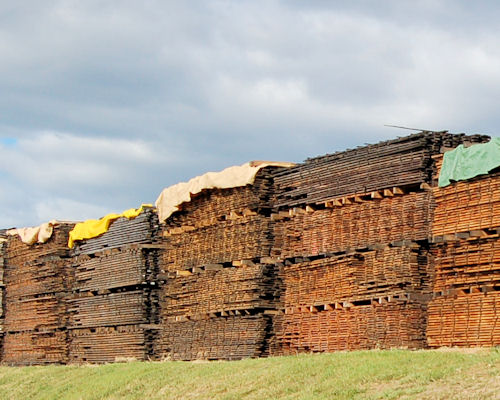
Seasoning is the process of drying timber down to EMC. It can be done naturally by simply exposing the timber to the air, although this can take some time depending on the species being dried. For example, many hardwoods take about one year per 25 mm of thickness to achieve EMC from a green state.
 Audio for slide 77 (mp3)
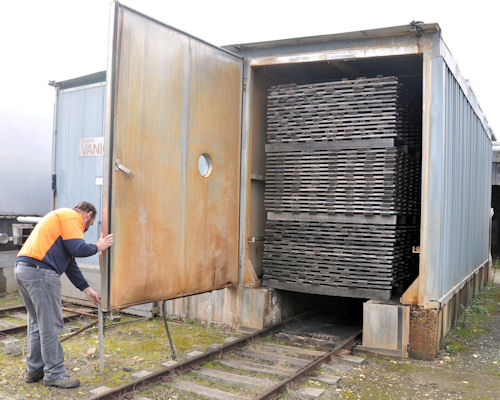
Alternatively, the timber can be kiln dried. Some kilns have solid concrete or block walls, while others have plastic membranes stretched over a frame. Either way, they all use mechanical ventilation systems and heat and humidity controls to allow the timber to dry much faster under controlled conditions.
 Audio for slide 78 (mp3)
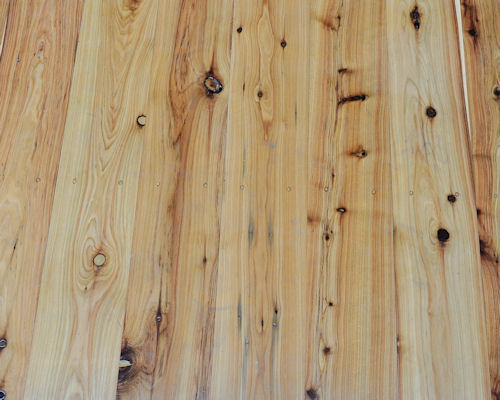
Advantages of seasoning Traditionally, building timbers were generally used in an unseasoned state, particularly in the days when house frames were built 'stick-by-stick' on-site. Even cypress pine floor boards were typically green, because cypress has a very low shrinkage rate when it dries, and the flooring was often covered with carpet or linoleum anyway.
 Audio for slide 79 (mp3)
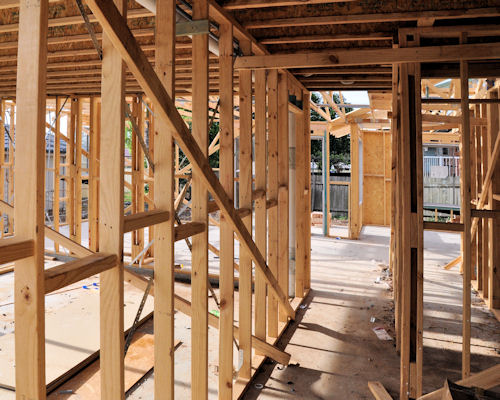
However, most species of timber perform better when they're dry, particularly the plantation pines and high grade hardwoods. So it's common practice these days to use kiln dried timber in just about all building applications.
 Audio for slide 80 (mp3)
The changing nature of EMC Once the timber reaches EMC, that doesn't mean its moisture content will remain stable. As the humidity in the atmosphere continues to rise and fall, the EMC in the timber will change accordingly. This is why in wet weather you sometimes find that timber doors and drawers tend to stick. What's happening is that the timber swells as it takes up moisture from the atmosphere and then shrinks back again when the dry weather comes.
 Audio for slide 81 (mp3)
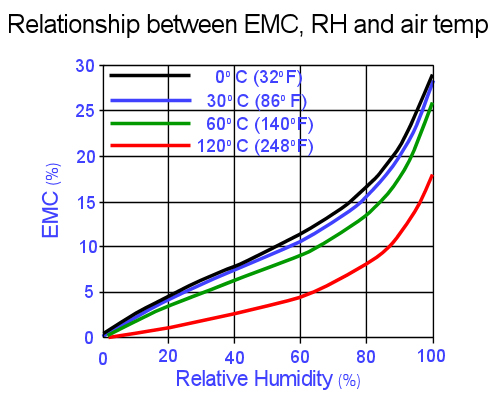
This graph shows the relationship between EMC, relative humidity and air temperature. You can see that as the RH rises, the EMC will also rise. This is why the general definition of seasoned timber under the Australian Standards is timber with a moisture content of between 10% and 15%. However, the definition goes on to allow for EMC levels outside this range when they've been specified by the client. This caters for situations when the EMC is normally lower than 10% (such as in air conditioned buildings or dry inland areas) or above 15% (such as in very humid areas).
 Audio for slide 82 (mp3)
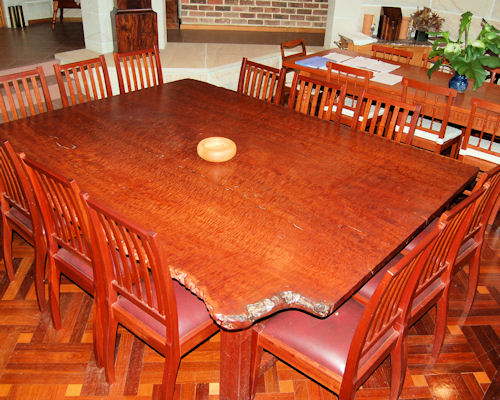
In practice, the timber's moisture content won't change immediately as the humidity in the surrounding air rises and falls. The speed of change will depend on various factors, including the cross-sectional size of the piece, whether there are any chemical treatments in it, and most of all, how exposed the surface of the wood is to the atmosphere.
 Audio for slide 83 (mp3)
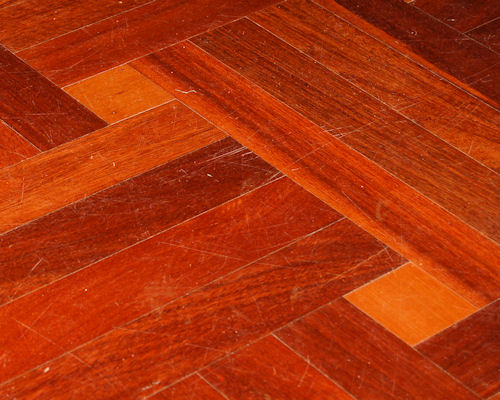
So if the timber is properly sealed with a surface finish and protected from the weather, there will be hardly any movement at all in the short term. However, if the humidity stays very high or low, and the surface finish starts to break down and allow direct contact with the wood fibres, then the EMC will change more quickly in response to the humidity levels.
 Audio for slide 85 (mp3)
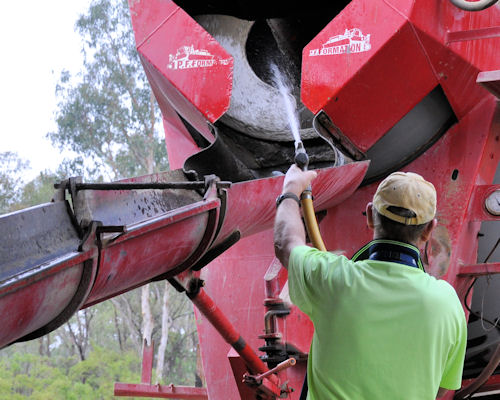
We've already talked about the importance of water in the growth of living wood fibres. In a sense, concrete has a similar relationship to water - for the chemical reaction to take place that turns cement and aggregate into solid concrete, water is an essential ingredient.
 Audio for slide 86 (mp3)
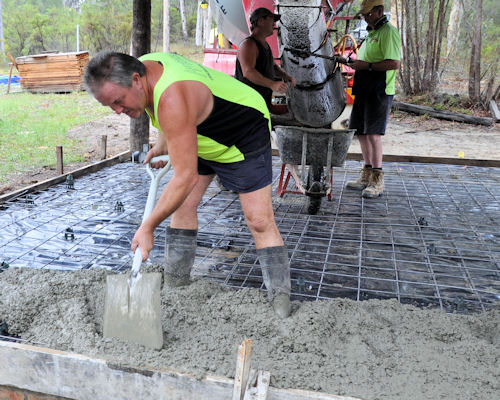
Concrete forms when aggregate particles are 'glued' together with a cement paste. The paste is made by mixing cement and water, which sets off a chemical reaction called hydration. Once the mixture cures, or hardens, the concrete becomes a solid mass.
 Audio for slide 87 (mp3)
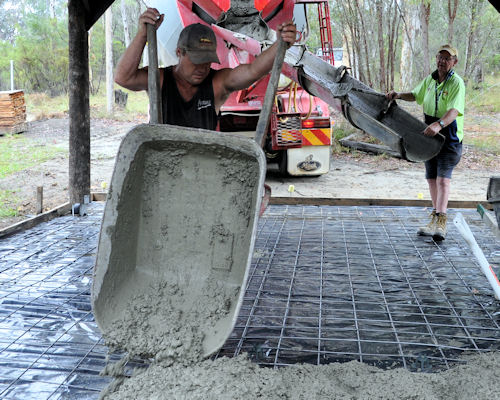
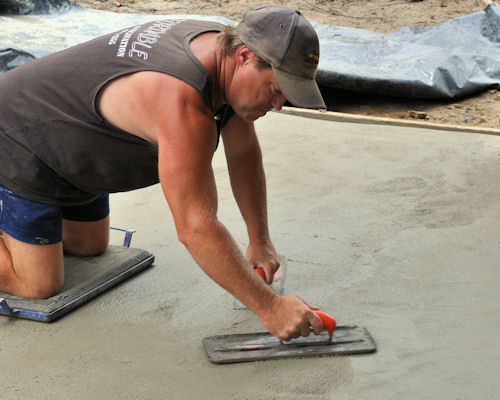
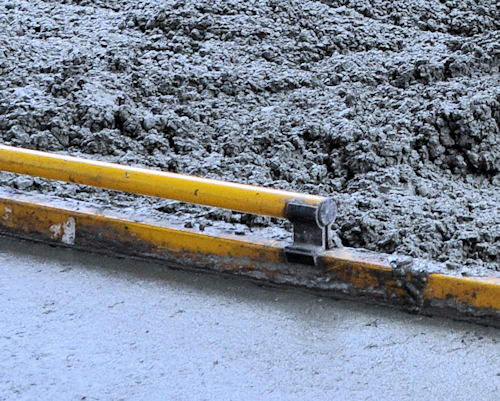
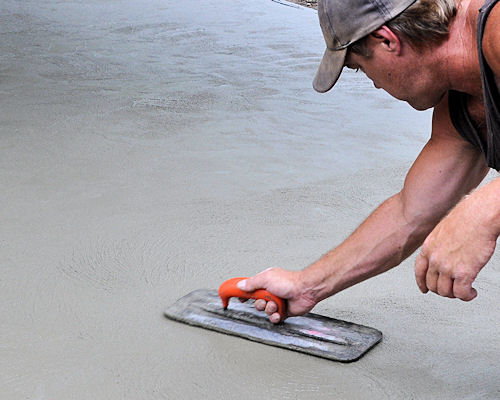
A typical concrete mix is about 10-15% cement, 15-20% water and the rest in aggregate, generally a combination of sand and blue metal. If you've ever mixed your own concrete by hand in a barrow, you've probably used the simple ratio of 4:2:1 - four shovelfuls of blue metal (or coarse aggregate), two shovelfuls of sand (or fine aggregate), and one of cement. Then you would progressively add water until the mix is fluid enough to place easily in position and trowel the surface to a smooth finish.
 Audio for slide 88 (mp3)
Water and strength The strength and quality of concrete depends on the proportions of the different ingredients. If there isn't enough cement paste to fill all the voids between the aggregates, the concrete will be porous and the surface will come out honeycombed and rough. If there's too much paste, the surface will be easy to trowel, but the concrete will shrink more and crack over time. It will also be much more expensive, because cement is the dearest component in the mix. So the trick is to get the balance just right, where the fresh concrete is workable and flows easily into the mould or formwork, but the hardened concrete is durable and strong.
 Audio for slide 89 (mp3)
In general, the highest quality concrete is made by using the least amount of water possible without sacrificing the workability of fresh concrete. However, this means that fresh concrete will have more water in it than is actually used up in the hydration process. The excess moisture will remain in tiny pores throughout the concrete and gradually dry over time, until the concrete eventually reaches EMC with the surrounding conditions.
 Audio for slide 90 (mp3)
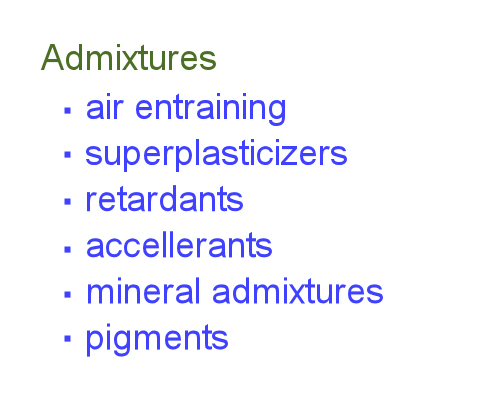
Admixtures Admixtures are additives that are put into the mixture. They are used for a range of purposes, depending on the site conditions, prevailing weather or needs of the client. Some of the most commonly used admixtures are: Air entraining, such as special detergents, which improves durability and workability and reduces freezing or thawing problems Superplasticizers, which increase strength by reducing the amount of water needed to keep the concrete fluid and workable Retardants, which slow down the setting time, especially in hot weather, to give the concrete more strength Accellerants, which speed up the setting time and are particularly used in cold weather Mineral admixtures, which improve workability, plasticity and strength Pigments, which add colour to the concrete.
 Audio for slide 91 (mp3)
For more details on how concrete is made and how to work with it, have a look at the information manual published by Cement Concrete and Aggregates Australia (CCAA) called: Concrete Basics: A guide to concrete practice. You can download it from the web under the link below:
 Audio for slide 93 (mp3)
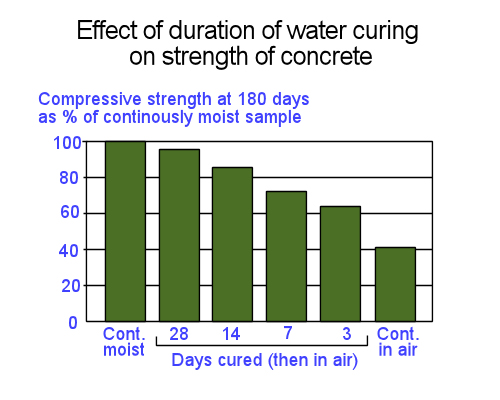
In general, the longer the concrete is kept moist, the stronger it will become - because the hydration reaction continues to bond the ingredients together for as long as there is water available. Although most of the hydration occurs within the first month, it actually continues at a slower rate for years, and the concrete gets progressively stronger throughout that time.
 Audio for slide 94 (mp3)
This graph shows the relative strength of concrete that has been cured for different periods of time. You can see that if the concrete was allowed to dry out immediately after it was poured, it would only achieve 40% of the strength it could have attained if it had been kept continually moist for 180 days.
 Audio for slide 95 (mp3)
The problem for builders is that although they know the best way to maximise the strength of concrete is to slow down the drying process, they also have a competing priority to finish the construction project in a timely manner. So good building practice often involves a compromise - the concrete is protected from moisture loss in the critical first few days or weeks, and is then allowed to dry naturally while the work continues.
 Audio for slide 96 (mp3)
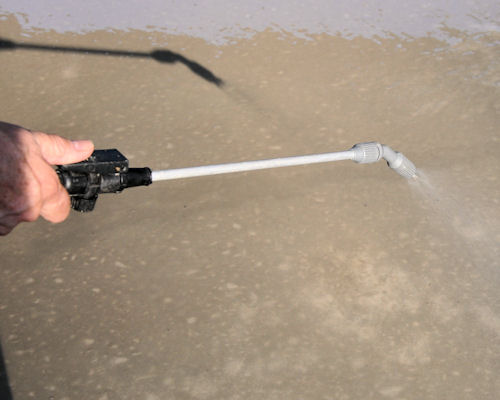
Sometimes a liquid curing compound is sprayed on the surface, which then dries to form a membrane. These compounds include wax, resin or rubber emulsions. Admixtures can also be used in the concrete mix itself to retard the drying process.
 Audio for slide 97 (mp3)
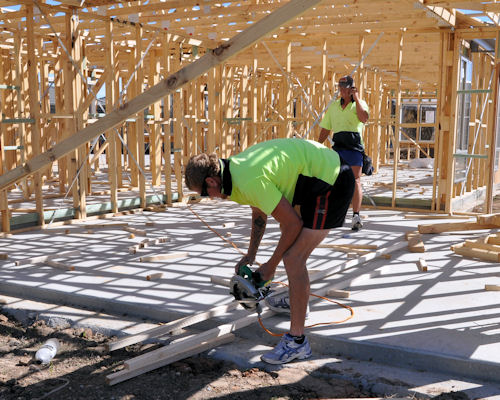
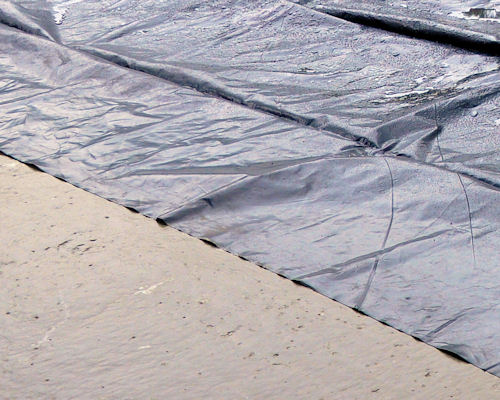
The simplest method of protecting concrete is to keep the formwork in place and cover the surface with an impermeable membrane, such as plastic sheeting. In domestic jobs this is often done for three days. On industrial projects it can be for one week or more.
 Audio for slide 98 (mp3)
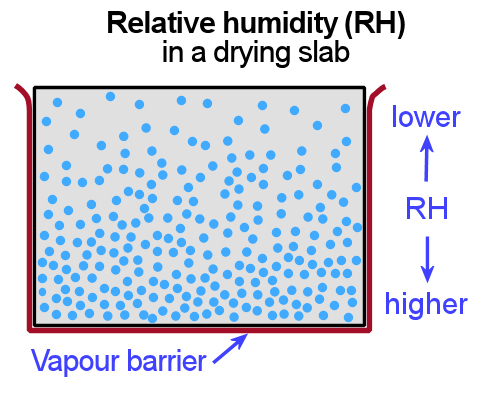
Achieving an equilibrium Like timber, a concrete slab exposed to the air will eventually dry to a relative humidity level that's in equilibrium with the surrounding atmosphere. The rule of thumb used by many flooring installers is that, under normal conditions, the slab will dry at a rate of 1 mm per day in relation to its thickness. This means that a 100 mm thick slab will take 100 days to reach EMC, and a 150 mm slab will take 150 days.
 Audio for slide 99 (mp3)
While this drying takes place, there is a moisture gradient in the slab. In other words, the relative humidity is less at the top of the slab and progressively increases with depth. As the moisture continues to evaporate from the surface, the heavier concentrations of moisture below are drawn upwards.
 Audio for slide 100 (mp3)
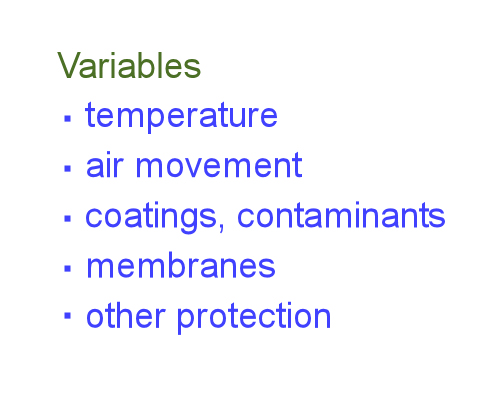
Caution on the rule of thumb Although the '1 mm per day' guideline is handy to know, in practice there are a lot of variables that can make the actual speed of drying faster or slower. These include: temperature and dryness of the surrounding air - higher temperatures and drier air will allow for a faster absorption of moisture air movement over the slab - the more circulation there is, the easier it will be for the air to carry away evaporated moisture coatings or contaminants on the surface - these will slow down evaporation moisture-resistant membranes on the surface - these will also slow the movement of moisture other forms of protection such as a roof and closed-in walls - these will shield the concrete from exposure to the sun and wind.
 Audio for slide 103 (mp3)
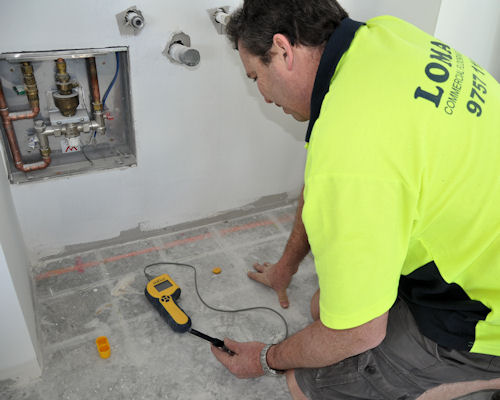
You're likely to carry out the subfloor inspection when you meet the client or builder on-site to do a measure-up. It's important that you get a good idea of the subfloor conditions and any problems that may exist before you start to cost up the project. This will let you tackle the issues with the client right at the outset and discuss what the problems are, how much work is involved in fixing them, and who will carry out the work.
 Audio for slide 104 (mp3)
Don't let the client pressure you into turning a blind eye to any problems that might come back later to haunt you. And don't let your own timetable or workload tempt you into taking shortcuts in the subfloor inspection or preparation work that needs to be done.
 Audio for slide 105 (mp3)
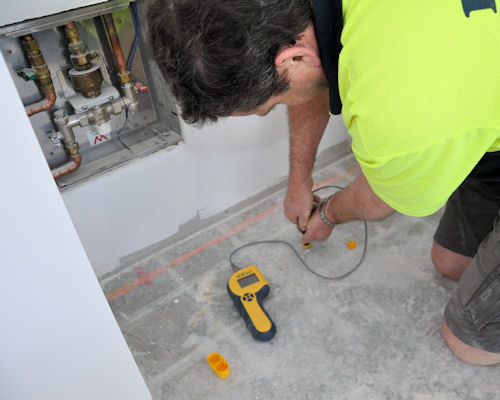
Remember, once you start the project, any problems with the subfloor will become your problems. And even if they're not immediately obvious in the finished floor, you may still be held responsible for them at some time in the future if they affect the long term quality of the work you've done. As a wise flooring installer once said: You don't have to carefully inspect every installation project - just the ones you don't want to replace at your own expense!
 Audio for slide 106 (mp3)
In this section, we'll discuss the flooring installer's responsibility for inspecting the subfloor and testing it for moisture content. We'll also talk about the sorts of things you should look for in the subfloor and around the jobsite as part of your site assessment. Note that the actual process of carrying out a moisture test on the subfloor is covered in detail in the next section of this unit.
 Audio for slide 108 (mp3)
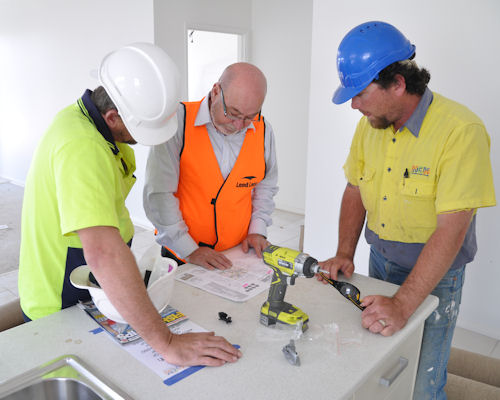
Safety requirements for different building sites vary, depending on the size of the jobsite. If you're carrying out a site assessment at someone's home, the conditions will be quite different from those at a high rise commercial building. Obviously, the need to work safely never changes - your number one concern should always be to finish the day as fit and healthy as you began it. But the compliance requirements will vary according to the scale of the project and the types of activities going on around you.
 Audio for slide 109 (mp3)
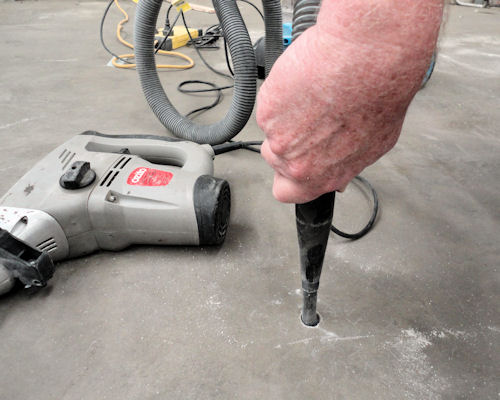
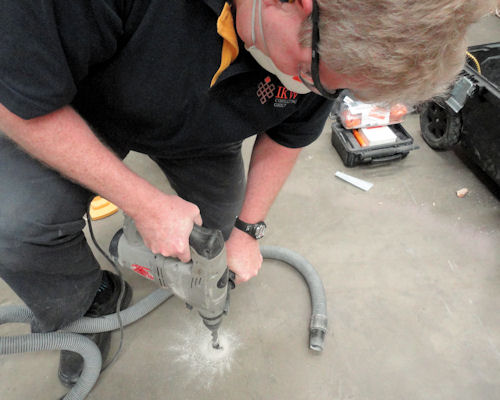
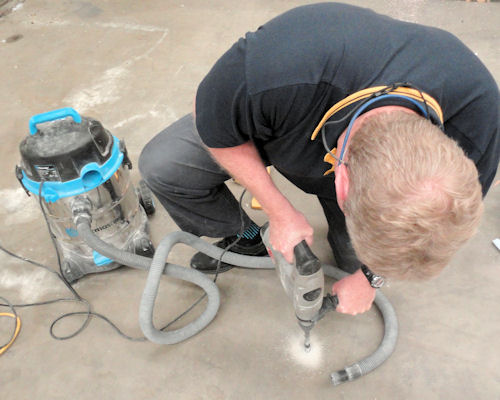
Personal protective equipment Some items of personal protective equipment (PPE) are only needed when you're using certain tools or doing particular tasks. For example, if you're going to use a hammer drill to put test holes in a concrete subfloor, make sure you wear hearing protection, safety glasses and a dust mask.
 Audio for slide 110 (mp3)
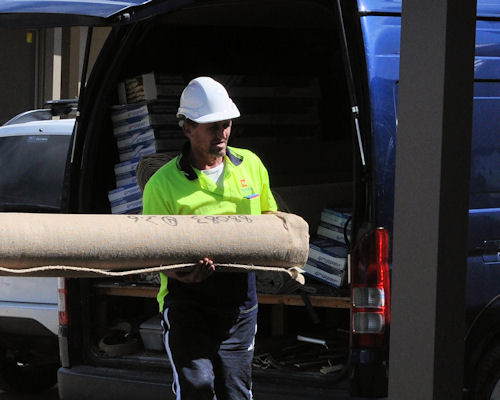
Other items of PPE are general site requirements, and will apply to everyone who comes onto the site. These may include a high visibility shirt and work boots. On large projects you may also be asked to wear a hard hat while you're outside or near work being carried out overhead.
 Audio for slide 111 (mp3)
White card The White Card is the accreditation you receive from WorkCover once you've completed the Construction Induction Certificate. This short course is compulsory for all people who work on building sites. Previously, different states and territories around Australia used different colours for the cards they issued, so you may still hear people calling it a Green Card or some other colour. Whenever you're on-site you should carry the White Card with you, just in case you're asked to produce it by a builder or inspector. If you're going to a commercial jobsite, you're sure to be asked for it at the site office when you sign in.
 Audio for slide 112 (mp3)
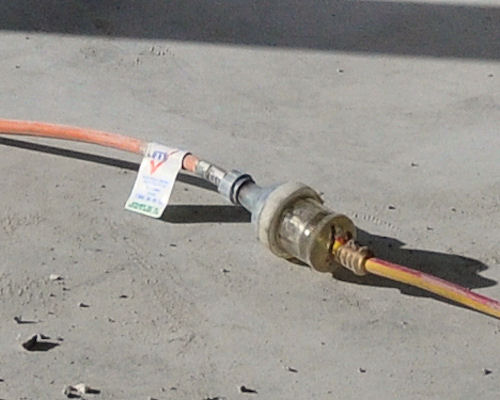
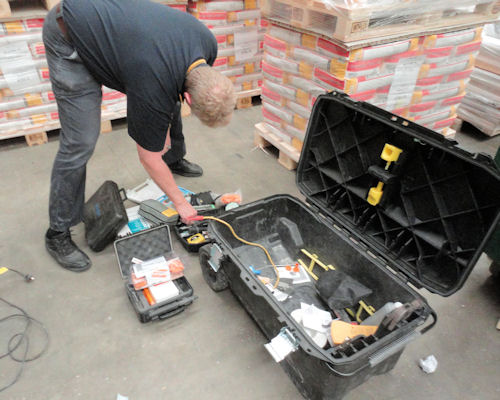
Electrical safety Any electrical tools, extension leads and other mains power devices that you take onto a construction site need to have been tested and tagged by an authorised person. Because construction sites come under the category of 'Hostile operating environment', each of these items must be tested and tagged every month.
 Audio for slide 113 (mp3)
On large building projects, the site manager is likely to check that all your power tools and equipment have been properly tagged. They may also ask to see your 'Electrical equipment register', which lists each item together with its inspection date and the details of the person who tested it. WorkCover produces template forms for the full range of registers and other Work Health and Safety documents commonly used on-site in their 'Subbypack'. You can download the Subbypack by clicking on the link below.
 Audio for slide 115 (mp3)
Every flooring installer should be familiar with the Australian Standards relating to the work they're carrying out. The Standards not only set the benchmarks for what's considered an acceptable job, they'll also help to protect you if there is ever a dispute about the quality of the work.
 Audio for slide 116 (mp3)
This is especially the case when something goes wrong and the client wants to know who's liable. 'Liability' refers to the level of responsibility that particular people take for the problem, and who will pay to fix it. If you've followed the Standards in every aspect of the installation project, you're always able to say that you've done your job properly and met all of your responsibilities as a professional installer.
 Audio for slide 117 (mp3)
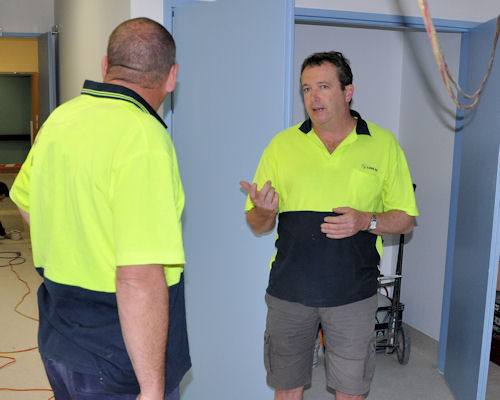
It's very important to be able to say this, because as an expert in your field people will have high expectations of you. The client will have taken it for granted that before you started the installation you made all the necessary checks and satisfied yourself that the site conditions were suitable. If you believe there are problems with the subfloor, you need to tell the client at the outset and agree with them on a course of action.
 Audio for slide 118 (mp3)
It might mean that you carry out extra work to improve the subfloor conditions or bring in a specialist to do the work. Or it might mean that you turn down the job completely, or at least wait until the client has taken other steps to fix the problem.
 Audio for slide 119 (mp3)
General provisions in the Australian Standards Below are some of the general provisions in the Australian Standards relating to subfloor inspection. We'll look at specific provisions to do with checking moisture content levels in the next section of this unit.
 Audio for slide 120 (mp3)
Requests for information from the client As part of your site assessment, you should ask the client to provide the following information: steps that have been taken to protect the walls and subfloor from rising damp location of the air conditioning and/or heating systems whether the subfloor ventilation complies with the Australian Standard requirements (as set out in AS 1684 and 3660) if the subfloor is concrete, the date it was completed, the thickness of the slab, whether curing agents were used, and any other details relevant to the floor covering installation.
 Audio for slide 121 (mp3)
Report to the client If you find problems with the subfloor or other aspects of the site, you should prepare a written report for the client or the builder. This will allow you to state what the issues are and how they can be addressed. Once the issues have been documented, you'll be able to agree with the client on who will be responsible for carrying out the work.
 Audio for slide 122 (mp3)
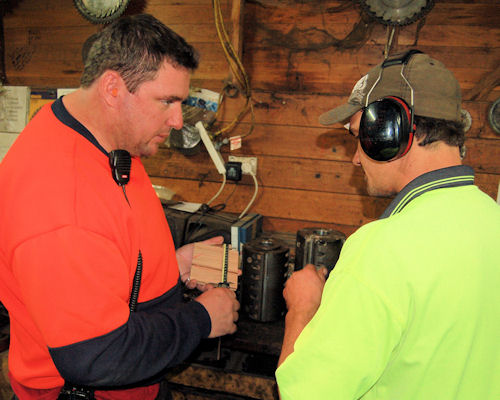
Other Standards and guidelines In addition to the Australian Standards, there are various industry standards and codes of practice developed by organisations such as the Australian Timber Flooring Association (ATFA) and Forest and Wood Products Australia (FWPA). When a flooring manufacturer or installer becomes a member of one of these associations, they enter into an agreement to comply with the association's standards and codes.
 Audio for slide 123 (mp3)
This lets the business tell their clients that they're part of an industry network that upholds a set of rules governing quality and performance. It also keeps them in touch with the latest trends in the industry and the expectations of customers in relation to service and quality. So it's often the case that a business has to comply with an association's standards and codes as well as the Australian Standards that apply to their work.
 Audio for slide 124 (mp3)
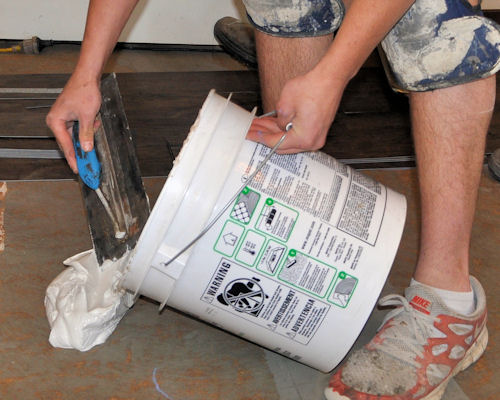
For the on-site installer, there is one more layer of standards that you need to comply with. These are the manufacturer's instructions on how to use their products in the 'approved' way. Like all of the standards and codes mentioned above, these guidelines are not only designed to give you the best results - they'll also help to protect you if something goes wrong. Manufacturers often provide a warranty that says they will replace a product or help to rectify problems if the product doesn't perform as well as it's meant to. But the warranty only applies when the product is used strictly in accordance with the instructions.
 Audio for slide 125 (mp3)
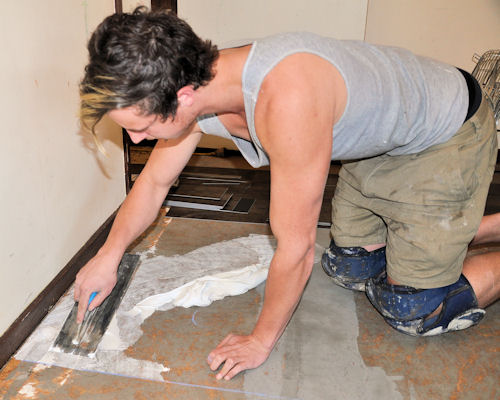
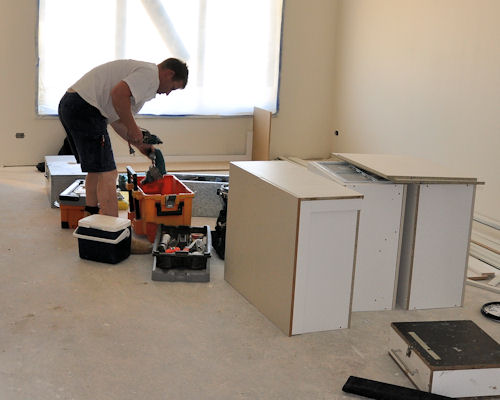
It's another reminder that when you follow all of the standards, codes and guidelines that relate to the job you're doing, you've got the backing of industry associations and manufacturers who develop them. You've also got the law on your side if there is ever a dispute about the quality of your work. But if you take shortcuts or don't follow the standards that apply to the work, you're on your own when something goes wrong.
 Audio for slide 127 (mp3)
There are several things you need to check when inspecting a concrete subfloor. The single issue that has the most potential to cause a problem with a new floor covering is the concrete's moisture content. Another factor is the surface pH - or level of alkalinity. Because these tests are such a crucial part of the inspection process, we'll cover them separately in the next section of this unit. So for now we'll look at some of the other issues you should be aware of.
 Audio for slide 128 (mp3)
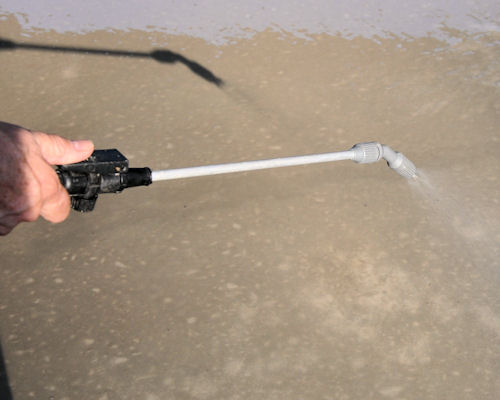
Curing compounds Curing compounds are used to seal the surface of fresh concrete to slow down the evaporation process. Click on the link below for more details on the types of curing compounds available. More on types of curing compounds They're generally sprayed onto the surface, but can also be rolled or painted on. The problem for flooring installers is that they stop glues and cement based toppings from bonding properly to the concrete.
 Audio for slide 129 (mp3)
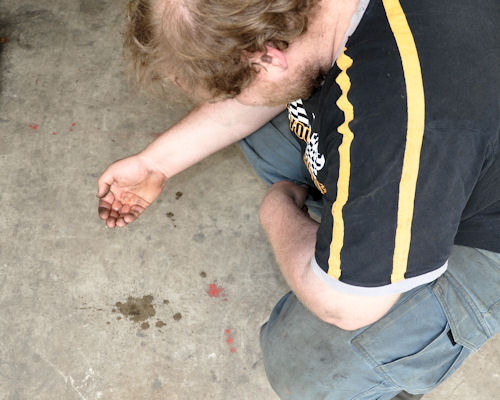
The simplest way to test whether there's a curing compound, sealant or other non-porous substance on the concrete is to use the water drop test. Put some drops of water, about the size of a 50 cent piece, on the surface and watch what happens.
 Audio for slide 130 (mp3)
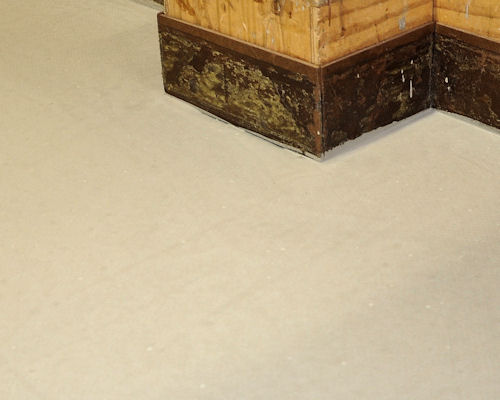
If the water soaks into the floor within 60 to 90 seconds, the surface can be considered clean - at least in that area of the floor. If the water beads up, it means there is still a film of non-porous material present.
 Audio for slide 131 (mp3)
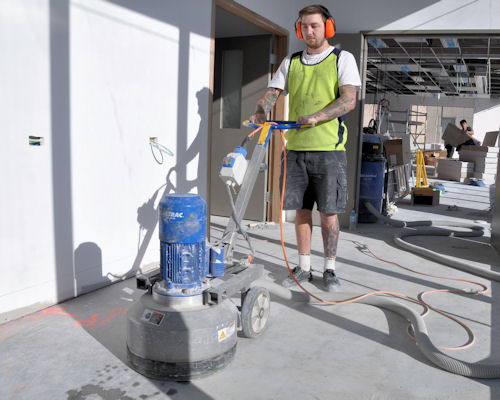
To remove a curing compound, you'll need to use some form of concrete grinding or blasting equipment. We'll talk more about mechanical abrasion techniques in the unit: Concrete grinding.
 Audio for slide 132 (mp3)
Laitance Laitance is a powdery or milky layer of cement and sand on the surface of concrete. It's often caused by over-watering the fresh concrete or over-trowelling the surface. Sometimes it occurs when the concrete has dried too quickly because it didn't have a curing membrane on top. The problem with laitance is that it's loose and friable, and can easily 'delaminate' from the solid concrete below, so any glue or topping applied to it won't be properly bonded to the slab.
 Audio for slide 133 (mp3)
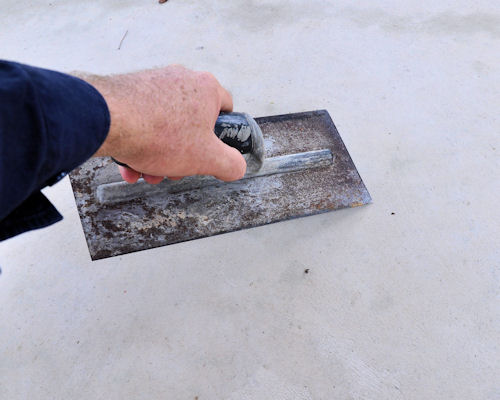
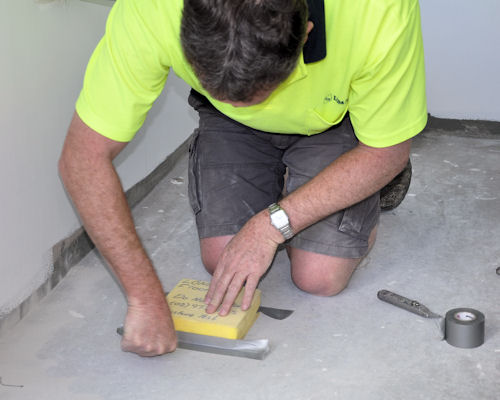
Before you decide on how to remove the laitance, you need to determine its depth. Do this by scratching the surface with a steel edge. If it's only a surface film, the laitance can be removed by acid etching. If it's more serious, you may need to blast the concrete or use a grinder.
 Audio for slide 134 (mp3)
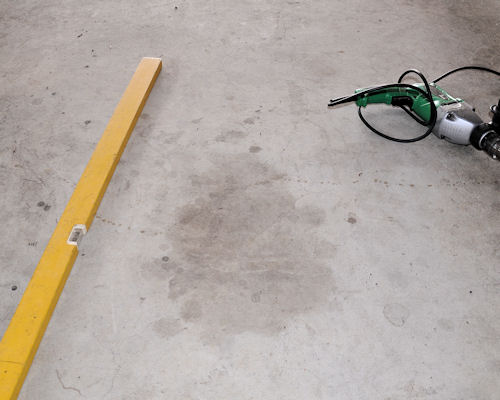
Surface Contaminants Contaminants include oil, grease, wax, and any other substances that might prevent the glue or topping from bonding to solid concrete. Like laitance, you need to find out how deep the contaminants have penetrated into the pores of the concrete before you decide on the best method for removal. For example, a light film of grease on the surface might be able to be removed by scrubbing with a commercial detergent or degreaser. For contaminants that have penetrated deeper, the only solution may be to grind or blast the surface till you get to clean concrete.
 Audio for slide 135 (mp3)
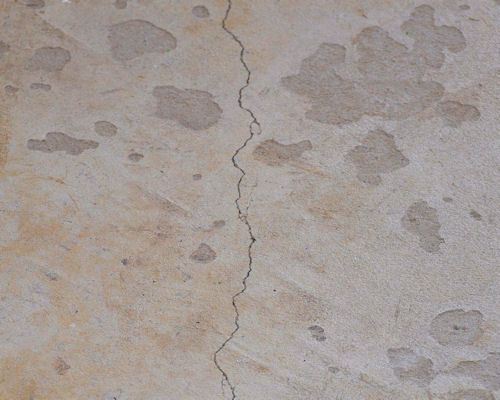
Cracks Most cracks occur as a result of shrinkage during the drying process. Small cracks can easily be filled with an epoxy or polyurethane compound. Larger cracks may need to be injected with epoxy or filled with a patching compound. We'll cover this in more detail in the unit: Subfloor coatings and toppings.
 Audio for slide 136 (mp3)
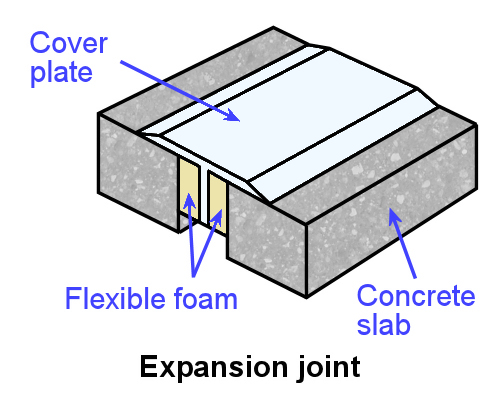
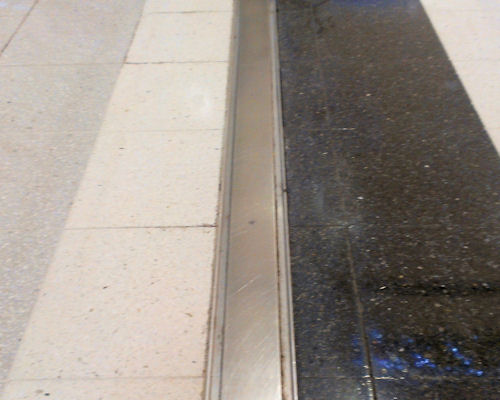
Expansion joints Expansion joints are put into concrete at regular intervals to allow for expansion and contraction due to temperature changes in the slab. The number and design of the joints will depend on the building design and size of the slab.
 Audio for slide 137 (mp3)
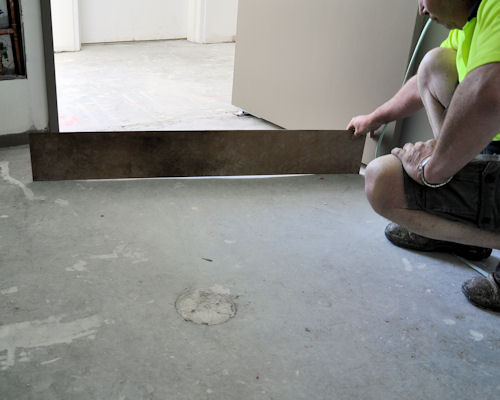
You're less likely to come across expansions joints in domestic projects because the slab floor will generally be too small to need them. But on large commercial projects there may be joints at regular intervals across the floor. These joints should never be filled with a patching compound, because it will crack when the concrete moves. Instead, the joint should be covered by a cover plate in accordance with the specifications for the project.
 Audio for slide 138 (mp3)
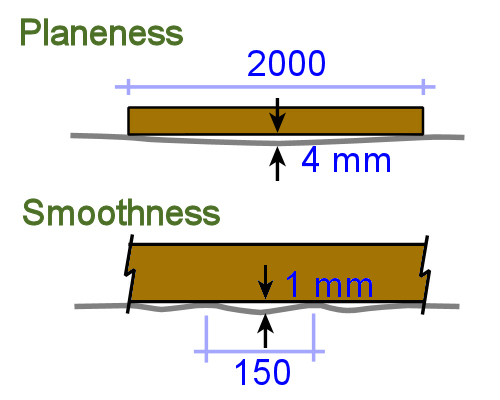
Planeness and smoothness The Australian Standards set limits on the amount of deviation that's allowed from a smooth flat surface. These tolerances vary depending on the type of floor covering installed. There are also industry standards and manufacturers' recommendations for particular products. These might set stricter limitations than the Australian Standards.
 Audio for slide 139 (mp3)
The tolerances set out in AS 1884-2012 for resilient floor coverings are as follows: Planeness: When a 2 metre long straightedge is placed on a concrete floor, resting on two points that are 2 metres apart, the maximum deviation from planeness (or 'flatness') is 4 mm. Smoothness: When a 150 mm long straightedge is placed on a concrete floor, resting on two points, the maximum deviation is 1 mm. We'll look at the techniques for measuring planeness and smoothness in more detail in the unit: Subfloor coatings and toppings.
 Audio for slide 140 (mp3)
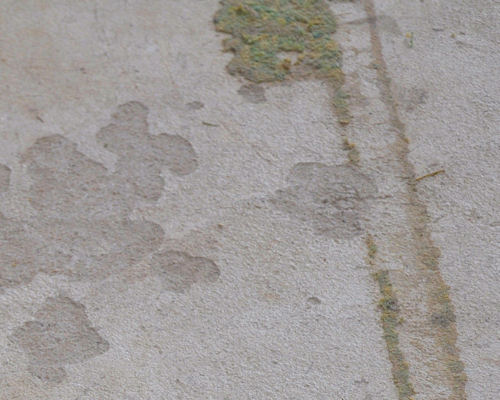
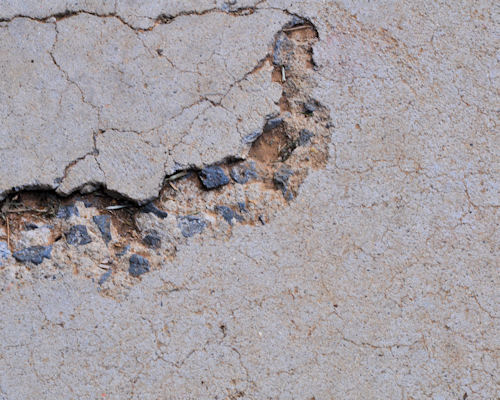
Irregular surfaces If the concrete has hardened before the concreter was able to achieve a good quality trowel finish, there may be grooves or roughness in the surface. These will need to be ground down and coated with a smoothing or patching compound.
 Audio for slide 141 (mp3)
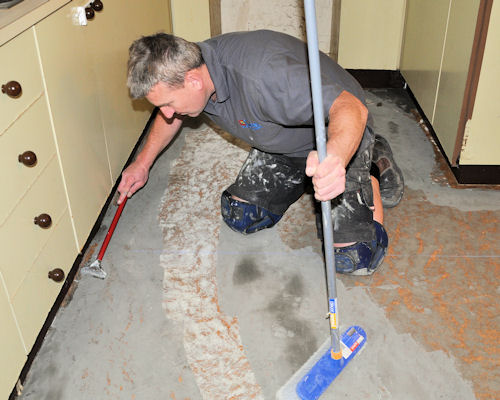
Spalling is a more serious problem. This occurs when the steel reinforcement inside the concrete begins to rust and expand in size. The first symptoms are generally rust stains and a flaking surface. The condition is sometimes called 'concrete cancer', and if left untreated it can cause major structural damage to the slab.
 Audio for slide 142 (mp3)
Before you can treat spalling you need to know exactly what caused it. In some cases it could be because the steel was originally placed too close to the surface or edge of the slab, allowing water to come into contact with it. In other cases it could result from cracks or damage that have allowed the water to get in. If the problem is too serious for you to handle with patching compounds, the only solution is to tell the client that a specialist will be needed. This is something they may wish to organise themselves or ask you to handle on their behalf.
 Audio for slide 144 (mp3)
Most of the problems that tend to occur with timber subfloors are also related to moisture, which we'll deal with in the next section. So in this lesson we'll cover the main things you should check on the surface of a timber subfloor, and in the next lesson we'll look at the issue of subfloor ventilation.
 Audio for slide 145 (mp3)
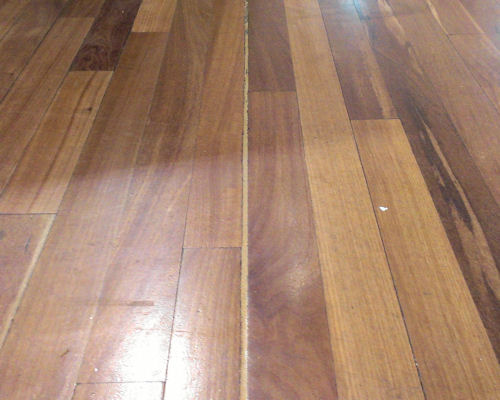
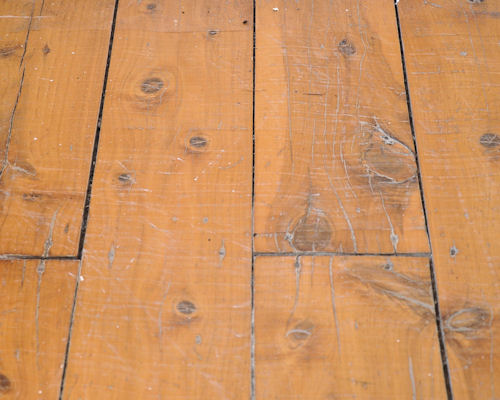
Gaps between boards Older houses with tongue and groove (T&G) strip flooring will often have gaps between the boards. This is because it was once common practice to use green (unseasoned) boards, particularly in cypress pine, and simply lay them upside down on the floor while the rest of the construction was taking place.
 Audio for slide 146 (mp3)
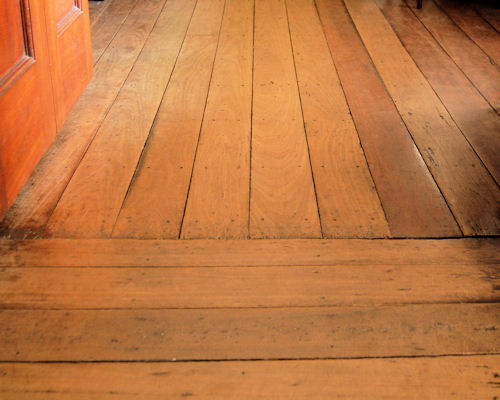
Once the building was closed in and weatherproofed, the boards were turned over, cramped together and nailed in position. As they continued to dry over the years, the boards would shrink and small gaps would appear. If the gaps are wide enough to show through the floor covering, the easiest remedy is to either fill them with a suitable compound or cover the floor with a hardboard or MDF underlay.
 Audio for slide 147 (mp3)
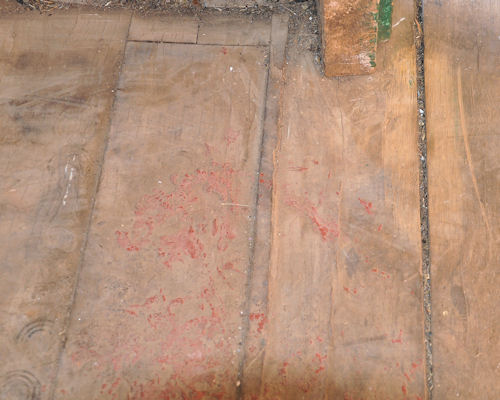
Blown floors 'Blown' floors are caused by boards that have swelled - which is the opposite problem to a floor with gaps. That is, for the timber to swell it has to be taking up moisture from somewhere. Sometimes the moisture problem will since have been fixed, but often it's a continuing issue that needs to be addressed.
 Audio for slide 148 (mp3)
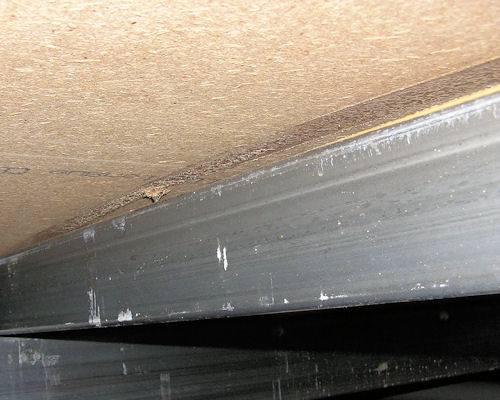
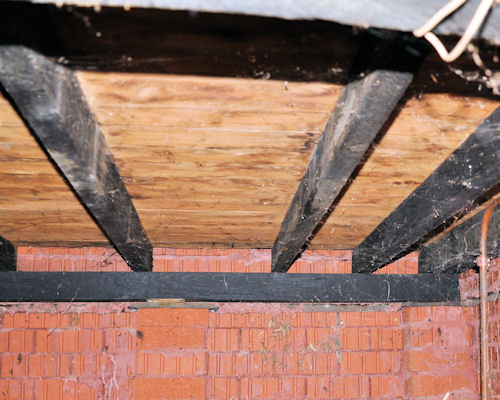
In mild cases the individual boards may 'cup', or the grain may fracture and lift as the wood fibres are compressed. In more serious instances, the boards or sheet products underneath may lift off the joists. In the worst cases the floor may push out wall frames and even crack brick walls or stonework.
 Audio for slide 149 (mp3)
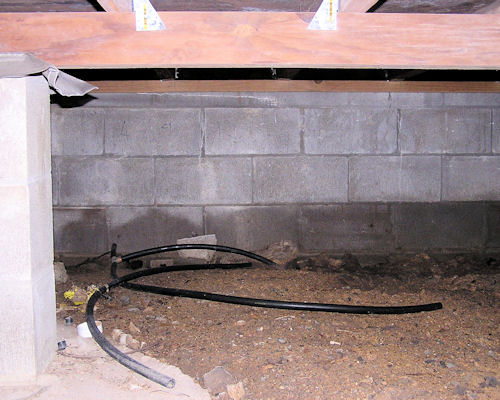
The causes can include: poor subfloor ventilation, allowing moisture to be absorbed by the floor boards flooding as a result of a storm or burst water pipe floor boards with a moisture content that was too low when they were installed an installation job that didn't leave enough of a gap around the perimeter of the floor to allow for natural expansion in humid weather.
 Audio for slide 150 (mp3)
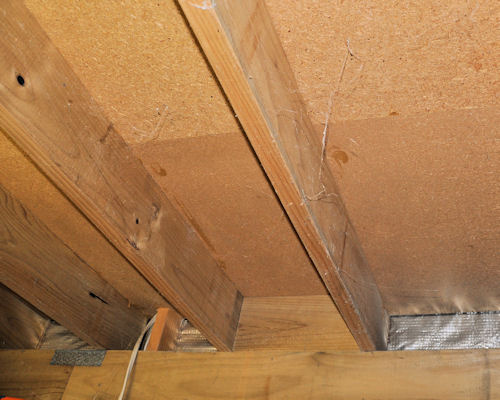
Squeaky floors Squeaks are caused by adjacent parts of the floor rubbing against each other when they're walked on. It especially occurs in T&G joints and butt joints, both in strip flooring and sheet products. The most common causes are: uneven shrinkage in the joists, allowing a gap to form where the joist has shrunk away from the board or panel above it too great a span across joists, causing excessive deflection in the board or panel loose-fitting or broken tongues and grooves nails that have missed the joist underneath, and rub against the side of the joist when the flooring is walked on.
 Audio for slide 151 (mp3)
In some cases you may be able to fix the squeak by going under the floor and filling the gap between the joist and flooring with a packing piece, such as an off-cut of fibre cement or a folded piece of flashing. In general, you should re-nail all boards or sheets wherever there is movement. For structural problems, such as a span that's too wide for the flooring product being used, you might need to call in a carpenter to install extra joists.
 Audio for slide 152 (mp3)
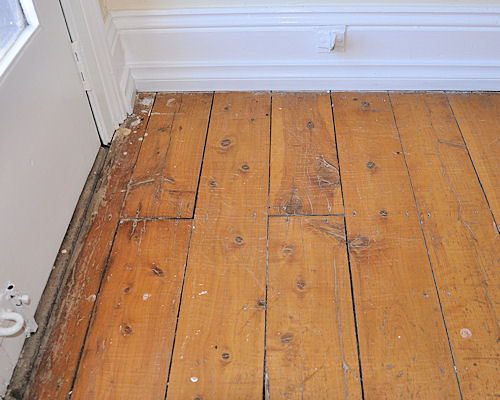
Contaminants and old surface finishes Timber subfloors must be clean and free from oil, grease, wax, dirt, varnish, shellac or any other substance that will affect the glue's ability to bond to the surface. It's likely that you'll need to sand the floor down to bare timber with a commercial drum sander. This will also help to smooth out any bumps or uneven surfaces.
 Audio for slide 153 (mp3)
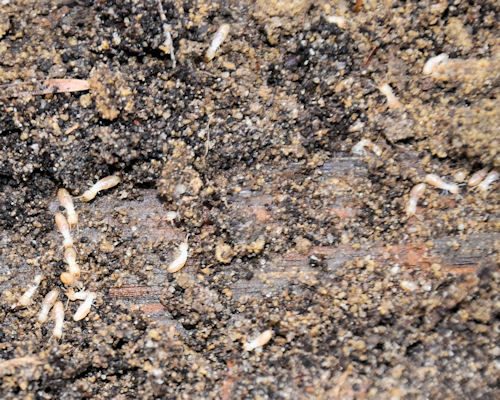
Termites Although there are about 300 species of termites in Australia, only a dozen or so are a problem for timber in buildings. Most termites feed on grass and roots, as well as living trees and decaying wood. Termite colonies can contain up to several million members, so when they find a good source of food they're capable of causing a lot of destruction.
 Audio for slide 154 (mp3)
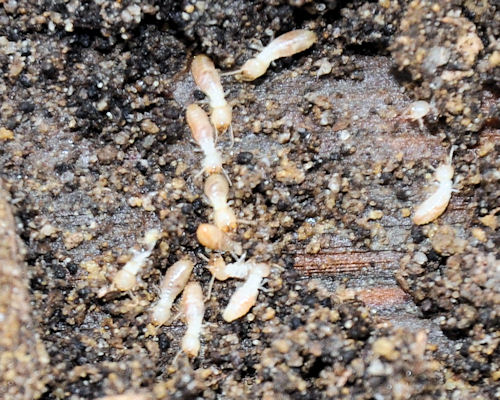
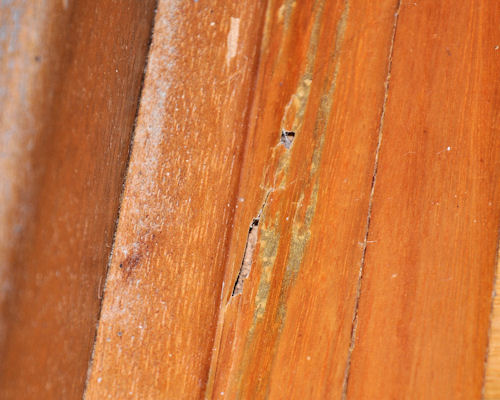
The termites that cause the most damage to building timbers are the subterranean species. They typically have their nest in a tree or partially decayed piece of wood buried in the ground. From here, they tunnel through the soil looking for food. Because they need to be protected from daylight and the external atmosphere, they always leave a thin veneer on the outside of the timber they're eating. This is why infested timber often has a drummy or papery sound when it's tapped.
 Audio for slide 155 (mp3)
In a building, termites sometimes build mud-covered shelter tubes over the foundations and up piers or walls to get to the sub-floor timbers. Although ant caps aren't able to stop their progress, the caps do make the tubes more visible when an inspection is carried out. We discussed ant caps in the lesson: Timber framed subfloors, back in Section 1.
 Audio for slide 156 (mp3)
If you find live termites in a building, the best thing to do is cover over the runway, and then call the pest controller. You should disturb them as little as possible, so that the pest controller can work with the active runway to get access to the nest, which may be some distance away.
 Audio for slide 158 (mp3)
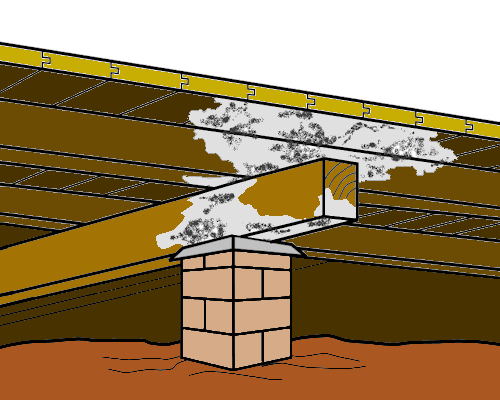
Moist soil and humid air under a subfloor can lead to several problems, including: subfloor timbers and flooring products absorbing the moisture, resulting in cupped boards and other damage as the wood fibres swell increased chance of termite attack, since subterranean termites prefer moist conditions likelihood of fungal decay in the timber, since fungal spores need a moisture content of at least 20% to thrive.
 Audio for slide 159 (mp3)
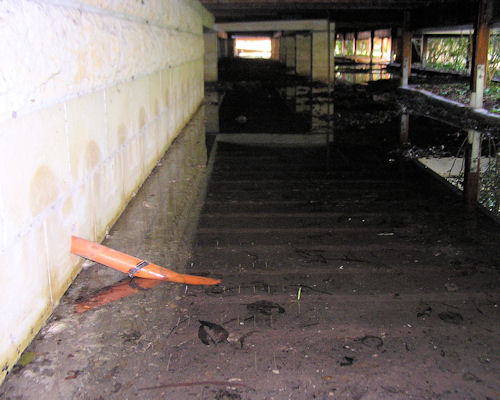
There are various ways that moisture can seep into the ground under the floor. Some buildings have drainage problems, which allow rainwater to pool against an external wall and seep through. Other buildings have garden beds built up against the outside wall, so that even in dry weather the moisture seeps through whenever the garden is watered.
 Audio for slide 160 (mp3)
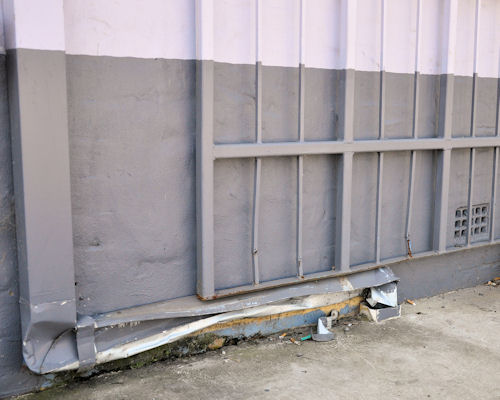
Building codes and local council regulations specify the minimum standards for storm water drainage, ground level grades and subfloor ventilation designs. But that doesn't mean you won't see any problems in your inspections. Older buildings, in particular, often have downpipes that are blocked or broken and ground levels that have changed over the years. They're also likely to have had renovations done that blocked off subfloor air vents or changed the airflow in some way under the house.
 Audio for slide 161 (mp3)
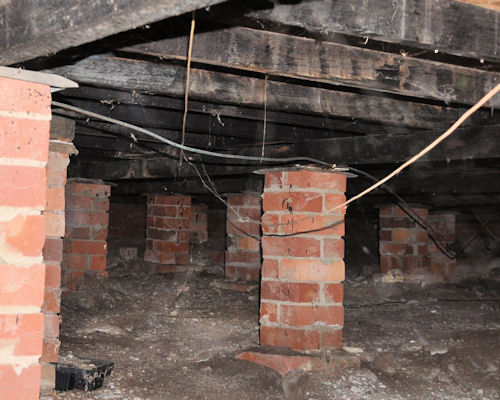
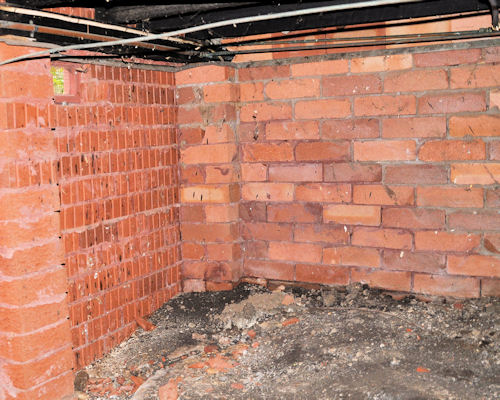
Australian Standards and BCA requirements Australian Standard 3660 specifies the minimum clearance requirements between the ground and the underside of a subfloor. This Standard is called 'Termite management' and it sets out a range of good building practices for avoiding termite attack and maintaining adequate subfloor ventilation. Under AS 3660, the minimum clearance allowed is 400 mm, except for the last 2 metres around the perimeter, where it can slope up to 150 mm minimum clearance.
 Audio for slide 162 (mp3)
The open space allows the air to move freely inside the subfloor cavity. It also enables a person to climb in and inspect the area for termites, fungal decay and other building problems. Have a look at the Just for fun exercise for more details on these requirements.
 Audio for slide 163 (mp3)
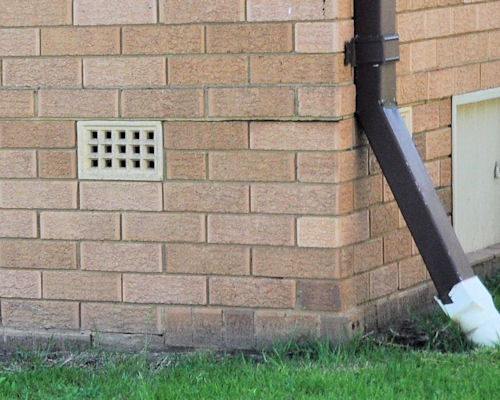
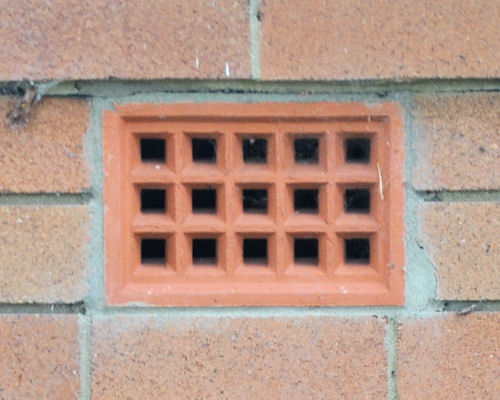
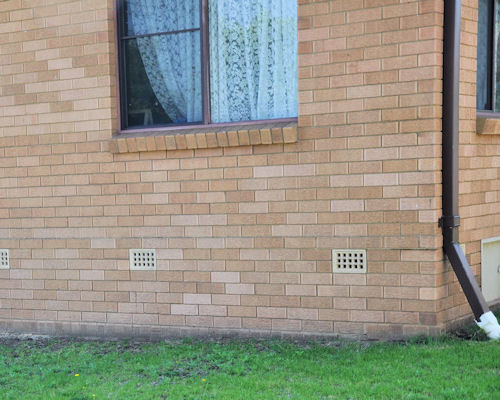
The general Australian Standard requirement for the spacing of air vents is that they should be placed within 600 mm of corners and be spaced evenly around the perimeter walls of the building. Their size and spacing depends on the design of the vent and the amount of air it allows through. Terracotta vents, like this one, were once a standard feature in brick veneer dwellings. Their problem was that the very small holes restricted the passage of air, so they have been replaced in more recent years by wire mesh vents.
 Audio for slide 164 (mp3)
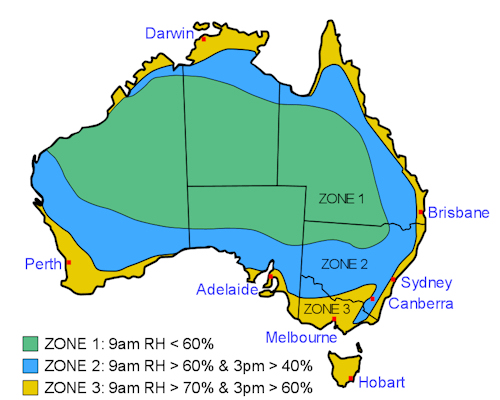
The current requirements on vent sizes and spacing are set out in the Building Code of Australia (BCA) and other documents used by government regulators. The table below is taken from the BCA and shows the minimum ventilation requirements when the ground is exposed.
 Audio for slide 165 (mp3)
| Minimum subfloor ventilation (mm2 / metre) (with no membrane on the ground) | |
| Climate zone | mm2 per metre of wall |
| 1 | 2000 |
| 2 | 4000 |
| 3 | 6000 |
 Audio for slide 166 (mp3)
To find out the ventilation area in each vent, you can look up the manufacturer's specifications and read it off in square millimetres (mm2). But for the sake of the exercise, let's work it out mathematically for the terracotta vent shown in this photo. If you put a tape measure on the individual holes in the vent, you'll find that they measure 16 mm x 16 mm. There are 15 holes in total, so the ventilation area is: 16 mm x 16 mm x 15 holes = 3,840 mm2.
 Audio for slide 167 (mp3)
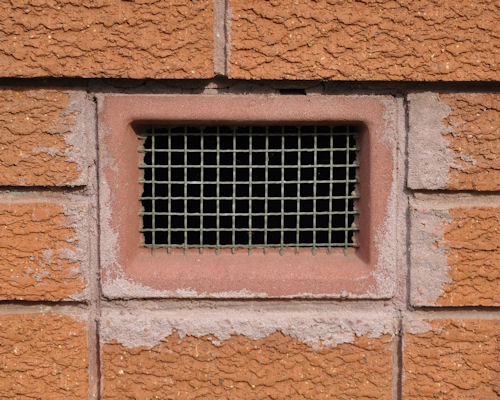
This is a very inefficient ventilation area, which is why terracotta vents are no longer used. By contrast, the wire mesh vent shown here has a ventilation area of 14,200 mm2. Click on the link below to see an example of how to use the BCA table to calculate the number of vents needed in a wall.
 Audio for slide 168 (mp3)
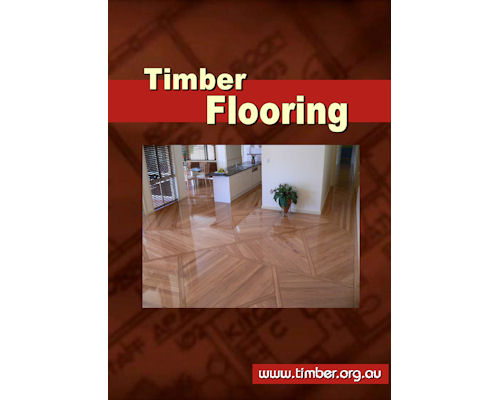
A note of caution It's important to note that the BCA table is only designed to show the minimum ventilation requirements for subfloor framing timbers. It's not necessarily going to provide enough ventilation for a tongue and groove timber floor, especially if it's in a very humid area. For more information on the variables that apply to these figures, have a look at the booklet published by the Australian Timber Flooring Association (ATFA) called 'Timber Flooring'. You can buy a copy of Timber Flooring direct from ATFA by ordering it through their website at: http://www.atfa.com.au. If you are an apprentice or trainee, you can join ATFA for free as a member and get a free copy of this manual at the same time. For more information, go to the Join ATFA page of their website.
 Audio for slide 169 (mp3)
See if you can calculate the number of vents needed in a wall. Let's say you're inspecting a building in Climate Zone 2 and the subfloor walls have wire mesh air vents. The wall is 12 metres long, and the opening size of each vent is 14,200 mm2. How many vents are needed? When you've finished the calculations, check the answer with your trainer to see if you're right. Note that there are many different designs and styles of subfloor air vents. What types of vents are used in the building you're in right now? Go outside and have a look. If you're not in a building that has a raised floor, see if you can find a nearby building with subfloor air vents.
 Audio for slide 174 (mp3)
Most clients want their installation completed quickly, or within a time frame that suits their overall project plan. Sometimes they're not too concerned about the subfloor conditions because they see it as your responsibility. That is, if something goes wrong with the floor at some time in the future, you'll be liable for it, so they don't have to worry about it.
 Audio for slide 175 (mp3)
This is an important point to keep in mind, because there'll be occasions when you're put under pressure to carry out an installation before the moisture content has reached an acceptable level. However, you're doing yourself and the client a very big favour by being methodical in your moisture testing, and careful in your professional judgement as to whether the subfloor is ready for the installation.
 Audio for slide 176 (mp3)
In this section, we'll examine the process of carrying out moisture tests on concrete and timber subfloors and discuss the main types of test equipment used. We'll also look at the process for measuring pH levels in concrete.
 Audio for slide 178 (mp3)
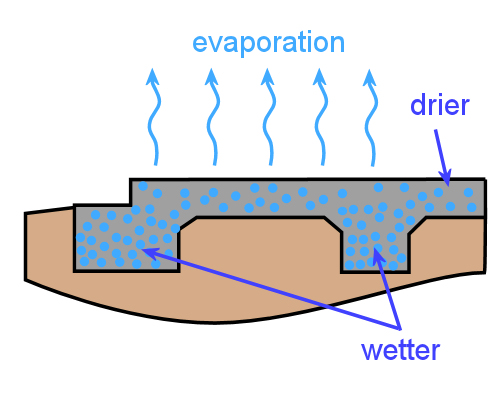
While concrete is drying, the surface will generally have a lower moisture content than deeper down in the slab. So you won't really know how much moisture is present if you only do a surface test. It's also the case that slabs often have integrated beams and other areas of thickening where extra strength is required. This means that these parts will dry more slowly than the rest of the slab.
 Audio for slide 179 (mp3)
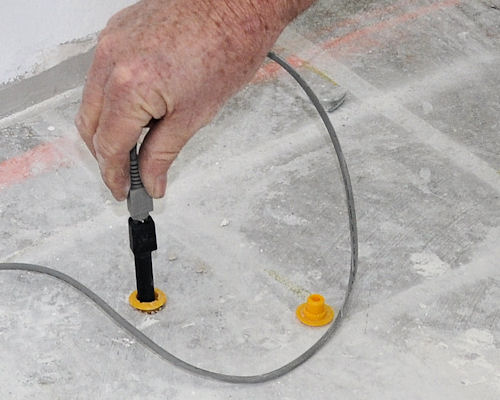
So you should do at least one test for each level of concrete (or each separate concrete pour) where the thicker areas are. You also need to test the slab in a range of places to make sure there are no other areas with unusually high concentrations of moisture.
 Audio for slide 180 (mp3)
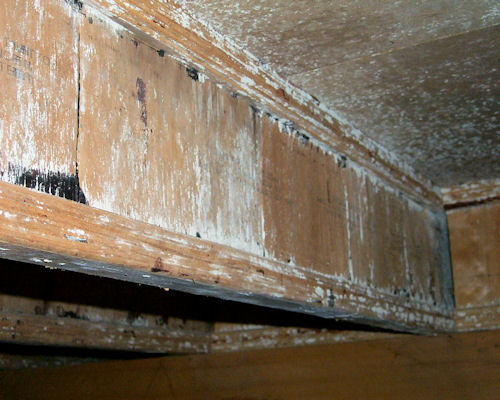
The same principle applies to timber subfloors. Different timber components may have had different moisture contents when they were installed, depending on whether they were supplied kiln dried or green from the sawmill. There could also be particular areas in the building with moisture problems - such as through leaking water pipes, poorly sealed flashing or subfloor ventilation problems. Again, you'll need to test the subfloor timbers in various places to make sure you've got an accurate picture of the moisture levels.
 Audio for slide 181 (mp3)
RH and MC levels The Australian Standards for textile floor coverings (AS 2455) and resilient coverings (AS 1884) specify different relative humidity (RH) or moisture content (MC) levels, depending on which moisture testing method is used. These are shown in the table below. We'll talk about how to physically carry out these tests in the following lessons. Note that the figures shown below are general specifications in the Standards. Manufacturers of adhesives, coatings, levelling compounds and floor coverings may have different specifications listed in their installation guidelines. There may also be particular regions in Australia where these general limitations are not appropriate, such as in North Queensland where the atmospheric RH can stay very high for long periods of time.
 Audio for slide 182 (mp3)
| Subfloor | Testing method | Moisture level |
| Concrete | RH surface-mounted insulated hood test | Maximum RH: 70% |
| Concrete | RH 'in-situ probe test' in concrete | Maximum RH: 75% |
| Timber | MC test in timber. | MC range: 10-14%. (Note that for timber floor coverings, the MC range is 9-14% for all species, except cypress, which is 10-15%.) |
 Audio for slide 183 (mp3)
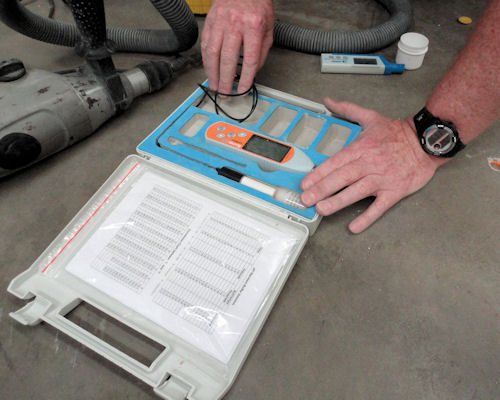
Testing methods For testing RH in concrete, AS1884-2012 (the new resilient flooring Standard) follows the 'in-situ probe' testing methods set by the American Society for Testing and Materials (ASTM). On the other hand, AS/NZS 2455.1:2007 (the older but still current Standard for carpet) uses a modified version of the ASTM 'insulated hood' test. We'll describe both of these methods in the following lessons, but if you want to see the full details you should look up the original ASTM documents listed below.
 Audio for slide 184 (mp3)
But remember, in addition to following the methods described in the ASTM documents, you still need to comply with the instrument manufacturer's instructions. Occasionally, you might find that the ASTM and instrument manufacturer say two different things. In these cases, you should ask the floor covering manufacturer how to proceed. For timber subfloors, the testing methods are defined by the Australian Standards. Again, we'll describe the general methods later in this section, but you should also look at the original documents listed below.
 Audio for slide 185 (mp3)
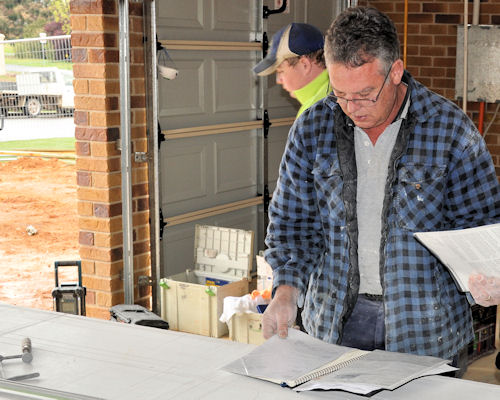
Test report It's in your interests to fully document the testing you carry out, and record the following details: jobsite address type of subfloor tested, slab thickness and depth of the holes that you've drilled date and time of testings where the tests were carried out (with the positions marked on the floor plan) what the moisture and pH readings were (preferably with photographic evidence) subfloor temperature, ambient temperature and RH at the time of testing test equipment type, make, model, serial number and calibration status.
 Audio for slide 187 (mp3)
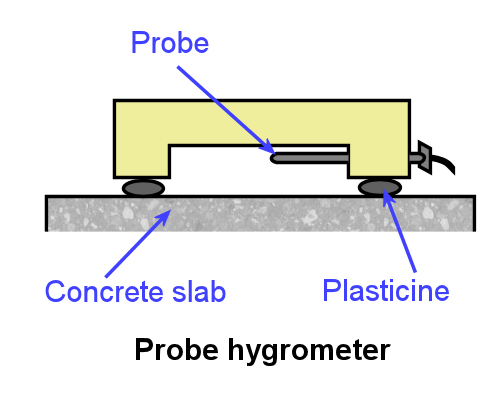
The surface-mounted insulated hood test works on the basic idea that moisture will rise to the surface of a concrete slab and evaporate into the air - so if you trap the vapour above the surface, you can measure the air's relative humidity.
 Audio for slide 188 (mp3)
There are several types of hygrometer designed to measure RH in a contained atmosphere. The traditional synthetic hair hygrometer has a hair that changes length in response to the RH level. The length is measured by a gauge on top of the unit. A more modern variation uses a moisture-sensitive probe inside the sealed box. This is attached to an electrical cable that can be connected to an external unit with a digital readout.
 Audio for slide 189 (mp3)
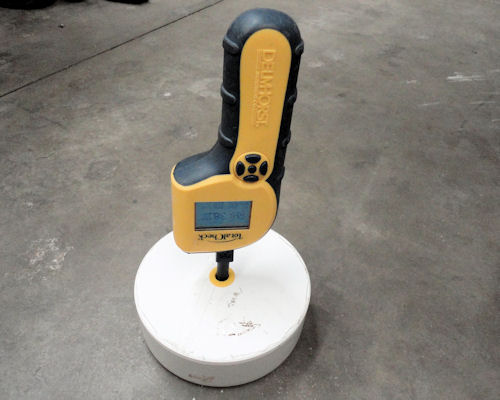
Using a relative humidity probe and insulated hood For slabs at ground level or below, it's best to place one hygrometer in the centre of the room and others within one metre of all exterior walls where floor coverings will be laid. Carry out as many tests as needed to meet the requirements of the Standard. In particular, choose areas that might be susceptible to high readings, such as entryways and walls near garden beds.
 Audio for slide 190 (mp3)
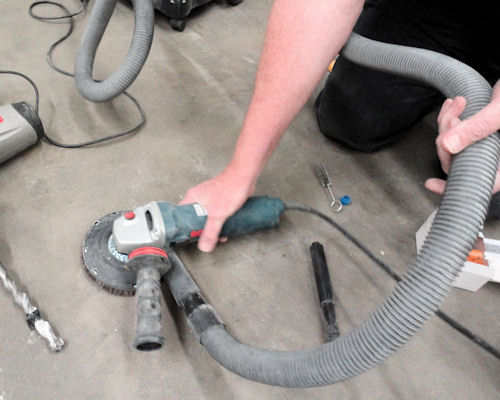
At each test location, clean the concrete surface back to bare porous concrete. Remove all traces of curing compound, adhesive residue, and anything else that might impede the free flow of vapour. You can check that there's no burnished or non-porous surface material by doing the 'water drop' test - see. Inspecting concrete subfloors. Once it's clean and free from dust, leave the test area exposed for at least 24 hours.
 Audio for slide 191 (mp3)
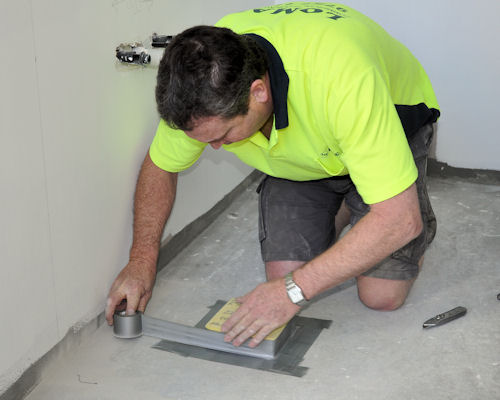
Place the insulated hood on the test area and seal it off from the surrounding air. Some installers use plumbers putty, others use several layers of insulation tape. Either way, it's important that the seal is completely airtight. Leave the hood in place for at least 72 hours. Note that if the slab is 200 mm thick or more, or if it has a low porosity, you might need to wait a lot longer than 72 hours for the air chamber inside the hood to reach moisture equilibrium. In these situations it might be better to use the in-situ probe test.
 Audio for slide 192 (mp3)
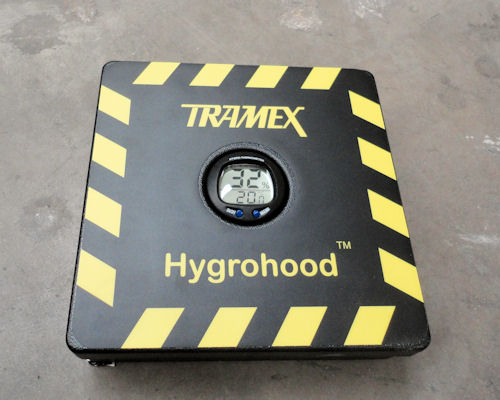
The way the reading is taken will depend on the model of instrument. The 'Tramex Hygrohood', for example, has a built-in digital readout. Be careful of 'drift' in the readings - the meter reading must not drift by more than 1% RH over a 20 minute period.
 Audio for slide 194 (mp3)
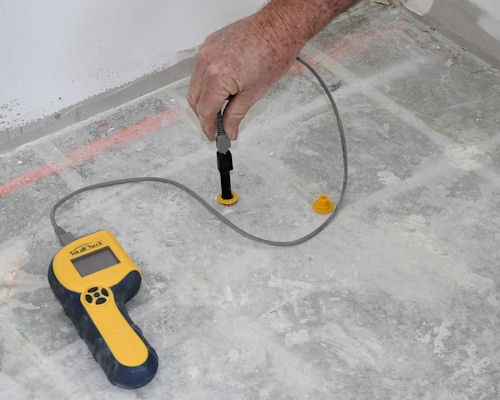
The in-situ probe test is now the main test method specified under AS 1884-2012. It's sometimes called an 'invasive RH test', because test holes need to be drilled into the slab. Sensor probes are inserted into the holes, enabling them to take RH readings well below the surface of the slab.
 Audio for slide 195 (mp3)
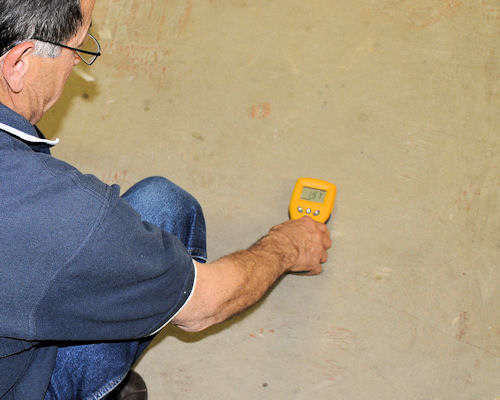
The location of the holes will depend on the size and shape of the slab. You can look for areas that might have high RH levels by using a capacitance meter. Although the capacitance meter can't be relied on as a final test in a concrete subfloor, it can help you to decide where to place the probes. For more details on capacitance meters, see: Other moisture testing methods.
 Audio for slide 196 (mp3)
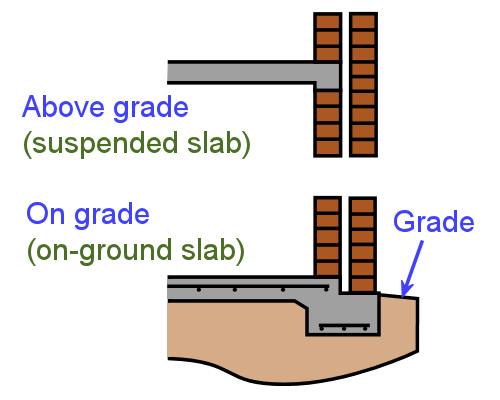
The depth of the holes will also vary depending on whether the slab is drying from one side only or from both sides. On-ground and below ground slabs (also called 'on grade' and 'below grade') can only dry from one side. Suspended (or 'above grade') slabs are able to dry from two sides when the underside is exposed to the air.
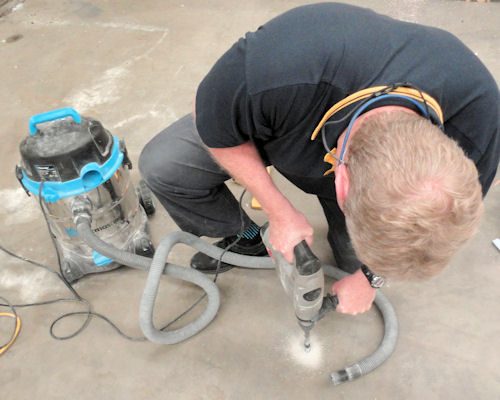 Audio for slide 197 (mp3)
General procedure 1. For slabs drying from one side only, drill a hole to a depth of 40% of the slab thickness. (That is, if the slab is 100 mm thick, drill a 40 mm deep hole.) For slabs drying from both sides, drill a hole to 20% of the slab thickness. (That is, 20 mm in a 100 mm thick slab.) Make sure you measure the depth of the hole to ensure it's accurate, because this is critical to achieving a precise RH reading.
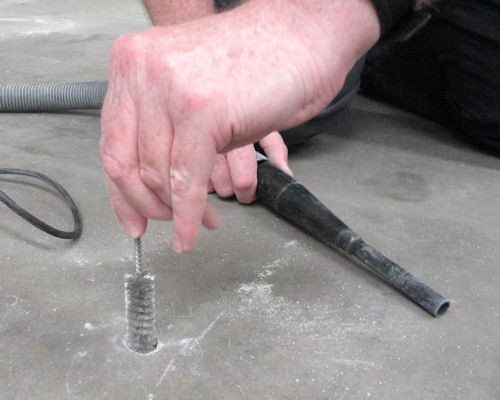 Audio for slide 198 (mp3)
2. Clean out the concrete dust carefully with a wire bristle brush and vacuum out the hole. The manufacturer of the instrument will probably have included a brush and vacuum attachment in the kit for this purpose.
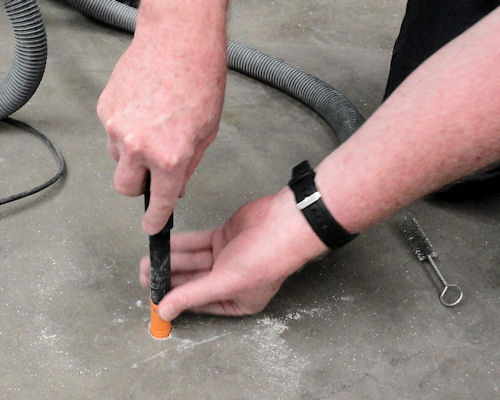 Audio for slide 199 (mp3)
3. Insert a plastic liner into the hole and check that it goes right to the bottom. Seal the hole with the cap supplied by the manufacturer. 4. Allow the test hole to equilibrate with the slab for at least 72 hours.
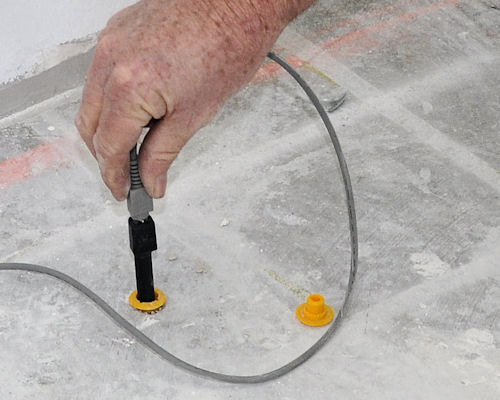 Audio for slide 200 (mp3)
5. Insert a probe into the sleeve and wait an hour or two for it to acclimatise. Note that the probe will need to reach the same temperature as the concrete before it will give an accurate reading - even a small difference in temperature can result in a significant error in the RH measurement.
 Audio for slide 201 (mp3)
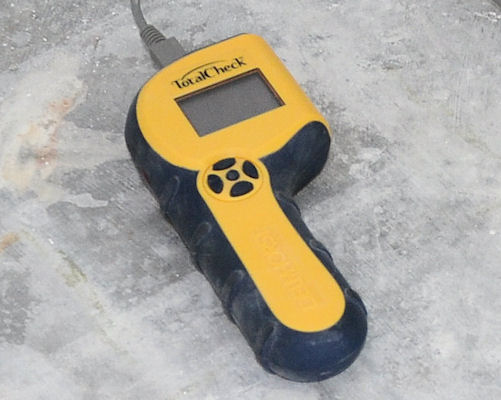
6. Connect a meter to the probe and take an RH reading. Check that the reading doesn't drift by more than 1% RH over a 5 minute period. Equilibration may take from several hours to several days, depending on the type of meter being used and the initial temperature difference between the probe and the concrete.
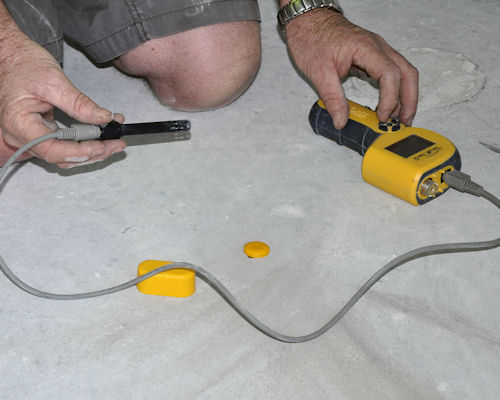 Audio for slide 202 (mp3)
Repeat this process for each of the test holes you have drilled. When you've finished taking the readings, remove the probes and the top lip of the sleeve. The holes can then be filled with a cement-based patching compound and smoothed off.
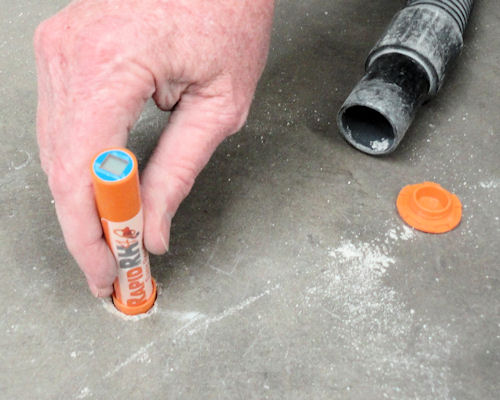 Audio for slide 203 (mp3)
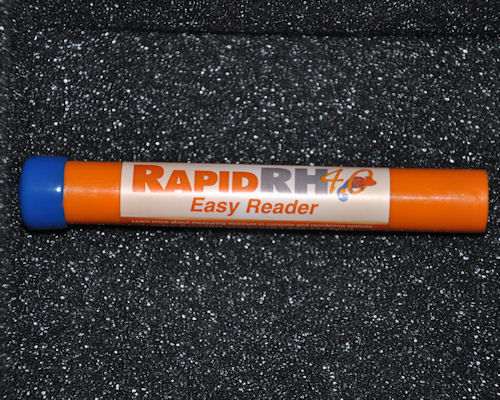
An alternative version to the in-situ probe is the Rapid RH 4.0 EX. It has a 'smart sensor' that's inserted into the lined test hole and left to equilibrate for 72 hours. After this time the 'Easy Reader' is inserted into the hole until it makes contact with the sensor, and the RH measurements are taken almost immediately. Although these probes are not reusable, they can be left in the slab for up to six years, allowing the RH levels to be monitored throughout that time.
 Audio for slide 204 (mp3)
Cautions Some floors you come across may have had a silicate-based moisture barrier installed, such as Protect Crete Moisture Fix 1, Aquron 2000 or Deflecta. We'll talk about the process of applying these moisture barriers in the unit: Subfloor coatings and toppings. These sorts of floors are not suitable for an in-situ probe test, because if the moisture barrier has been applied correctly, it will give you an incorrect reading. One of the tell-tale signs that this type of moisture barrier is in place is a high RH reading from the in-situ probe and a pH reading of between 7 and 9. If a moisture barrier has been installed, you should use the insulated hood test method.
 Audio for slide 205 (mp3)
The 'Rapid RH' probe discussed above is manufactured by Wagner Electronics. You can see an instructional video clip on how it works by clicking on the link below: 

Rapid RH 4.0 EX
Have you used an in-situ probe before? If so, what brand did you use? If you haven't used one before, do you know of any other manufacturers of these RH probes? Do a web search and find a manufacturer. Name the brand and briefly describe how the probe is used.
 Audio for slide 207 (mp3)
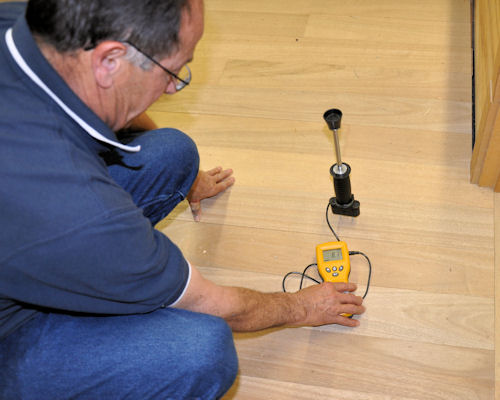
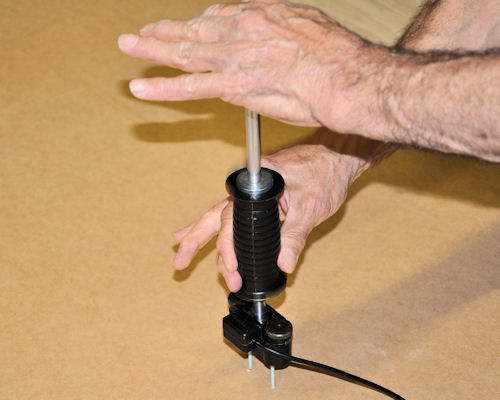
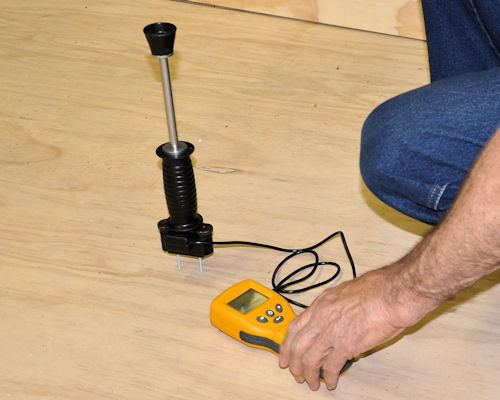
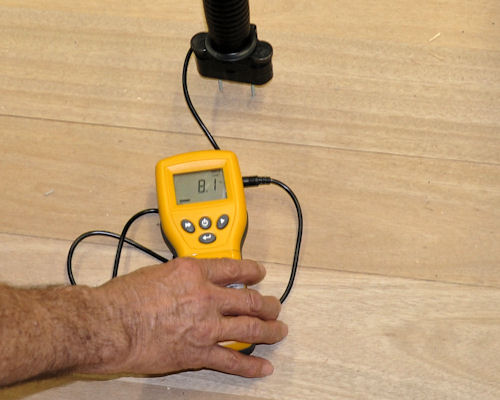
An electrical resistance moisture meter is mostly used for measuring timber moisture content. It has two pins, or 'electrodes', which are hammered or pushed into the timber. An electric current is passed between the electrodes and the amount of charge that gets through is measured.
 Audio for slide 208 (mp3)
Moisture meters work on the principle that water is a good conductor of electricity, but wood is not. So the higher the charge, the more water there must be in the wood. It's a simple rule that works reasonably well for timber, but you need to remember that the meter is measuring electricity, not moisture. This means that any other substances that conduct electricity, such as certain chemical additives, will give false readings.
 Audio for slide 209 (mp3)
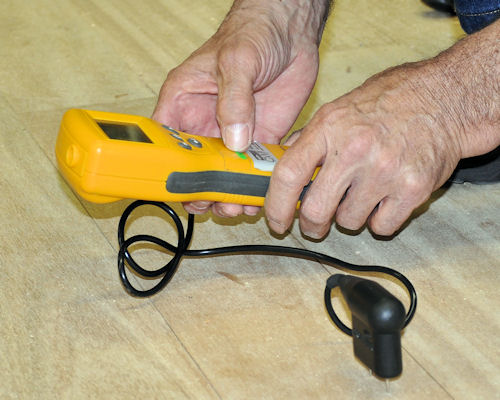
It's also the case that moisture meters are calibrated to measure Douglas fir (also called oregon). So you have to apply a conversion factor when you measure other species to get an accurate reading. The result also needs to be adjusted to allow for different temperatures in the wood, because higher temperatures tend to lower electrical resistance.
 Audio for slide 210 (mp3)
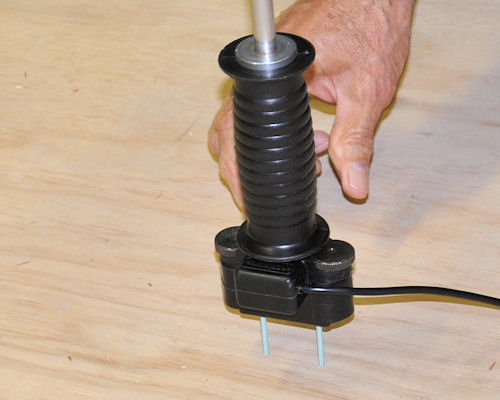
Another important factor is the depth of the electrodes in the wood. If the wood is still drying, the moisture content will be highest near the core, so you have to make sure you've pushed the electrodes in far enough to reach this area of the piece.
 Audio for slide 211 (mp3)
The moisture content range in timber subfloors should be between 10% and 14% for resilient floor coverings and 9 to 14% for timber floor coverings. Note that in air conditioned buildings it could be less, particularly if the windows are sealed and there is no direct access to outside air. This is because air conditioners tend to de-humidify the atmosphere. The levels could also be less in some dry inland areas where the atmospheric RH is typically low. By contrast, in tropical areas where the humidity remains high for long periods of time, the EMC may be as high as 17% during the 'wet season'. In these cases, you should discuss the local conditions with the builder or local council before proceeding.
 Audio for slide 212 (mp3)
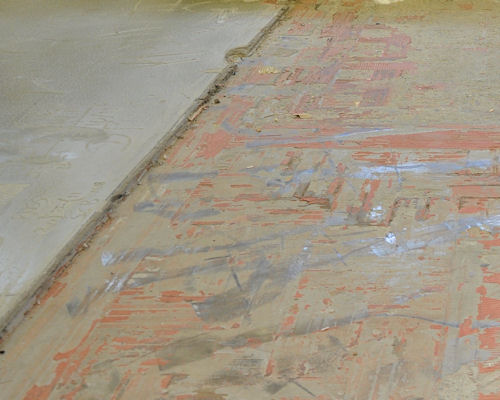
Moisture meters and concrete In the past, electrical resistance moisture meters were sometimes used to test concrete; however, this is no longer permitted under AS 1884-2012. One of the reasons is that the electrodes won't penetrate far enough into the concrete to provide an accurate RH measurement. Another problem is that the meter can give distorted readings if there are additives in the concrete.
 Audio for slide 213 (mp3)
The link below will take you to a clip produced by Delmhorst descibing their BD-10 'pin type' moisture meter. 

Delmhorst BD-10 moisture meter
Have you used an electrical resistance meter to measure moisture content in wood or concrete? What brand was it? If you haven't used one before, do you know of any other manufacturers of these types of moisture meters?
 Audio for slide 215 (mp3)
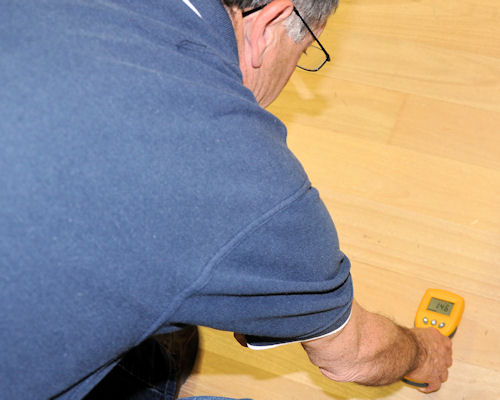
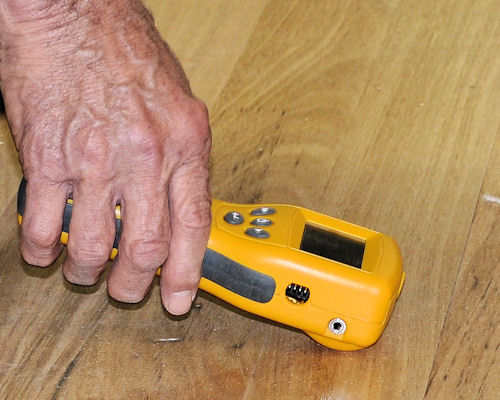
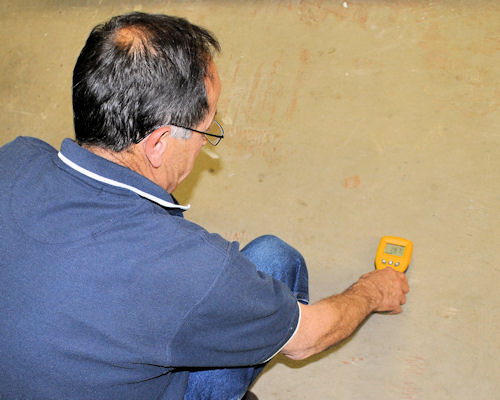
Capacitance test Capacitance moisture meters use radio waves to measure the moisture content inside the material being tested. They have in-built transmitting and receiving pads which pass the radio wave through the material and measure the capacitance, which is directly related to the amount of water present.
 Audio for slide 216 (mp3)
These meters are 'non-invasive', in the sense that they sit on the surface and don't need test holes. They're used on a wide range of materials, including concrete, wood, vinyl and ceramics. For timber floors, they are a quick and easy way to measure moisture, although they're generally not quite as accurate as electrical resistance meters. They also require a correction factor for different timber densities, because of the effect that density has on the way radio waves travel through the wood fibres.
 Audio for slide 217 (mp3)
For concrete floors, they have the same problem as other methods that only measure moisture near the surface. This is because the radio waves only penetrate to a depth of about 25 mm. They can also show false readings in concrete if there are additives or large pieces of aggregate or reinforcing steel near the surface. Although capacitance meters are accepted by the Australian Standards as an approved way of testing timber, they are not permitted for concrete. Nonetheless, they are still a useful tool for finding out where the wetter areas are in a concrete floor so that you know where to drill the test holes for sensor probes.
 Audio for slide 218 (mp3)
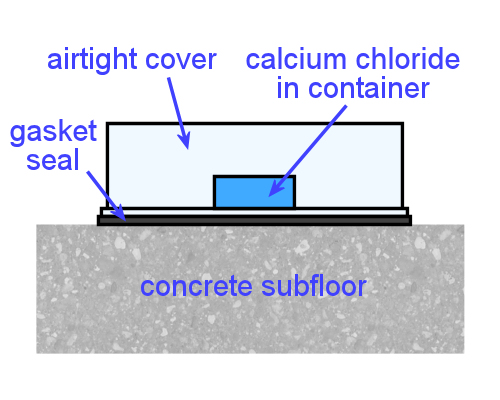
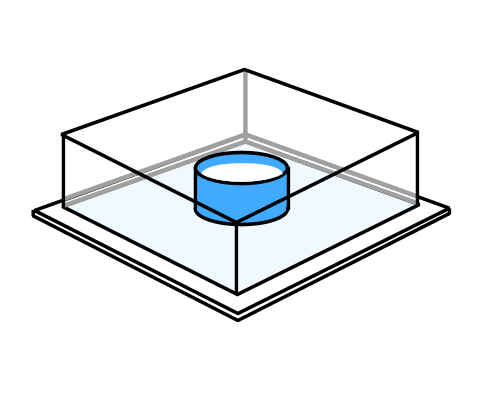
Calcium chloride test The calcium chloride test was once considered standard practice in America for determining moisture levels in concrete floors, and was written into the American Society for Testing and Materials (ASTM) Standard. However, over the years many of the floors that were originally assessed as acceptable with this test were later found to have developed moisture problems. As a result it has fallen out of favour with flooring installers and has now been removed from the ASTM Standard for testing lightweight concrete. It is also no longer permitted under AS 1884-2012.
 Audio for slide 219 (mp3)
The test is designed to measure the moisture vapour emission rate (MVER) of a slab, which makes it similar in principle to the surface-mounted insulated hood test. In this test the moisture is absorbed in a small mound of calcium chloride salt, which is placed on the concrete surface and sealed with a plastic dome. The increase in weight of the salt is used to calculate the relative humidity in the slab. The biggest problem with the test is that it can only measure the rate of moisture loss in the very top of the slab, and can't take account of the higher concentrations deeper down. It also tends to underestimate moisture levels that are high and overestimate levels that are low.
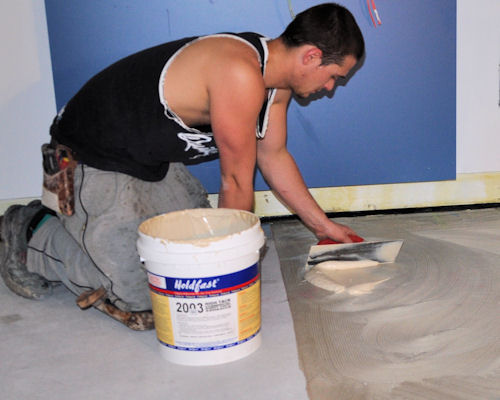 Audio for slide 221 (mp3)
When the alkalinity in a concrete subfloor is too high, it can stop the floor covering adhesive from bonding properly to the concrete. Although this problem has always existed, it hadn't been fully realised by flooring installers until quite recently. This is partly due to the fact that the materials used by installers have changed over time. It's also due to continuing research and a much better understanding of the importance of pH levels.
 Audio for slide 222 (mp3)
The new Australian Standard for resilient flooring installation (AS 1884-2012) now says that a pH test must be carried out on a concrete subfloor as part of the pre-installation assessment. The minimum number of tests required is the same as for moisture testing - three in the first 100 m2 of floor, plus one extra test for every additional 100 m2.
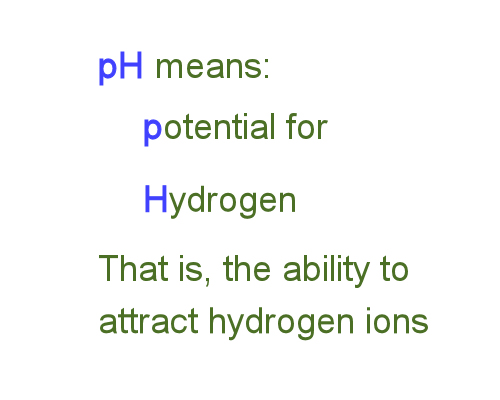 Audio for slide 223 (mp3)
What pH means pH is a measure of how acidic or alkaline a material is. In scientific terms, 'p' stands for 'potential' and 'H' is the chemical symbol for hydrogen - so 'pH' means 'potential hydrogen', or the ability to attract hydrogen ions.
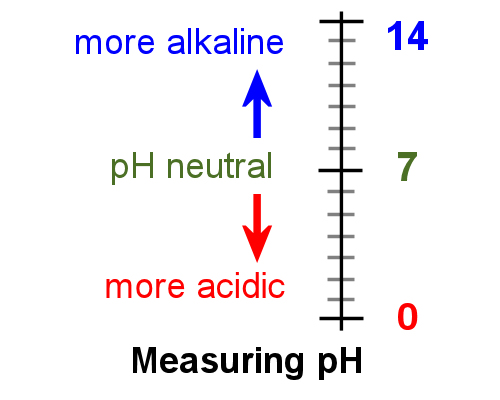 Audio for slide 224 (mp3)
Materials with a low pH level are more acidic and have a lower attraction for hydrogen. Materials with a higher pH are more alkaline and have a higher attraction for hydrogen. The balancing point is 7. If the pH is lower than 7, it is more acidic; if it's higher, it's more alkaline. When it's right on 7, it's called 'pH neutral'.
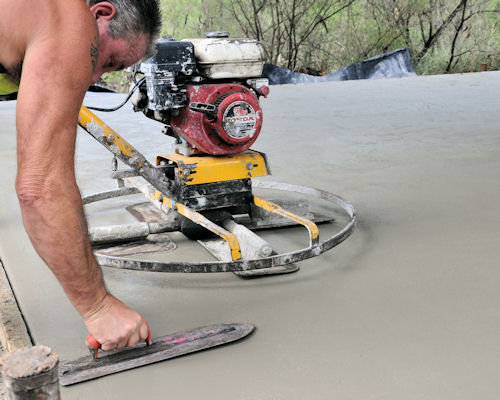 Audio for slide 225 (mp3)
Freshly mixed concrete is extremely alkaline - well above 10 - but the pH level drops as the concrete cures. AS 1884 says that the pH level of the concrete surface should be between 9 and 10 before the flooring installation is commenced. However, it also says that the final level should be determined by the adhesive manufacturer. You should also check on the pH requirements of other manufacturers' products that you might be using on the subfloor, such as moisture barriers, epoxy coatings and leveling compounds.
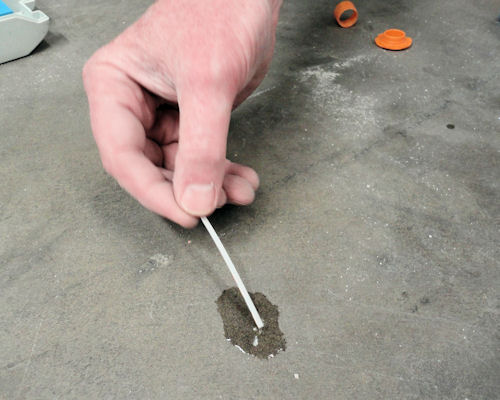 Audio for slide 226 (mp3)
Measuring pH One way to measure pH is to use paper test strips, which change colour according to the alkalinity of the concrete. A more accurate way is to use a pH meter, which gives a numerical reading via a digital display. The testing procedure is as follows.
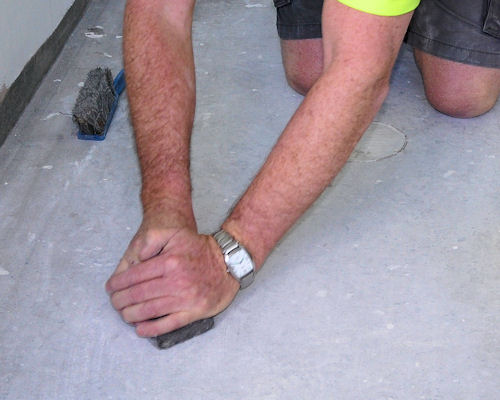 Audio for slide 227 (mp3)
Step 1 Sand a small section of the concrete surface with 200 grit sandpaper. This will remove any impurities from the surface that might affect the test results. Remove the dust with a vacuum cleaner.
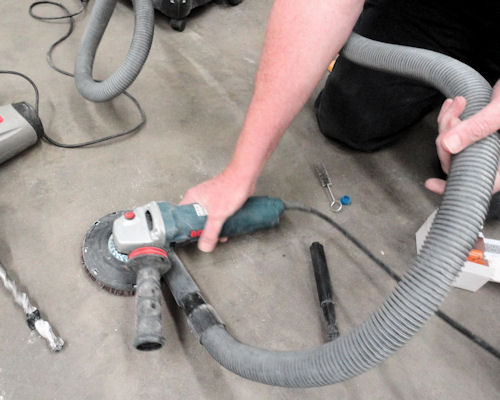 Audio for slide 228 (mp3)
Note that if the surface is still not porous after sanding - that is, if it doesn't pass the water drop test - you'll need to use a hand grinder to remove the non-porous material. Remember, if the water is beading on the surface, you won't get an accurate pH reading because you'll only be testing the pH of the water drop itself. If you do have to mechanically prepare the surface, it's best to wait until just before you install the floor covering so that your pH test is done on the actual floor surface you'll be installing over.
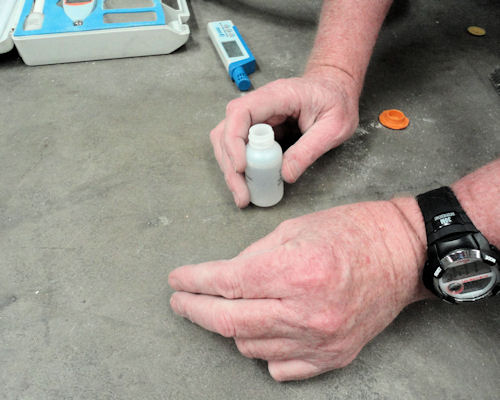 Audio for slide 229 (mp3)
Step 2 Put several drops of distilled or 'de-ionised' water onto the prepared surface. The water must have a pH reading of 7 - you can use the test strip or meter to check the water's pH before you use it.
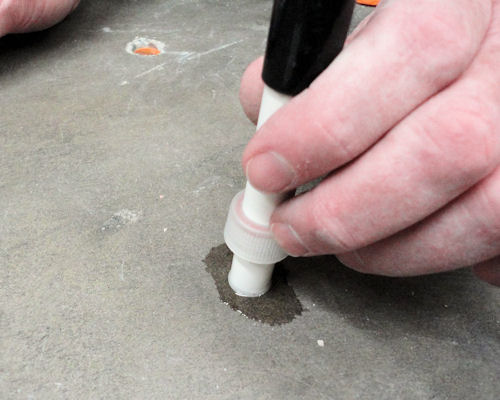 Audio for slide 230 (mp3)
Step 3 Leave the drops for 60 seconds and then place the test strip or meter reader in the water. Wait for the period of time specified by the manufacturer.
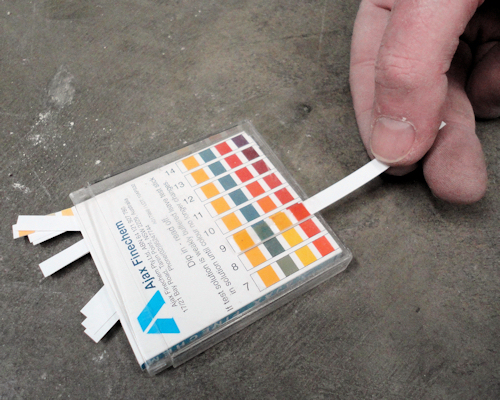 Audio for slide 231 (mp3)
Step 4 If you are using test strips, compare the colour of the strip to the pH colour chart.

