 Audio for slide 2 (mp3)
Planning and costing an installation job is a bit of a balancing act. On the one hand you need to make sure you've covered all of your costs and made a reasonable profit for your efforts. On the other hand you've got to give the client a competitive price in order to win the project in the first place.
 Audio for slide 3 (mp3)
As every installation firm knows, there's more to staying in business than simply doing a good job. You also have to pitch your prices at just the right level to make a fair profit, while still satisfying your client that they're getting value for money.
 Audio for slide 4 (mp3)
In this unit, we'll look at the skills involved in planning a flooring project, estimating material quantities, calculating costs, and preparing a quotation. We'll start with an overview of the whole process, and then look in detail at various aspects of estimating and costing.
 Audio for slide 5 (mp3)
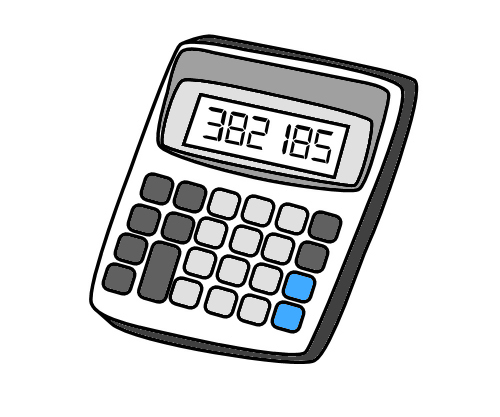
There is a certain amount of mathematics in this unit. If you know how to work with percentages and decimals and use a calculator, you shouldn't have any trouble. But if you need to brush up on basic maths, go to the unit titled Making measurements for more examples and practice exercises.
 Audio for slide 7 (mp3)
A quotation is a formal offer to carry out a particular job for a specified price. It's formal in the sense that once the client accepts it, you're obliged to stick to that price and do all the work you've said you will do. The only exception to this would be if you've made allowance for specific 'variations', such as different options or changes in the price of certain materials.
 Audio for slide 8 (mp3)
So you need to be very careful when you prepare a quotation, because it forms the basis of the contract you both sign when the client gives you the go-ahead. In this section, we'll look at the process of talking to the client about their proposed job, collecting the information needed to estimate a price, planning the project, writing up a quotation, and finally putting all the documents in order.
 Audio for slide 9 (mp3)
We'll cover the processes involved in carrying out the calculations in the second and third sections of this unit. So in this first section we'll lay the groundwork and take a 'big picture' view of overall task.
 Audio for slide 11 (mp3)
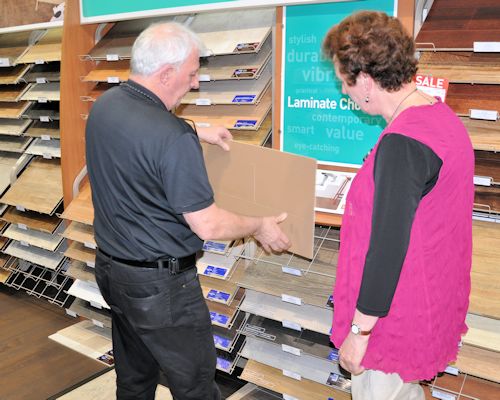
For most clients, the first step in organising a flooring installation is to visit a showroom. If the showroom is part of your company's services, then the whole process of preparing a quotation, supplying the products and carrying out the installation will be handled internally. On the other hand, if the showroom is run by a supply specialist, it's likely that you'll be engaged as a contractor after the client has looked at the various options and decided on the floor covering that suits them best.
 Audio for slide 12 (mp3)
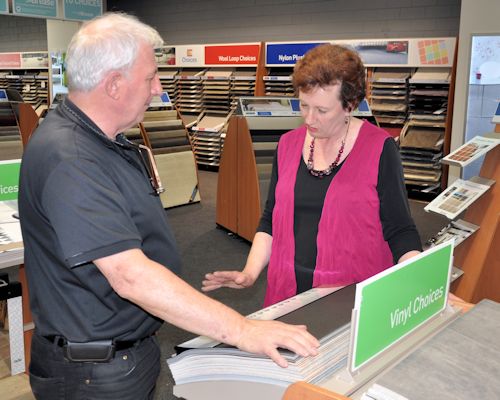
When the installer is also a salesperson In businesses that offer a supply-and-fix service, the flooring installer is sometimes involved with the client right at the outset. In these instances, you need to be part technical expert and part salesperson. Keep in mind that clients don't always know exactly what they're looking for, so you may have to help them by recommending various options and providing advice on the pros and cons of each one. You can do this while you show them a range of samples.
 Audio for slide 13 (mp3)
Here are some questions you can ask the client to help collect the details you need to know: Are there building specifications or special requirements for the project? What size is the job? What is their preference in materials? Is there a time line? What is the budget?
 Audio for slide 14 (mp3)
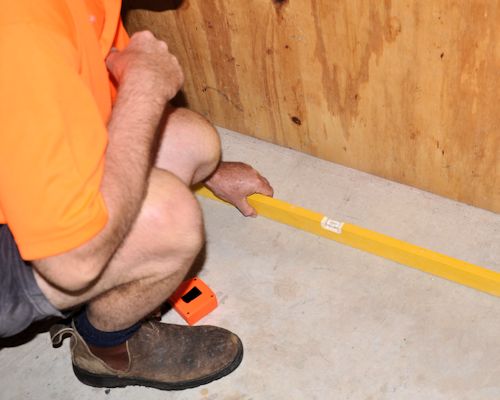
Meeting the client on-site Before your company can offer a firm price for the installation, someone will need to visit the jobsite to do a site inspection and measure up. Again, you may be involved in this process as the installer. One of the most important parts of the site visit is the subfloor assessment. This process is covered in detail in the unit: Inspecting and testing subfloors. But for now, we'll look at the site visit in broad terms.
 Audio for slide 15 (mp3)
Before you go out to the site, you should arrange a suitable time with the client so they can be on hand to discuss the specific requirements of the job and talk about any potential problems or arrangements that need to be made. Make sure you write down all the information that's needed to plan the job and prepare a quotation.
 Audio for slide 16 (mp3)
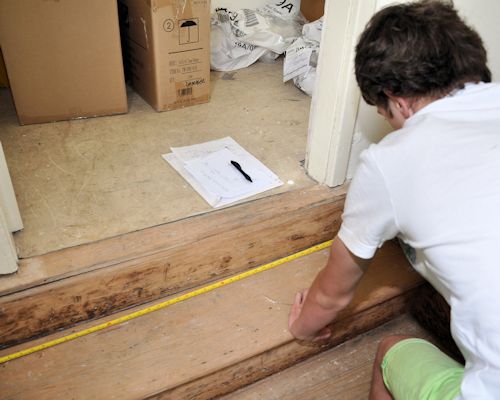
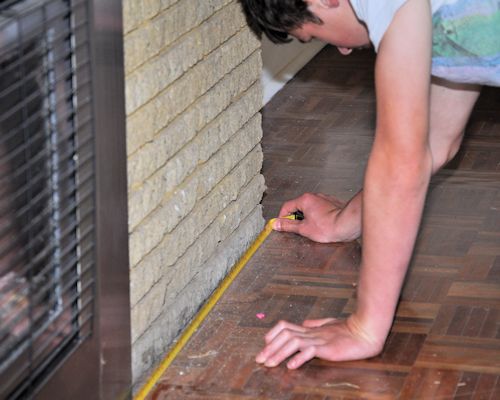
Most companies use a template form with boxes or blank spaces for recording the details. This helps to ensure that you don't forget anything important. In general, the minimum amount of information you'd need to collect would be: date of the site visit name, address and contact details of the customer description of the products to be installed subfloor preparation required sketches or plans showing detailed floor measurements and any special features. Click on the link below to see a typical example of a site assessment template.
 Audio for slide 17 (mp3)
Don't take shortcuts or skip over important points that you think you might be able to remember. Bear in mind that other people in your company may also need to refer to your notes, and if someone makes a mistake simply because you forgot to write down something critical, you won't be popular with your boss or the customer.
 Audio for slide 18 (mp3)
When you meet a client on-site for the first time, it's important that you present a professional image. The client needs to feel they can trust you and your company to do good job, charge a fair price and are taking a genuine interest in their needs. One way of looking professional is to show up to the meeting on time, give them a business card and introduce yourself by name. Can you think of other ways you could present a professional image at this first meeting? You might be able to interview another installer or supervisor and ask them for some tips on what to do and what not to do. Share your answers with your trainer and other learners in your group.
 Audio for slide 20 (mp3)
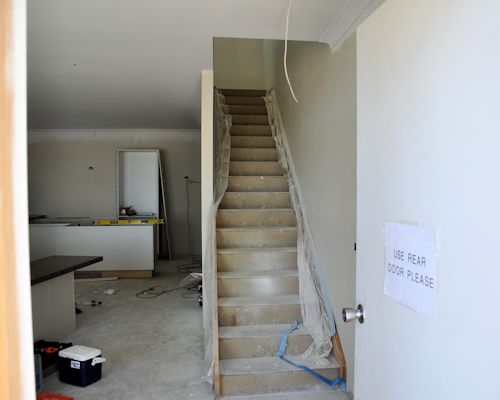
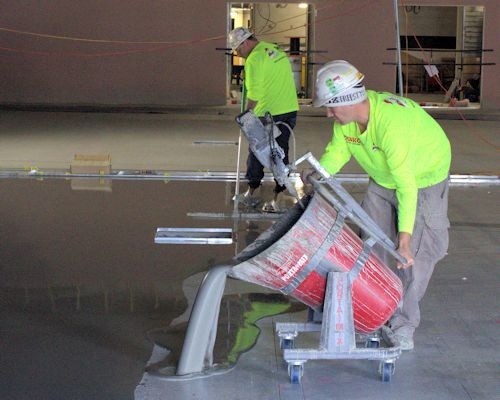
There are lots of things to consider when you're carrying out a site assessment and thinking about what will be involved in the project. Although your template form will prompt you on the main elements, there could be many other factors that have to be to be allowed for, depending on the type of job it is and who is overseeing it. Set out below are some of the issues that may not be itemised on your form, but would need to be taken into account nonetheless.
 Audio for slide 21 (mp3)
Safety requirements Every worker has to comply with the work health and safety (WHS) laws that apply to their state or territory. In addition to these laws are the regulations that cover specific parts of the Act. You'll find more details on these laws and regulations in the unit: Safety at work.
 Audio for slide 22 (mp3)
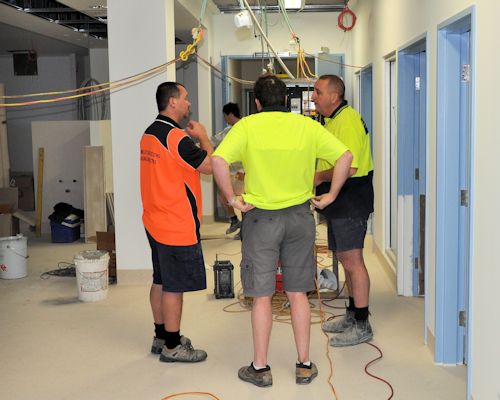
But it's worth remembering that complying with these requirements often comes at a cost. For instance, if you're working on a large building site your whole team may need to attend an induction session and toolbox meetings, and wear mandatory safety gear, such as hard hats and high visibility clothing. There may also be an extra set of site safety procedures that the principal contractor has imposed, particularly in relation to working around other tradespeople and machinery.
 Audio for slide 23 (mp3)
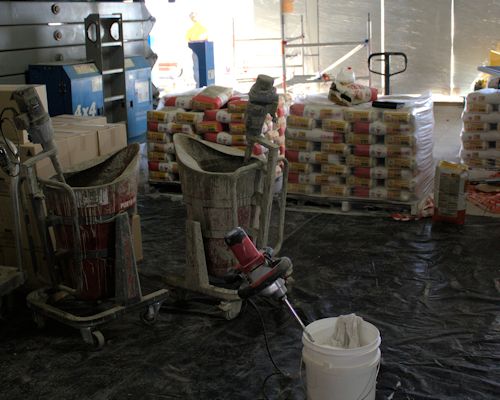
Environmental requirements Every worker has to comply with environmental laws and regulations. These are generally policed by the Environmental Protection Authority and the local council. For more details on these, see the unit: Working sustainably. (You'll find this unit on the Kitchen and Bathroom Cabinetmaking website at: www.kbcabinetmaking.com.au.)
 Audio for slide 24 (mp3)
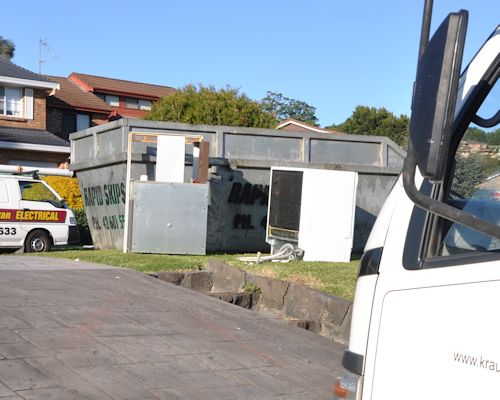
Again, complying with these regulations may add extra costs to your quotation. For example, if you're pulling up an old floor covering before installing a new one, there may be a certain disposal process you'll need to follow. There may also be procedures relating to how you store and dispose of glues or other hazardous substances.
 Audio for slide 25 (mp3)
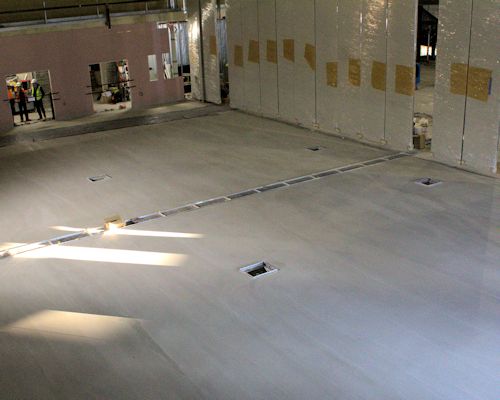
Site conditions and vehicle access When you're on-site doing an inspection and measure-up, chances are it will be some time before the actual installation is due to start. So you'll need to think ahead and try to visualise what the site will look like on installation day. The best way to do this is to ask yourself a series of questions, such as: Will all the other trades have finished any work that needs to be done before you can begin? Will there be other workers on-site on the day, or activities going on that might disrupt the installation? Will the power be connected and the lights working? Will the floor be ready for the installation - for example, if it's a new concrete floor, will it be dry enough? Are there plans to install air conditioning or other ventilation systems, and will these be operating normally when the flooring is ready to be installed?
 Audio for slide 26 (mp3)
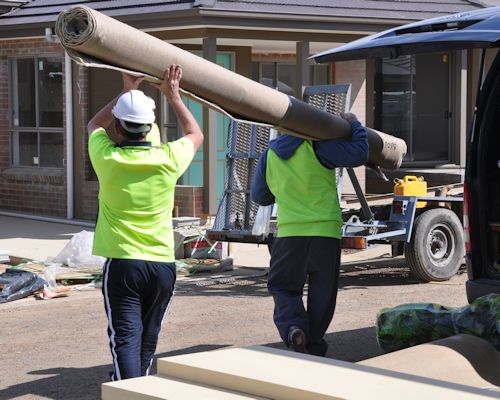
You should also think about vehicle access and parking arrangements. Ask yourself: Can the delivery truck get close to the installation area, or will the materials need to be carried some distance from the unloading point? Is off-street parking available for the installers, and if not, will they be able to park outside without any time restrictions?
 Audio for slide 27 (mp3)
Estimating time frames Although you won't need to commit yourself to timeframes until after the client has accepted the quotation, they may still ask you how quickly you can get onto the job and how long it will take to complete. Don't get too carried away with promising a quick start - unless your workload is very light and you've got all the materials in stock. You have to be realistic with your plans and make allowances for any hold-ups that may occur in the meantime.
 Audio for slide 28 (mp3)
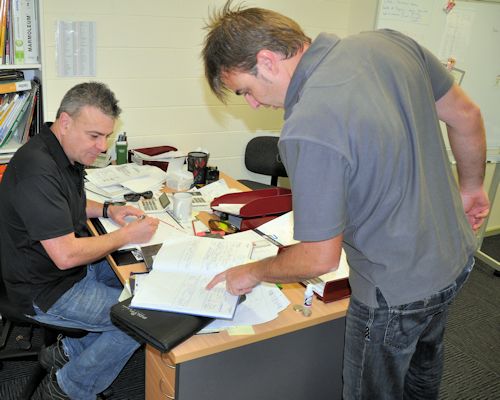
Here are some of the things you should consider when working out starting and finishing dates: Other work - if you have other jobs to complete first, make sure you allow enough time for delays or unexpected hold-ups. Non-working days - check that you haven't overlooked public holidays, workers' annual leave or flexi-days, or other days when you can't work. Supplier lead times - make sure your suppliers are able to deliver all the materials on time, particularly if there are unusual or imported items.
 Audio for slide 29 (mp3)
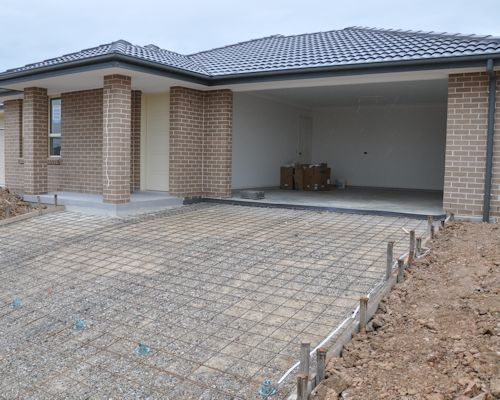
As you can see, there are all sorts of variables that might affect the way you carry out an installation project and the length of time it takes. Some of them can be a bit unpredictable, but there is often information you can draw on and hints around the site to help you determine when the site will be ready for your installers. For instance, if you arrived on-site and noticed that the street access and front yard were being excavated for a concrete driveway, you'd want to know that the concreting was going to be finished and the driveway was OK to drive on before your proposed installation date. Can you think of other examples of features or circumstances that might alert you to issues that needed to be noted or followed up?
 Audio for slide 31 (mp3)
Once you get back to the office, you can calculate the costs and prepare the quotation. A good way to start is to develop a work plan for the project. This will include: details of the materials to be used in the installation delivery and access arrangements sub-floor preparation required coatings or finishing work to be done number of hours needed to carry out each aspect of the job timetable for the whole project.
 Audio for slide 32 (mp3)
The work plan will help you to think through all of the requirements, from beginning to end, so you can make sure everything is properly covered when you calculate the costs. We'll look in detail at the costing process in Section 3 of this unit.
 Audio for slide 33 (mp3)
The quotation itself is the formal document that you give to the client, describing what you plan to do and how much you'll charge in total. As a minimum, a quotation should include the following information: reference number and date your business name, address, contact details and ABN client's name, address and contact details address of the jobsite description of the work to be done total price for the installation job, and a breakdown of the costings if required period of time the quote is valid for terms and conditions, such as payment schedule and any contractual requirements provision for a company representative's signature. The link below will take you to an example of a typical quotation. Example quotation
 Audio for slide 34 (mp3)
Following up on the quotation Once you submit the quote, some clients will give you an approval straight away and say: 'When can you start?'. Others will let it sit while they get other quotes, or consider their finances, or wait for other building work to be completed first. If you haven't heard from the client within a few days of submitting the quote - don't be afraid to ring up and ask whether they wish to go ahead. Clients like to deal with pro-active installers, because it demonstrates that they're keen and businesslike.
 Audio for slide 35 (mp3)
If the client decides not to give you the go-ahead, file the quote away for future reference. The costings may be handy for another quotation, or the client may come back some time later with a modified enquiry or even an approval on your original quote. For projects that are approved, make sure you re-confirm the details and ask the client to sign a contract. The typical procedure is as follows: Confirm the flooring colours, measurements and timeframe with client. Check the availability of the products to make sure there won't be any glitches or long waiting times. Send the client a contract to sign, and receive a deposit for the project. Once you've committed the client to a formal agreement, you can order in any special materials and put aside stock items for the project.
 Audio for slide 36 (mp3)
Are you familiar with the quotation documents that your company uses? Ask your boss if you can have a look at a typical quotation, preferably one that relates to a project you're working on at the moment. Compare your company's quotation layout with the sample quotation for a domestic job that we looked at earlier. Is there any additional information in your company's version that isn't in this sample document? If so, what is the purpose of this information?
 Audio for slide 38 (mp3)
Good records are essential to every business. They help the staff to plan and carry out projects efficiently, and keep track of payments and expenses. They also allow people to check up at any time on the measurements, calculations, job specifications, customer instructions or any other pieces of information that relate to the job.
 Audio for slide 39 (mp3)
It's generally the case that several people will need to refer to the information you've recorded in your site assessment and quotation. In most companies, there's a whole team involved in ordering materials, preparing site deliveries, supervising installers, carrying out the installation, producing invoices, liaising with the client, and so on. So the more accurate and thorough your records are, the less chance there is that a mistake will be made, or something overlooked.
 Audio for slide 40 (mp3)
Even long after the event, there may still be times when you want to refer back to old records. For example, if you're quoting on a similar job in the future, you'll save a lot of time if you can reuse your earlier calculations. You may also want to get an idea of cost movements over time, or look at particular trends that are developing.
 Audio for slide 41 (mp3)
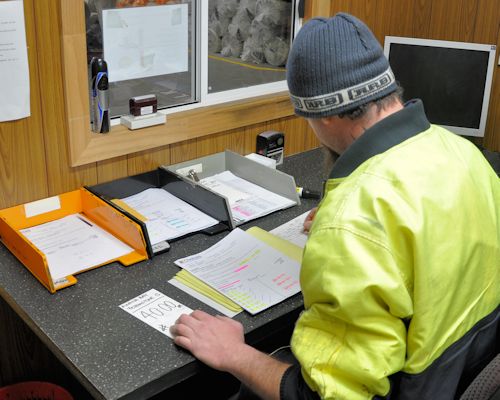
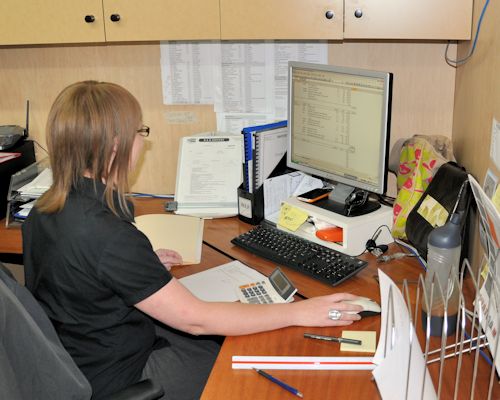
Here's some tips on keeping good records: Write clearly and legibly so that everyone can read the information easily and find details quickly. Show all costs and charges separately so they can be double-checked later and verified as correct. Attach all necessary documents, such as site sketches and specifications; or if they can't be attached, make clear references to where they can be found. File the records away in the correct place once you've created them, so that everyone knows where to find them.
 Audio for slide 42 (mp3)
What documents does your company use in the process of preparing and submitting a formal quotation to a client? Draw up a list of all the documents produced by your company or collected from the client, starting right at the beginning of the process. For each of these documents, indicate who creates it and how it is used in the quoting process. You may use the table below to set out your answer. The first entry shown is provided as an example.
 Audio for slide 45 (mp3)
The key component of your work plan for an installation project is the floor covering plan. This comprises a scale drawing of the floor, as well as specific details about the project, including internal room measurements, doorway widths, location of seams and pile direction. In this section, we'll look at the components of a floor covering plan and the basic techniques of drawing proportional sketches and scale drawings.
 Audio for slide 46 (mp3)
We'll also describe the units of measure used by flooring installers and the main methods employed to collect measurements on-site. If you're not sure about how the metric system works, in particular the relationship between centimetres and millimetres, go to the following two lessons in the unit: Making measurements: The metric system Length You'll find tape reading and metric conversion exercises in these lessons to help reinforce the concepts.
 Audio for slide 48 (mp3)
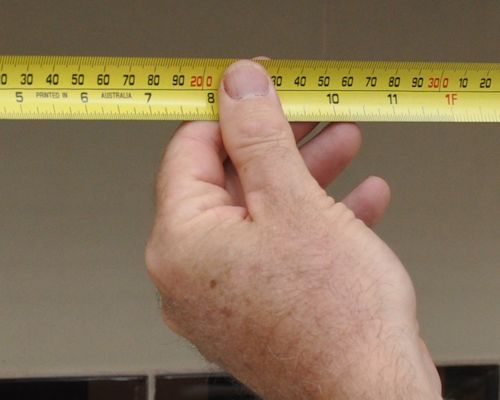
Over the years, flooring installers have had to get used to different units of measurement. Old timers in the industry will still remember using the imperial system and recording their measurements in feet (ft) and inches (in). In the 1970s, when the metric system was introduced into Australia, installers changed to centimetres (cm) as the unit of measure for floor coverings, because it was the standard adopted by the textiles industry.
 Audio for slide 49 (mp3)
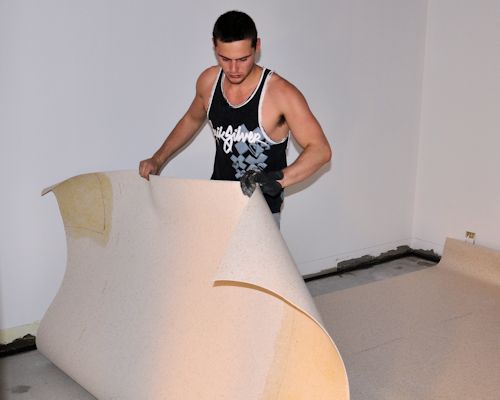
Now things are beginning to change again. The latest Australian Standard for resilient floor coverings (AS 1884-2012) specifies millimetres (mm) as the unit of measure. This move is designed to bring floor coverings into line with the other building trades. If you know the history of these changes, you can understand why flooring installers need to have some knowledge of all three units of measure.
 Audio for slide 50 (mp3)
For example, floor coverings imported from America or Asia are still manufactured in imperial widths, such as 6 feet or 12 feet. When they arrive in Australia, they are often re-sold in their metric-equivalent lengths, such as 183 cm (6 ft) or 366 cm (12 ft). On the other hand, materials imported from Europe are made in standard metric widths, such as 2 metres (200 cm) and 3 metres (300 cm). Australian made materials are manufactured both ways, depending on the company producing the products.
 Audio for slide 51 (mp3)
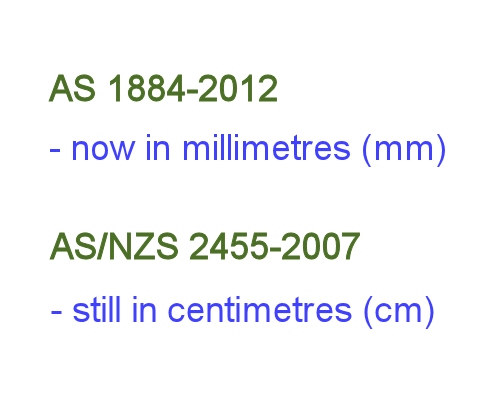
Recording measurements on-site In practice, all measurements are recorded in metric units. Most flooring installers still use centimetres, because that's the way it's been done for the last 40 years. However, if the installer picks up a building plan to check the internal room measurements, they need to remember that the dimensions will be shown in millimetres and do a conversion in their head as they read off the numbers.
 Audio for slide 52 (mp3)
In this unit, we'll use millimetres in our discussions on floor covering plans, because that brings us into line with the latest Australian Standard for resilient floor installations. But it's worth remembering that the Australian/New Zealand Standard for textile floor coverings (AS/NZS 2455) was last updated in 2007, so it still specifies centimetres as the unit of measure for floor covering plans. This is likely to change to millimetres in the next update.
 Audio for slide 54 (mp3)
A floor covering plan consists of a proportional sketch or scale drawing of the floor area, plus details about the project to be undertaken. These include: floor covering and underlay to be installed positioning of seams and joins direction of the pile types of accessories used subfloor preparations required any special features of the job.
 Audio for slide 55 (mp3)
Australian Standard 1884 says that the client should be shown a floor covering plan before the installation takes place. This allows them to see the specifications and details of the project, and either confirm that they're happy with it or ask for specific changes to be made.
 Audio for slide 56 (mp3)
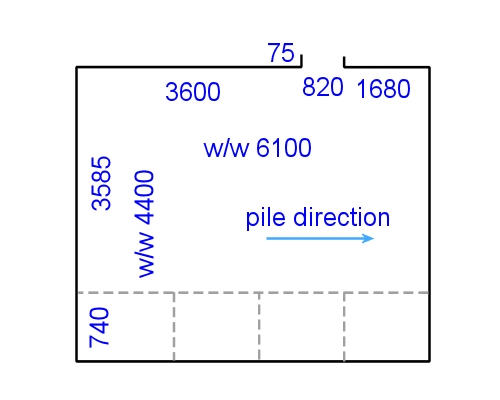
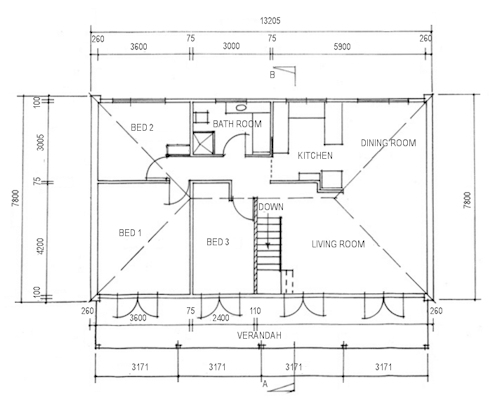
Note that a floor covering plan is not the same thing as an architectural or building plan. The drawing at right is an example of a simple floor covering plan for a single room. It shows the seams, pile direction and all necessary measurements for the floor layer to carry out the installation. Compare this to the building floor plan shown in the diagram below.
 Audio for slide 57 (mp3)
You can see that in this building plan, the dimensions appear around the outside, next to their own set of 'dimension lines' that indicate the starting and finishing points of the measurement. But on the floor covering plan the dimensions are written on the inside, directly beside the wall they refer to. When you meet the client to talk about the proposed job, they may give you a copy of their building plan and specifications for your own reference. The plan will be a great help when you start to draw up your own proportional sketch of the floor area.
 Audio for slide 58 (mp3)
But always double-check the measurements on-site with your own tape measure! You can never guarantee that the building plan will be perfectly accurate, or that there haven't been some changes made since it was produced.
 Audio for slide 60 (mp3)
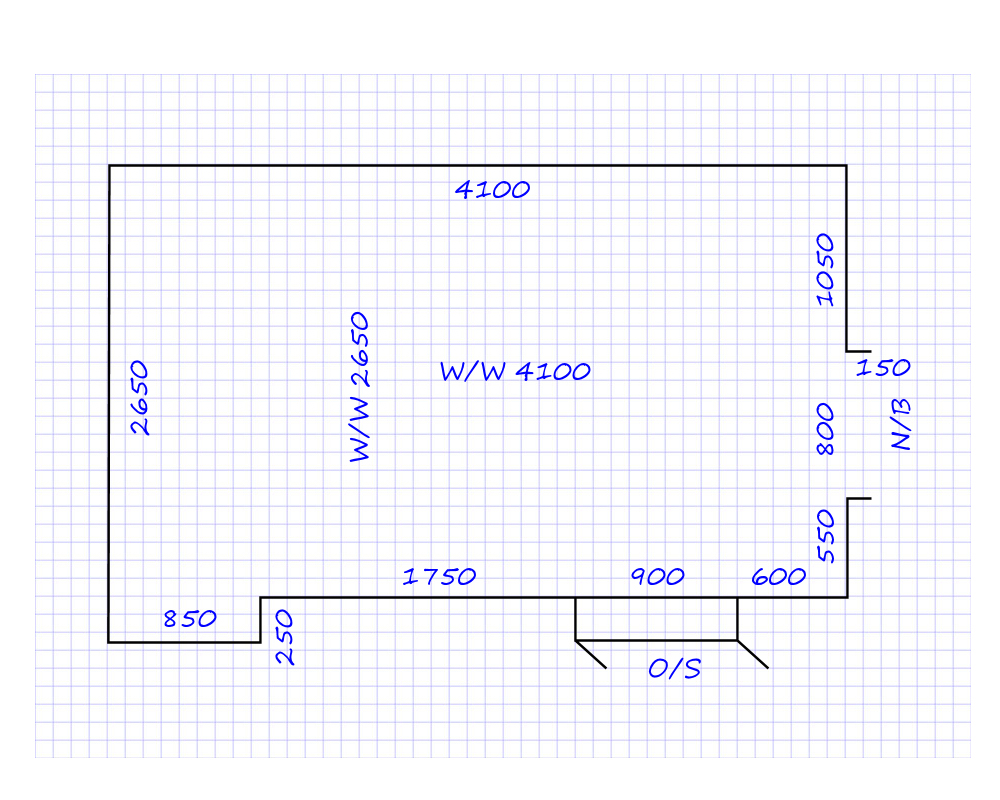
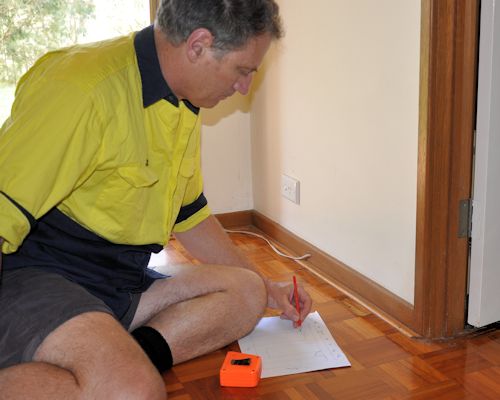
A proportional sketch is the drawing you produce on-site while you're doing the measure-up. Some installers work with a sheet of blank paper, others use graph paper to help get the proportions right. Either way, it's best to draw the lines with a pencil and have an eraser on hand so you can correct any mistakes on the spot.
 Audio for slide 61 (mp3)
You can see from the above drawing that the symbols and abbreviations used on proportional sketches are much simpler than those used on building plans. This is because you only need to include the specific information relevant to the flooring installation. The Just for fun exercise shows some common examples of symbols and abbreviations.
 Audio for slide 62 (mp3)
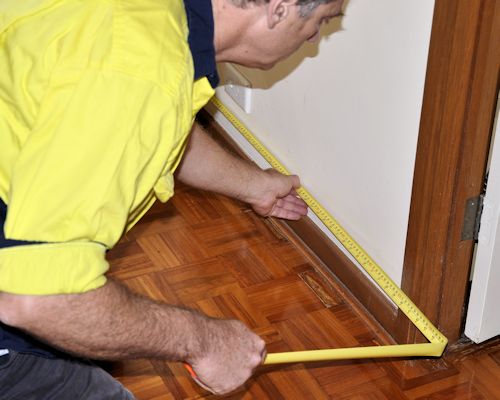
How to draw a proportional sketch Here are the basic steps involved in drawing up a proportional sketch. Walk around the room and look at its general size and geometry. If any furniture or obstacles are in the way, have a look at the ceiling to get an idea of the room's shape. Draw an outline of the room, showing its shape and features. Leave some space around the outside of the drawing and position the main entrance at the bottom. Mark in details such as doors, fireplaces, stairs, wardrobes, projections and recesses. Take 'running' measurements around the room and write them on the sketch as you go. Put the figures on the inside of the perimeter walls. Do the wall to wall (w/w) measurements first and then the running measurements. Check the running measurements against the w/w measurements. If they're not within 30 mm of each other, take the measurements again to see where the error is. Double-check that all necessary details and room features are recorded on the sketch.
 Audio for slide 64 (mp3)
When a plan or object is 'drawn to scale', it means that all the lines are in exact proportion to each other. So a scale drawing is really a proportional drawing that's completed back at the office when you have the time and equipment to make it look more professional. Some installers use a CAD (computer aided design) software program to produce their final scale drawing for the floor covering plan. This allows you to make changes easily and store the files electronically.
 Audio for slide 65 (mp3)
But you don't have to use a CAD program. You can still go about it the 'old fashioned' way with a pencil, scale rule and sheet of plain paper. It's handy to know how to use a scale rule anyway, because you can 'scale off' any dimensions that aren't physically marked on the drawing. Although this process isn't perfectly accurate, it can help you to estimate lengths for the purposes of costing up a quotation.
 Audio for slide 66 (mp3)
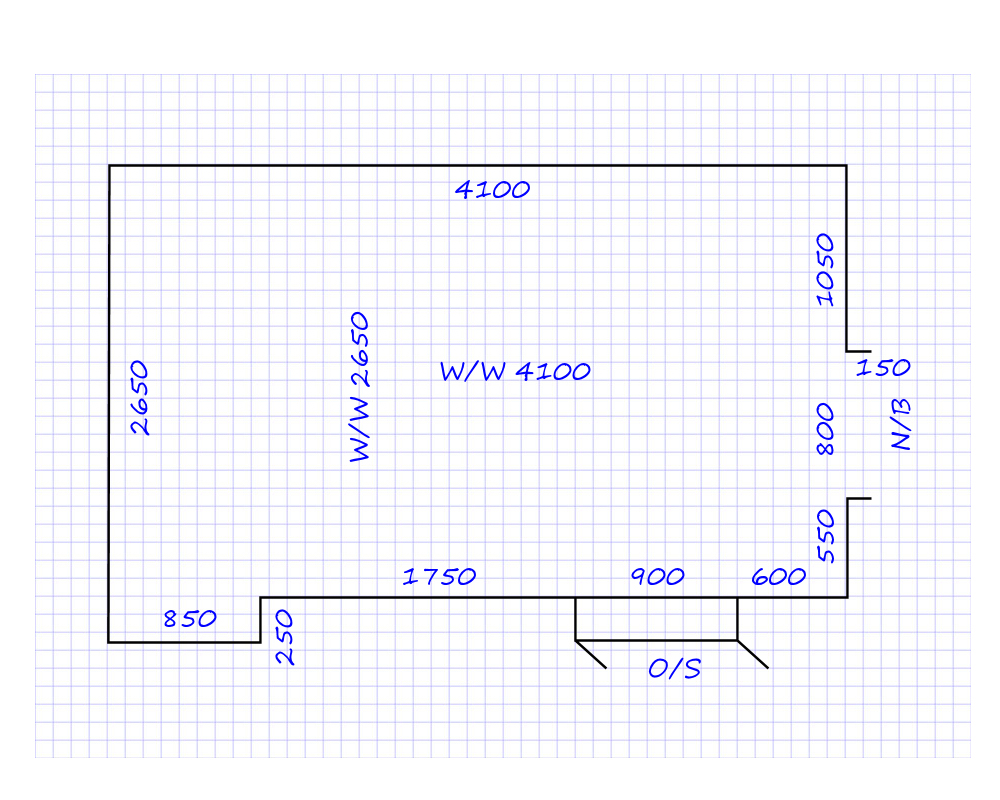
At right is the proportional sketch we saw in the previous lesson. It's been drawn on graph paper with a 5 mm grid. So if one square equals 100 mm in real life, the scale is: 5 mm = 100 mm, which is a ratio of 1:20. In other words, for every 5 mm you draw on the page, you're representing 100 mm of length on the actual floor.
 Audio for slide 67 (mp3)
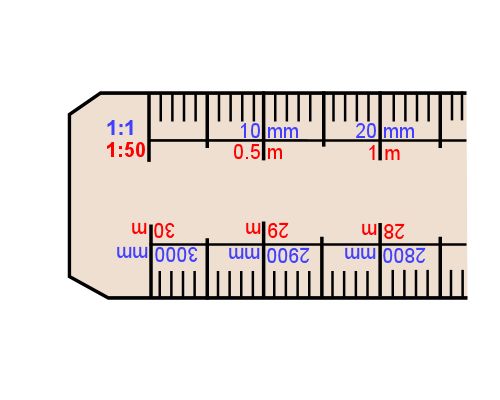
A scale rule lets you draw lines to scale without needing a grid. It also has a variety of scales marked, such as 1:5, 1:20, 1:50 and 1:100. Building floor plans are normally drawn at a scale of 1:100, because they need to show the whole house in a single plan.
 Audio for slide 68 (mp3)
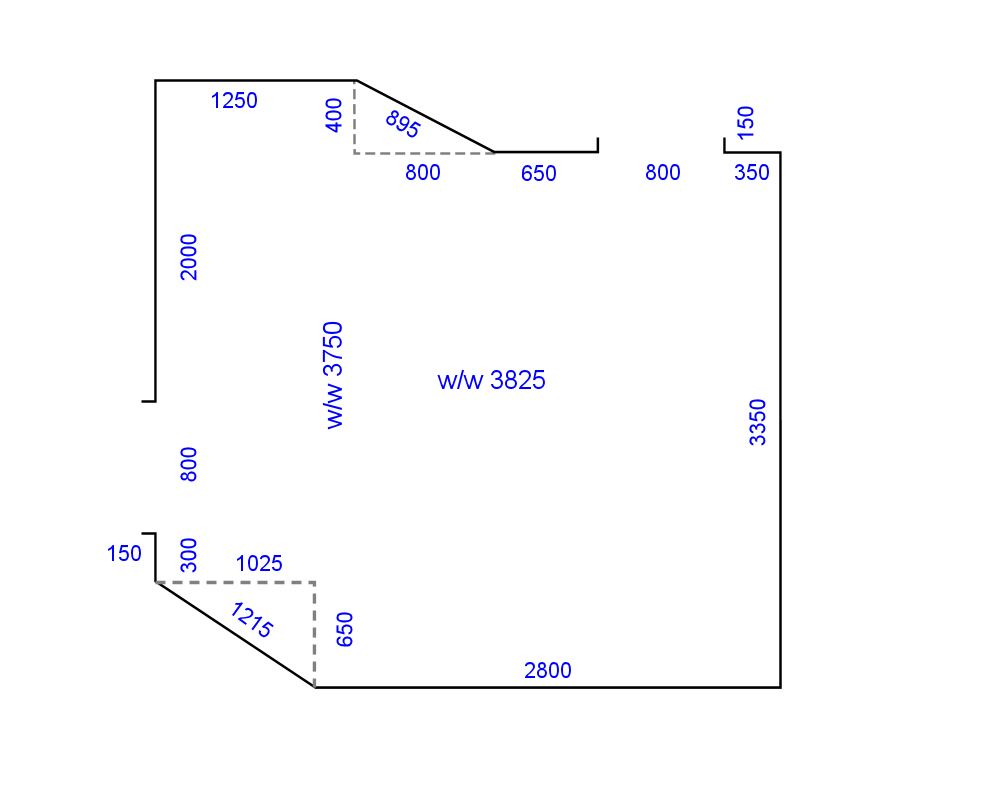
But if you were only drawing one room in your floor covering plan, you might use a scale of 1:20. If you were drawing a couple of rooms, you might use 1:50. The final choice of scale will depend on the amount of detail you need to show and the size of the page you're working with. Select the link below to see an example of a scale drawing.
 Audio for slide 69 (mp3)
Making a scale drawing by hand Here are some guidelines on how to produce a scale drawing using pencil and paper. Make a proportional sketch of the area first, noting all the measurements you'll need for the scale drawing. Decide on the scale you want to use. This will depend on the size and details of the installation site and what you want to show on your drawing. Re-draw the proportional sketch on a blank sheet of paper, using a scale rule and pencil. Start at the bottom right hand corner and draw all lines to scale. Leave space around the outside of the drawing for any notes you may want to add later. Rub out any lines that are not correct and re-draw them. Check that the projections and recesses are correctly shown. Fill in all measurements on the inside of the drawing. Write down the scale you have used underneath the drawing on the right hand side.
 Audio for slide 71 (mp3)
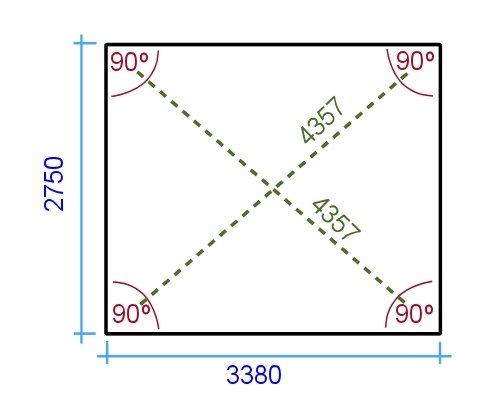
There will be times when the room you're measuring up is not square. An angle is square if it is at 90 degrees - in other words, a right angle. When a room is square, its opposite walls are parallel to each other, and the corners are all at 90 degrees. The diagonal measurements are also the same, as you can see in the top drawing at right.
 Audio for slide 72 (mp3)
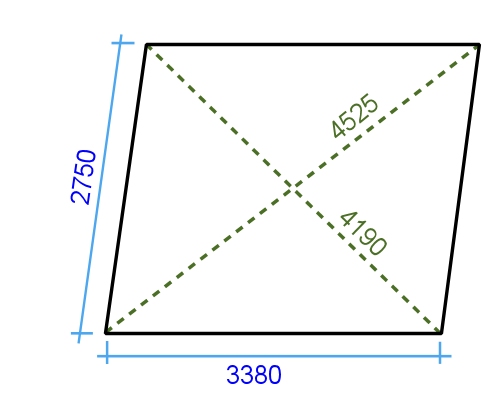
Note that saying a room is 'square' is not the same thing as saying it is 'a square'. As you know, a square has 4 equal sides. But in building terms, any rectangular room is 'square' when its walls meet at 90 degrees. To check a room for square, all you need to do is measure the diagonals. If they're not the same, then the room isn't square.
 Audio for slide 73 (mp3)
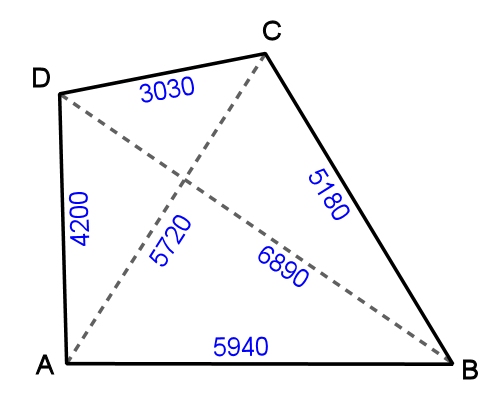
Odd shaped rooms Sometimes the room will be an unusual shape or have walls at odd angles. In these cases, you need to use triangulation to draw it accurately to scale. While you're on-site you should measure up all wall lengths, plus as many diagonals as you need to get a good picture of the walls' relative positions to each other. Choose one wall as your 'reference wall', and use its corners as your starting point for the diagonals. Mark all these measurements on your proportional sketch. Once you get back to the office, you'll need to re-draw this sketch as a scale drawing.
 Audio for slide 74 (mp3)
Let's take the example shown at right and work through the process. The first thing you need to do is get a scale rule, compass, pencil and blank sheet of paper. Then follow the steps below.
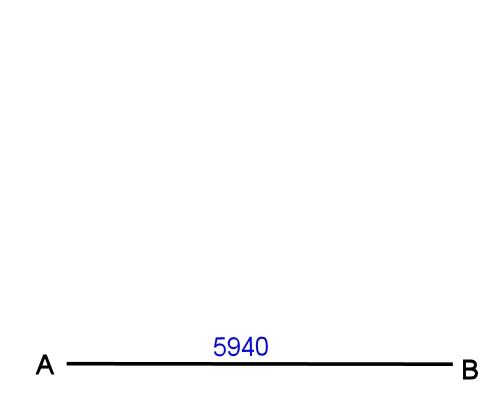 Audio for slide 75 (mp3)
Choose an appropriate scale for the size of paper you're using, leaving space for a margin around the outside so you can write notes in later. Draw the reference wall to scale. In our case, the reference wall is A to B - 5940 mm.
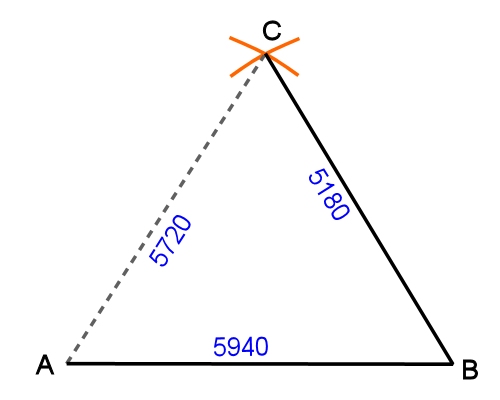 Audio for slide 76 (mp3)
- Open the compass out to the distance between A and C on the scale rule - that is, the scaled equivalent of 5720 mm. Then put the point of the compass on A and draw an arc at the approximate position of C.
- Open the compass out to the distance between B and C - 5180 mm. Then put the point of the compass on B and draw an arc that intersects the first arc.
- Draw a line between B and C.
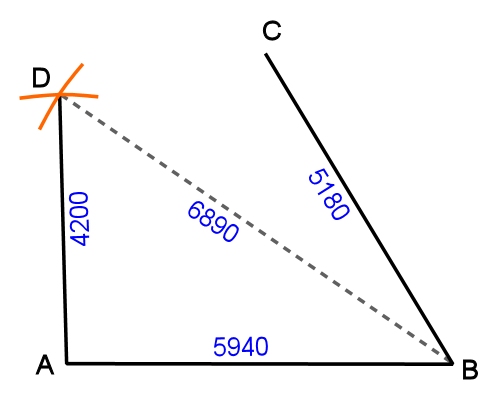 Audio for slide 77 (mp3)
- Go back to A and draw an arc at the approximate position of D, using the scaled measurement for 4200 mm.
- Do the same for B to D - 6890 mm - so that the two arcs intersect.
- Draw a line between A and D.
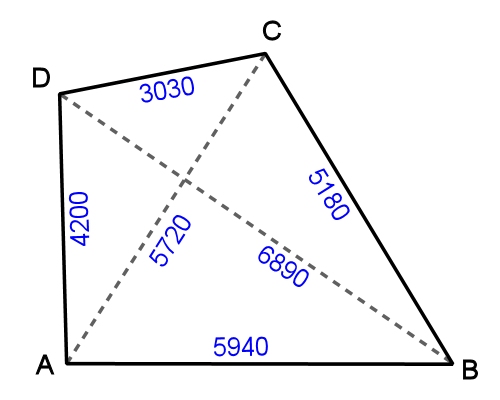 Audio for slide 78 (mp3)
- Draw a line between D and C
- Check the lengths of your wall lines using the scale rule to make sure the proportions are accurate.
 Audio for slide 80 (mp3)
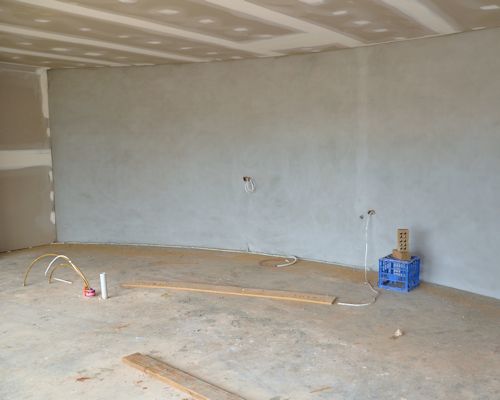
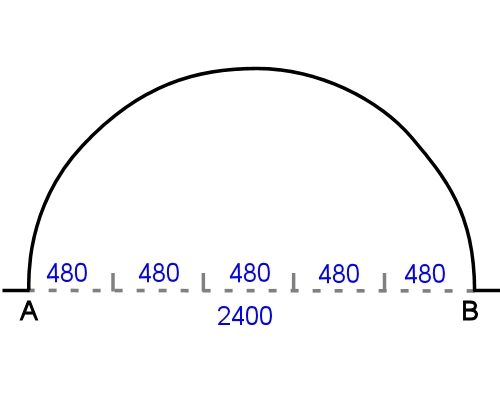
Some floors have curved areas. This might be because the walls are curved, or because there are internal installations such as fireplace hearths or raised stage areas. One method of measuring a curve is to divide the shape into smaller parts and form a grid. You can do this on the floor surface itself with a piece of chalk, and then rub off the markings when you've finished. Below are the steps involved in producing a proportional sketch of a curved area.
 Audio for slide 81 (mp3)
- Run a chalk line on the floor between the two outside points of the curve. This is shown as a dotted line in the drawing at right.
- Divide the length between the two points into equal parts and mark these divisions on the floor.
 Audio for slide 82 (mp3)
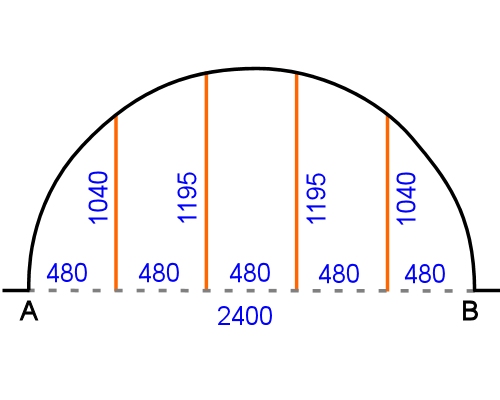
- Run vertical chalk lines from the marks (at 90 degrees to the original AB line) up to the edge of the curve.
- Measure each vertical line and write in the measurements on a proportional sketch of the area.
 Audio for slide 83 (mp3)
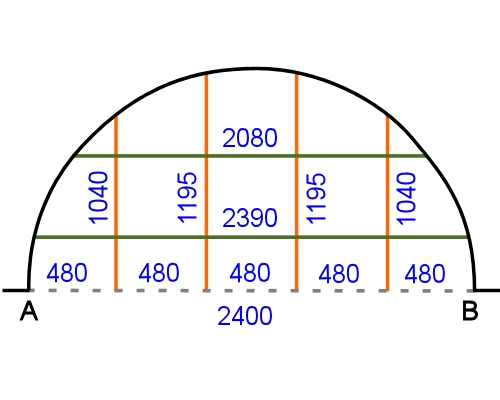
- Run horizontal lines (parallel to the AB line) the same distance apart as the vertical lines, to form a grid.
- Measure each horizontal line and note the measurements on your sketch. When you get the back to the office, you can use the proportional sketch to plot the points of the curve on the scale drawing. This will allow you to either draw the curve in a CAD program or use a 'flexi curve' ruler to manually form the shape and draw it with a pen.
 Audio for slide 86 (mp3)
To calculate the material quantities needed for an installation, you need to know the measurements of the floor areas you'll be covering, as well as details about the client's preferences. In this section, we'll talk about the process of estimating quantities and deciding on which way the seams and joins should run. We'll also work through the calculations for various types of floor coverings.
 Audio for slide 88 (mp3)
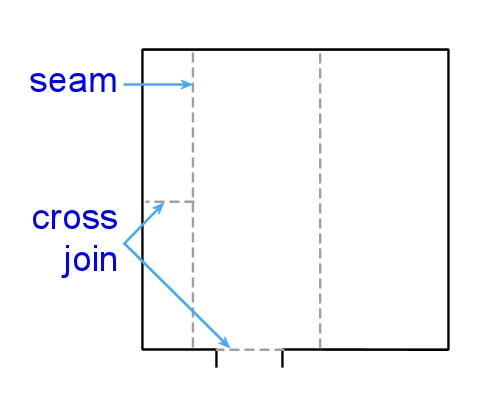
Seams occur in floor coverings wherever two lengths join side by side. Cross joins occur where two ends meet - that is, where one roll finishes and the next one begins. Although flooring installers try to minimise the number of seams and joins used, they are unavoidable in large rooms, angled areas and in doorways between rooms.
 Audio for slide 89 (mp3)
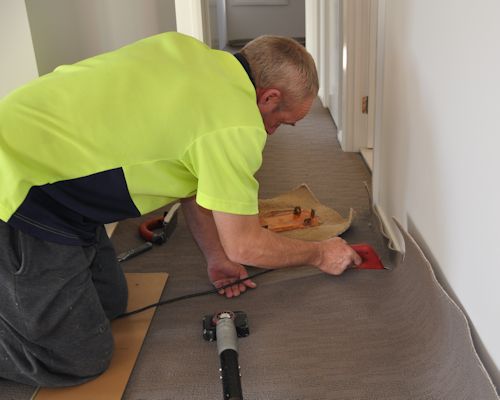
Your floor covering plan should show all seams and joins. This not only allows you to plan where they'll go, it also lets the client approve their position before you proceed with the installation. You especially need to involve the client when there's a choice between a layout that has the best appearance and an alternative that is more cost-effective.
 Audio for slide 90 (mp3)
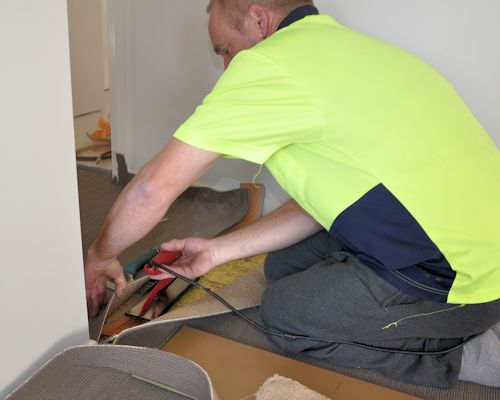
Here are some basic guidelines on where to position seams and joins: Traffic should travel along the seams wherever possible. When traffic goes across a seam it tends to cause more wear and tear. Strong light sources should run in the same direction as seams. Try to position seams so that they run towards windows and full length glass doors. Carpet pile should always lie in the same direction on both sides of a seam. The direction should also face the main entry where possible.
 Audio for slide 91 (mp3)
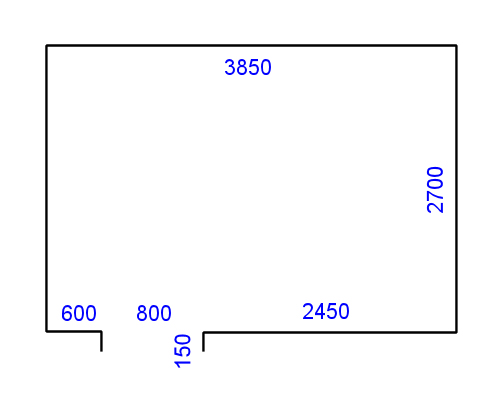
Effect of seam direction on material quantities Let's take a simple example to see what effect the seam direction will have on the quantity of material needed to cover a floor. Say you have just measured up the room shown at left, and the dimensions are: Length: 3850 mm Width: 2700 + 150 (doorway) = 2850 mm
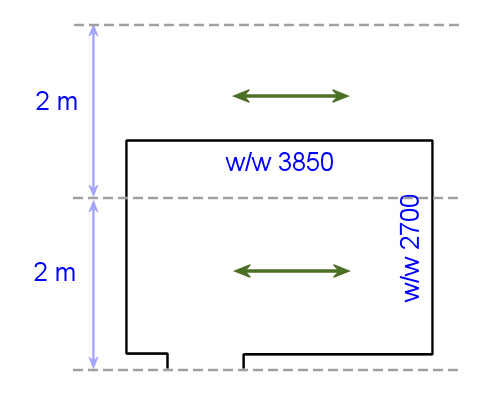 Audio for slide 92 (mp3)
Now let's say you're going to lay sheeting from a roll that's 2 metres wide. First, let's run the seam lengthwise. You can see that this will require two runs of 3850 mm, with a large off-cut on one run. We'll also need to add a trim allowance of 100 mm at the end, which will make the length of each run: 3850 + 100 = 3950 mm.
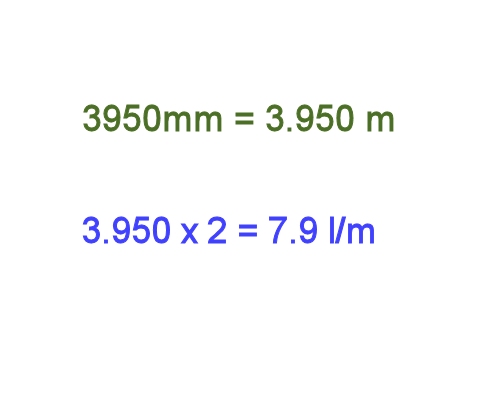 Audio for slide 93 (mp3)
Now we can work out the total lineal metreage (l/m) required for the room. 'Lineal' means 'in a line', so lineal metreage is the total number of metres needed if you measured it in a continuous line. Firstly, we have to covert the millimetres to metres: 3950 mm = 3.950 m Then we multiply the length of each run by the number of runs to find the lineal metreage: 3.950 x 2 = 7.9 l/m.
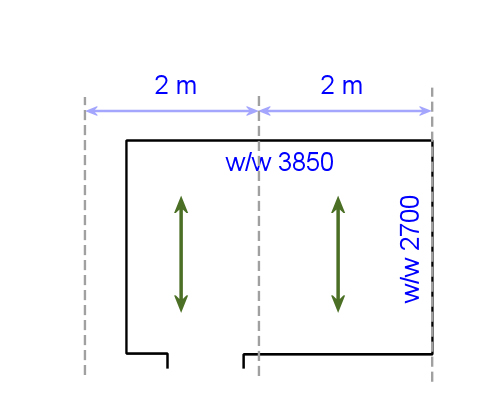 Audio for slide 94 (mp3)
Let's now start again, and change the direction of the runs so the seam travels across the room. This time the total lineal metreage will be: 2700 + 100 (trim allowance) + 150 (doorway) = 2950 mm = 2.95 m 2700 + 100 (trim allowance) = 2800 mm = 2.80 m 5.75 l/m That's quite a saving in material.
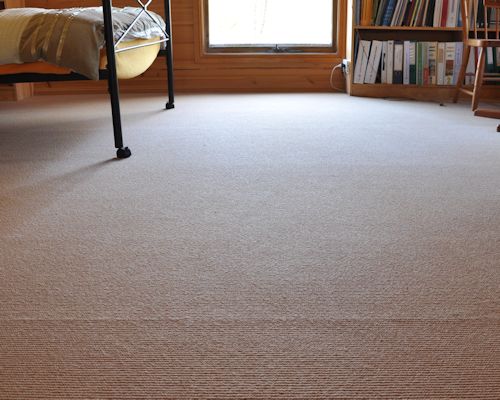 Audio for slide 95 (mp3)
But here's the complication. Just say there was a large window on the right hand wall, and it was the only source of natural light in the room. This will have the effect of making the seam more obvious, especially when the light is streaming in during the day. So now you've got a compromise to make. Do you go for the cheapest option, or the one that will hide the seam better? In cases like this, you should advise the client on the pros and cons of both options and let them decide!
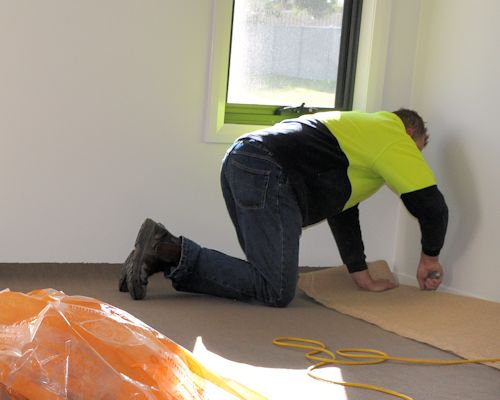 Audio for slide 96 (mp3)
Note that in some instances there may be other factors involved. For example, if you're doing several rooms, or there are built-in wardrobes or pantries to cover, you may be able to use the large off-cuts elsewhere. So you should weigh up these factors when you're deciding which way to go.
 Audio for slide 98 (mp3)
Patterned floor coverings sometimes have a repeat in the design at regular intervals to allow for pattern matching. This enables you to trim the sheets to match up the pattern at cross joins, but it also means that you have to build in an extra allowance for trimming.
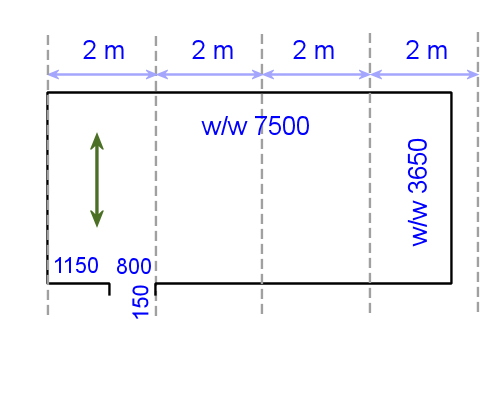 Audio for slide 99 (mp3)
Here's an example. Let's say that a sheet product is 2 metres wide and has a pattern repeat every 300 mm. How many lineal metres of material are required?
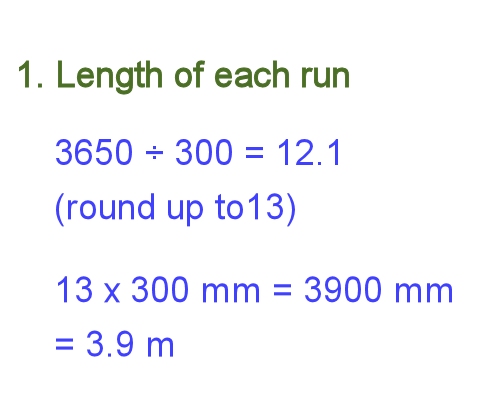 Audio for slide 100 (mp3)
Step 1: Calculate the length allowance for each run If the seam runs across the width of the room and each run is 3650 mm, then the number of pattern repeats will be: 3650 ÷ 300 = 12.1 So we'll need to allow for 13 pattern repeats in order to start each run at the beginning of a pattern. This means that the length allowance is: 13 (pattern repeats) x 300 mm = 3900 mm Because 3900 mm gives us plenty of allowance for the 150 mm return in the doorway, we don't need to add any extra for that run.
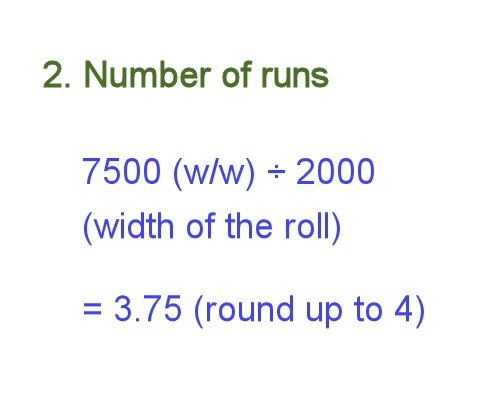 Audio for slide 101 (mp3)
Step 2: Calculate the number of runs The number of runs is: 7500 (w/w) ÷ 2000 (width of the roll) = 3.75, which means there will be 4 runs
 Audio for slide 102 (mp3)
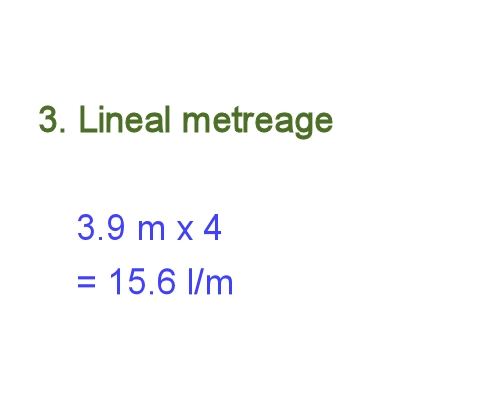
Step 3: Calculate the lineal metreage The total lineal metreage for the floor is: 3.9 m x 4 = 15.6 l/m
 Audio for slide 104 (mp3)
In the last section we talked about rooms with opposing walls that aren't parallel to each other - that is, the angles in the corners are not 'square'. Often you'll find that a room generally does have square corners, but there are also odd angles around recesses or projections. You're likely to come across them in hallways or at bay windows, or around features like fireplace hearths and staircases.
 Audio for slide 105 (mp3)
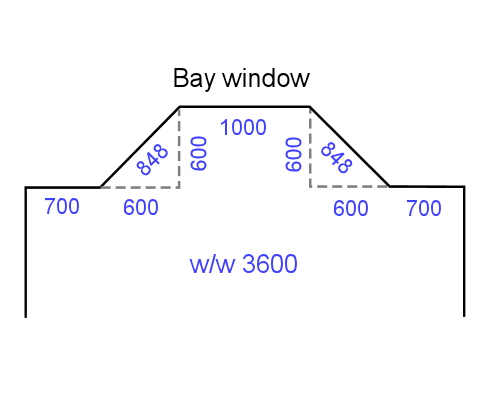
In most instances, the easiest way to mark these angles on a floor covering plan is to simply show the diagonal line as the 'hypotenuse' in a triangle. In other words, draw in the two imaginary square sides of the triangle and write up the lengths of all three sides.
 Audio for slide 106 (mp3)
You can see that in the case of the bay window in this drawing, the depth of the recess is actually 600 mm, even though the angled wall itself is 848 mm long. So if you're calculating how much sheet flooring is needed with the roll running towards the window, you'll need to allow for an extra 600 mm in length across the full width of 3600 mm. For more information on triangular shapes and angles in general, go to the following lessons from the unit: Make measurements: Area Angles
 Audio for slide 108 (mp3)
Vinyl tiles are manufactured in a range of square or rectangular sizes. Unlike rolls of flooring which are sold in lineal metres, tiles are priced by the box and charged either as a piece count or coverage in square metres. When it comes to calculating the quantity of tiles needed for an installation job, it's safest to use the piece count because that lets you account for the individual tiles that will need trimming.
 Audio for slide 109 (mp3)
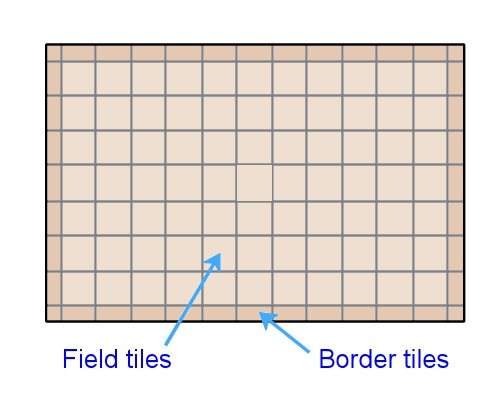
The tiles that run around the perimeter of a room are called border tiles. These are the ones that are trimmed to fit the room dimensions. The full tiles that make up the main body of the area are called field tiles.
 Audio for slide 110 (mp3)
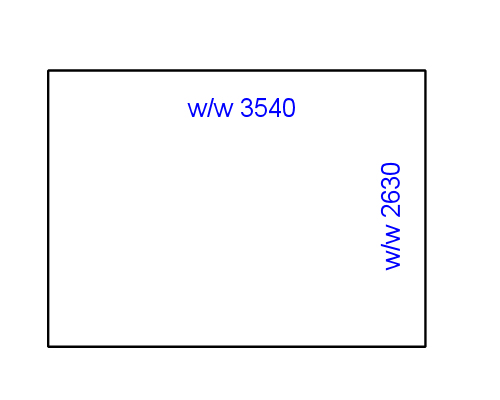
Example of a quantity calculation Say you had been asked to lay 300 x 300 vinyl tiles in the room shown at right. How many tiles will you need?
 Audio for slide 111 (mp3)
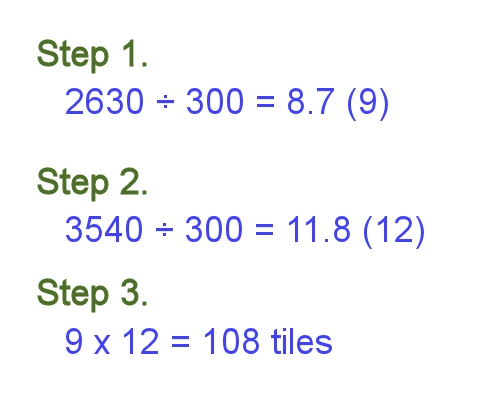
Step 1: Divide the width of the area by the tile width 2630 (width of room) ÷ 300 (width of tile) = 8.7, so 9 tiles will be needed. Step 2: Divide the length of the area by the tile width 3540 (length of room) ÷ 300 (width of tile) = 11.8, so 12 tiles will be needed. Step 3: Multiply the width and length quantities 9 x 12 = 108 tiles.
 Audio for slide 112 (mp3)
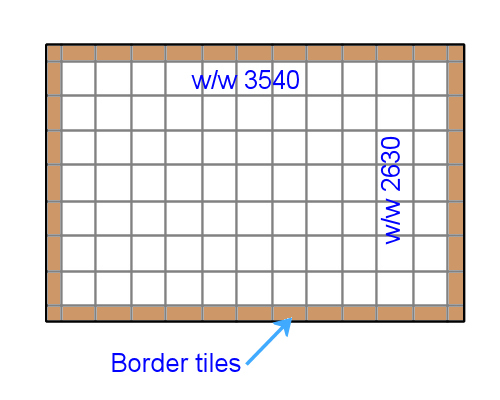
Balancing border tiles There are times when it's best to balance the width of the border tiles, particularly when you can see both sides of the floor area at once. This means that instead of trimming the border tiles on one side only, you halve the finished size needed and take the same amount off both sides. For example, if you decided to balance the borders on either side of the room as shown above, the calculations would be as shown below.
 Audio for slide 114 (mp3)
If you're laying carpet or vinyl on a flight of stairs, you'll need to include the stair measurements in your proportional drawing. This drawing shows a typical 'box step' staircase. The important dimensions for a flooring installer are: height of the riser depth of the tread width of the tread.
 Audio for slide 115 (mp3)
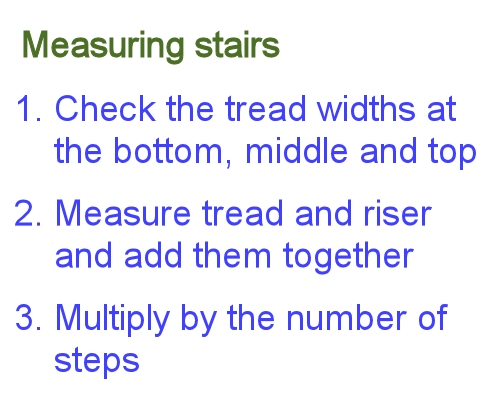
Here are the steps involved in measuring up a flight of stairs.
- Check the widths of the bottom, middle and top treads. If they're all the same, you can assume that all stairs are the same width.
- Measure tread and riser on one step and add them together.
- Count the number of steps in the flight. Multiply the number by the measurement you've derived from Step 2. This will give you the total length of carpet or vinyl needed for the staircase.
 Audio for slide 116 (mp3)
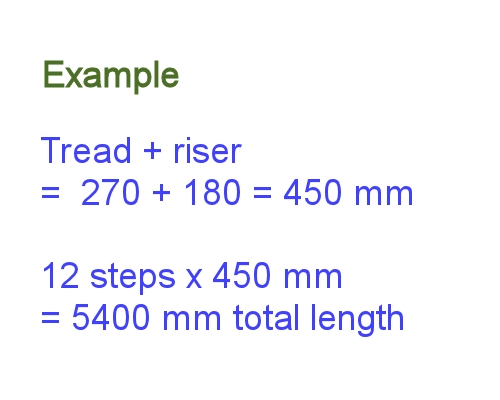
Example Let's say the drawing above shows part of a staircase made up of 12 steps. The calculations are shown below. Tread + riser = 270 + 180 = 450 mm 12 steps = 12 x 450 = 5400 mm total lengt
 Audio for slide 118 (mp3)
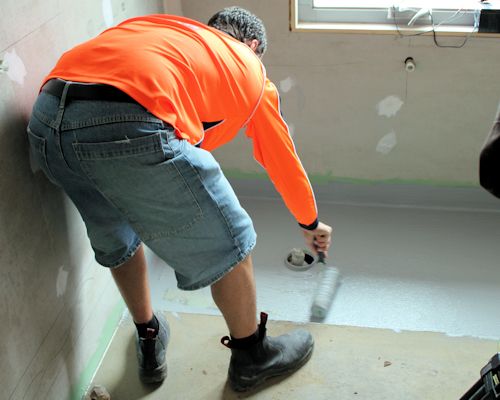
The coverage rates of primers and adhesives are expressed in terms of the square metreage (m2) they will cover per litre (L) of product. Because primers are applied to different types of subfloor surfaces, they are given an upper and lower coverage rate, with the lower one being for more porous surfaces. For example, the container might state: Coverage: 8-10 m2/L
 Audio for slide 119 (mp3)
Adhesives are spread at a thickness that suits the nature of the job. The thickness is regulated by the depth of the notches in the trowel. So an adhesive coverage rate might state: Coverage: 3 m2/L when using a 2.4 mm V-notch trowel
 Audio for slide 120 (mp3)
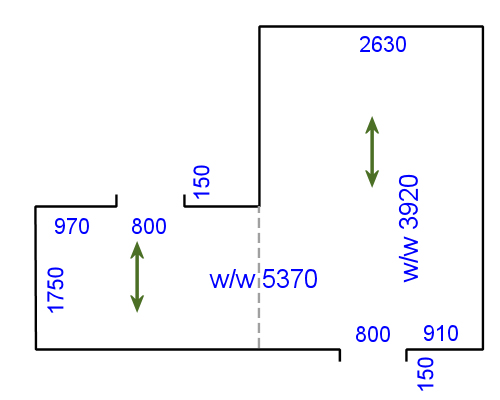
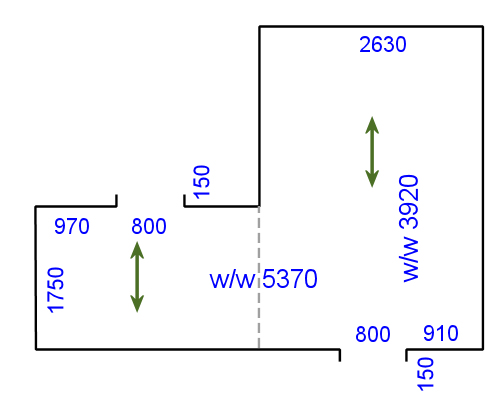
Example Say you're going to coat this concrete subfloor with a primer, and the coverage rate is 8-10 m2/L. Because the concrete surface is not perfectly smooth, you decide to use the lower rate of 8 m2/L. Step 1: Find the area This L-shaped floor is made up of two rectangles. We know that the w/w width of the room (across the pile direction) is 5370. We also know that the width on the right hand side of the seam is 2630. Therefore, the width of the room on the left of the seam is: 5370 - 2630 = 2740
 Audio for slide 121 (mp3)
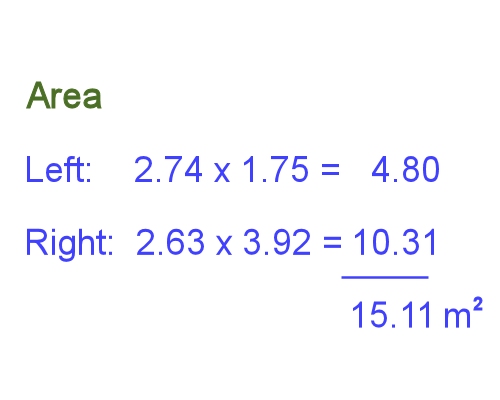
Now we can calculate the area of the two rectangles. Note that we'll have to convert the dimensions from millimetres to metres because we want to know the area in square metres, not square millimetres.
| Left side: | 2.74 x 1.75 | = | 4.80 |
| Right side: | 2.63 x 3.92 | = | 10.31 |
| 15.11 m2 |
 Audio for slide 122 (mp3)
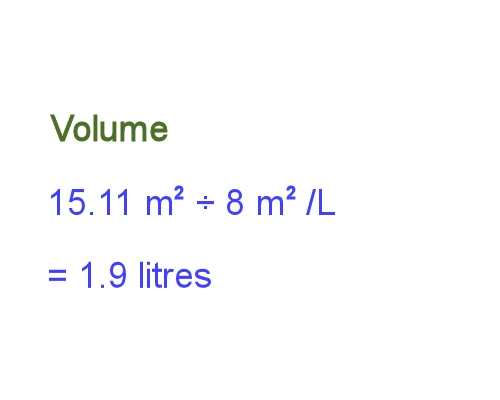
Step 2: Find the volume The primer covers 8 m2/L, so: 15.11 ÷ 8 = 1.9 litres.
 Audio for slide 124 (mp3)
Most levelling compounds are supplied as a 'cementitious' (cement-based) powder, ready for mixing with water. A common bag size is 25 kg. The coverage rate is sometimes shown in square metres per bag when spread at a particular thickness. For example, the bag might state: Coverage: 13 m2 at 1 mm thick per bag Alternatively, it might be expressed as the number of kilograms per square metres at a given thickness, such as: Coverage: 2 kg/m2 at 1 mm thick
 Audio for slide 125 (mp3)
Example Say you are going to install a cement-based levelling compound on the floor shown in this plan. The compound comes in 25 kg bags and the coverage for each bag is listed as: 13 m2 at 1 mm thick per bag. You have estimated that the average thickness required will be 3 mm. How many bags will you need?
 Audio for slide 126 (mp3)
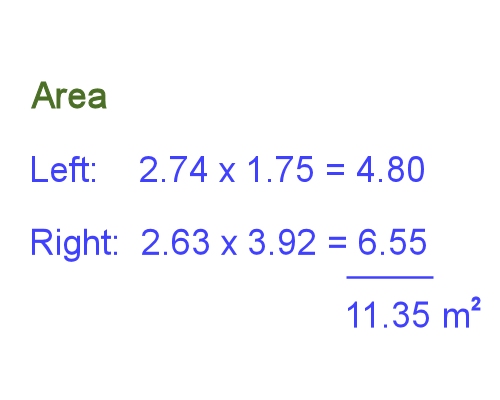
Step 1: Find the area In the previous lesson we calculated the area of this floor plan as: 11.35 m2
 Audio for slide 127 (mp3)
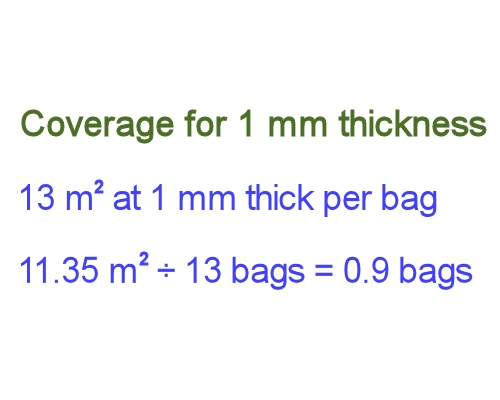
Step 2: Find the coverage for the given thickness The manufacturer has nominated a coverage of 13 m2 for one bag (25 kg) when spread at an average thickness of 1 mm. Therefore a 1 mm thickness will require: 11.35 ÷ 13 = 0.9 bags
 Audio for slide 128 (mp3)
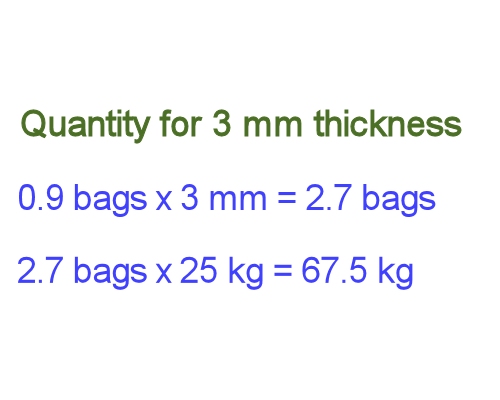
Step 3: Find the number of bags Because you have estimated that your average thickness will be 3 mm, you'll need to multiply the Step 2 figure by 3: 0.9 x 3 = 2.7 bags If you wanted to know how many kilograms of compound this represents, simply multiply the number of bags by the kg per bag: 2.7 x 25 = 67.5 kg
 Audio for slide 131 (mp3)
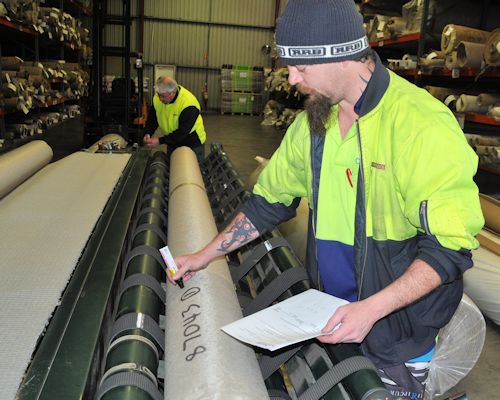
Cost estimation is the process of working out how much to charge for an installation project. The estimates you come up with will be based on the information you've collected in your site assessment and the knowledge you have about pay rates, product prices and time allowances.
 Audio for slide 132 (mp3)
It's not an exact science, because you can never know in advance whether everything will unfold the way you expect it to. But a good estimator is able to be accurate enough to win a job with a competitive price and still make a reasonable profit for the company. In this section, we'll look at the main categories of costs that need to be allowed for, and discuss the process of adding all the components together to arrive at a total price.
 Audio for slide 134 (mp3)
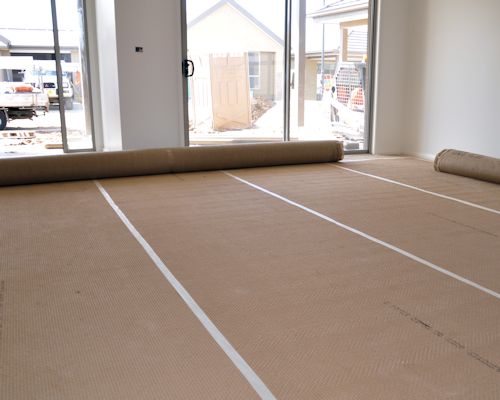
To estimate material costs, you need to start with the following information from your site assessment documents: floor covering type and quantity underlay type and quantity hardware and trims. Then you multiply the unit price for each of these items by the quantity required. Finally, you add an allowance for consumable items, such as blades, nails, glue, joining tape, and so on.
 Audio for slide 135 (mp3)
An example Say you had a carpet installation that required the items and quantities set out below:
The best way to set out the cost calculations is to use a table format, like the one below. This allows you to see the individual figures easily and double-check all your sums.
| Carpet | 100% nylon high-low pattern - 3660 mm: 17.6 lineal metres |
| Underlay | foam - 1830 mm |
| Trims | T capping - gold |
| Carpet gripper | Smooth edge pre-nailed concrete |
 Audio for slide 137 (mp3)
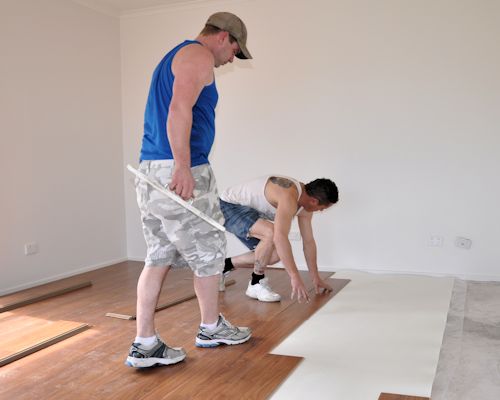
In principle, estimating on-site labour costs is very straightforward - just multiply the hourly rate of pay by the number of hours required to complete the job. For example, if an installation is likely to take 2 people 8 hours to complete and they're paid $25 per hour, the calculation would be: Labour hours (or 'man hours'): 2 people x 8 hours = 16 hours On-site labour cost: 16 hours x $25 per hour = $400 However, in practice there are a few extra variables that you need to build into the estimates. Here are some of these variables.
 Audio for slide 138 (mp3)
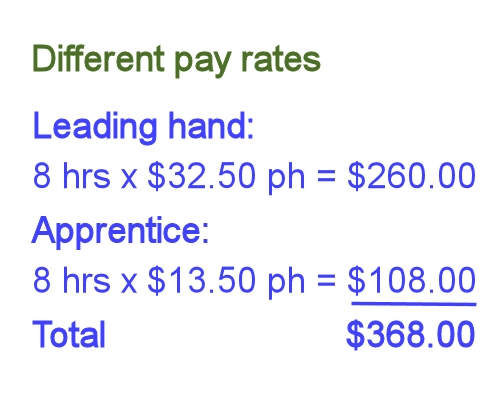
1. Different pay rates Your team of installers might include people paid at different rates, depending on their level of responsibility. For example, if you had one leading hand and one apprentice on-the-job for one full day, their labour costs might be as shown below. Leading hand: 8 hours x $32.50 per hour = $260.00 Apprentice: 8 hours x $13.50 per hour = $108.00 Total cost: = $368.00
 Audio for slide 139 (mp3)
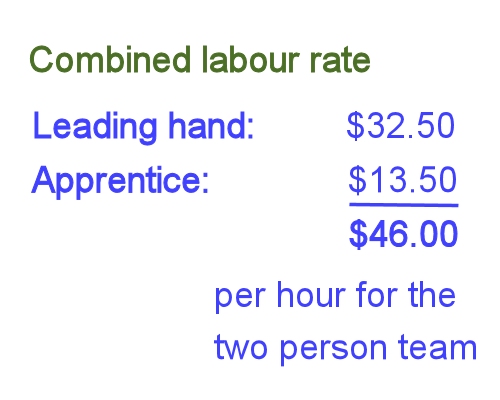
If you normally use this combination of workers for your installations, you could add the two amounts together and call the labour rate: $32.50 + $13.50 = $46.00 per hour for a two person team.
 Audio for slide 140 (mp3)
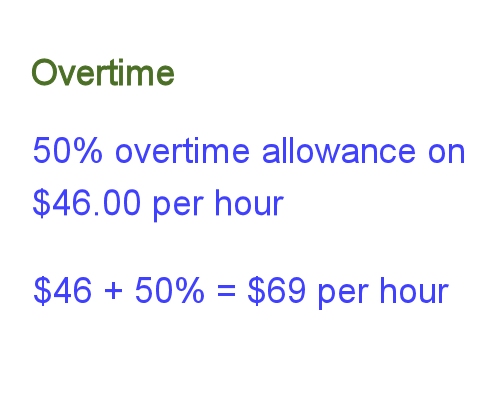
2. Overtime If a job needs to be completed quickly, you may have to pay your workers overtime, or ask them to work on a public holiday. A typical overtime allowance is 50% on top of the standard wage. Let's say our two-man team will spend 10 hours on the job to finish it in a single day, with the last two hours paid at a 50% overtime allowance. The first step is to calculate the overtime rate. If you're using a calculator, you'll probably be able to press the function keys as shown below. $46  50
50 
 $69 per hour Note that not all calculators operate in the same way, so you may have to vary the sequence of keys to add a percentage.
 50
50 
 $69 per hour Note that not all calculators operate in the same way, so you may have to vary the sequence of keys to add a percentage.
 Audio for slide 141 (mp3)
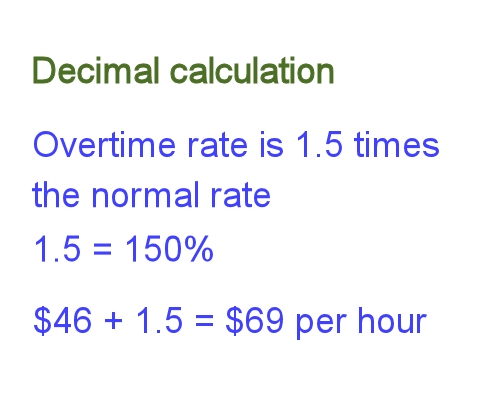
Alternatively, you can simply multiply the original figure by 1.5 - which is another way of saying that the overtime rate is 150% of the normal rate. In other words, 150% expressed as a decimal is 1.5. Therefore: $46 x 1.5 = $69 per hour For a more detailed explanation of percentages and decimals, and examples of how to use them in calculations, go to the lesson in Making measurements called: Decimals and percentages.
 Audio for slide 142 (mp3)
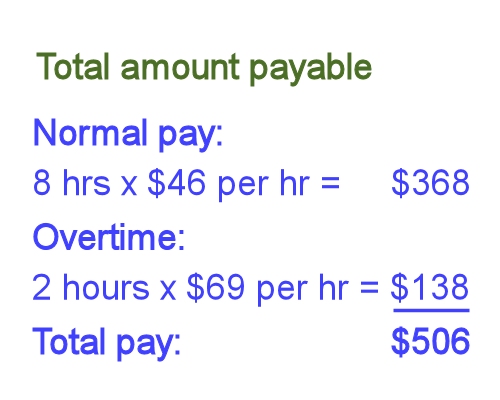
Now that we know both rates of pay, we can calculate the total amount payable for the 10 hour day. Normal pay: 8 hours x $46 per hour = $368 Overtime: 2 hours x $69 per hour = $138 Total pay: = $506
 Audio for slide 143 (mp3)
3. Downtime 'Downtime' refers to the times when the team is getting paid but not actually working productively. Obviously, you want to minimise downtime as much as possible, but there will always be a certain amount of non-productive time spent on the job. This could be because workers are cleaning up, having breaks, re-parking vehicles, and so on. There may also be times when workers have to attend toolbox meetings or site induction sessions. And there might be occasions when a mistake is made and work has to be redone.
 Audio for slide 144 (mp3)
So you need to build in an allowance for downtime that reflects the actual amount of time your team spends on the job, rather than simply charge the time it takes to carry out a task at maximum efficiency. Many flooring installers add between 5% and 15% to their time estimate to allow for downtime.
 Audio for slide 146 (mp3)
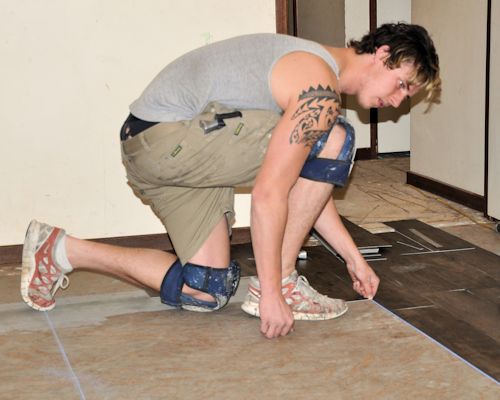
Overheads are all the expenses associated with running the business, other than the cost of materials and on-site labour. These expenses will vary depending on the size of the business, the services it offers, and the employment arrangement it has with workers and staff. Most companies use a percentage 'mark-up' on each job to build in a proportion for these overheads. This percentage figure is generally reviewed from time to time by the company's management to make sure it's still covering the costs adequately without making the quotes uncompetitive. Set out below are some of the overheads that need to be allowed for.
 Audio for slide 147 (mp3)
1. Overheads on direct labour Direct labour refers to the on-site workers involved in the actual installation. In the last lesson, we looked at this cost in terms of pay rate per hour. But the actual cost to the business may be much more than this amount. If they're contractors, the workers are likely to cover their own overheads, in which case there won't be any hidden costs. But if they're employees, their cost to you will include all of the obligations you owe them as their employer.
 Audio for slide 148 (mp3)
These may include: Allowances, such as tooling, clothing, travel, meals and shift loadings Leave entitlements, including public holidays, annual leave, sick leave, and long service leave Superannuation, which is currently set at 9% of an employee's wage and will soon move to 12% Workers' compensation insurance, which is calculated as a percentage of the total wages bill.
 Audio for slide 149 (mp3)
Some of these expenses may already be built into the rate per hour you use for your direct labour costings. But others will need to be added somewhere along the line as 'overheads', so that your business is covered for them in the overall quotation.
 Audio for slide 150 (mp3)
2. Indirect labour Indirect labour refers to the work done by all the support staff who are not directly involved in the installation. Depending on the size of the business, there may be sales people, clerical assistants, supervisors and other people needed to keep the wheels turning so the installers have always got a steady flow of work.
 Audio for slide 151 (mp3)
3. Other overheads There may be various other overheads that your business incurs in its day-to-day operations. These could include: Utilities, such as electricity, gas, water and telephone Insurance for vehicles, buildings, contents and public liability Purchase of plant and equipment Repairs and maintenance on plant and equipment Consumables, such as stationery and fuel Training for apprentices and other employees
 Audio for slide 153 (mp3)
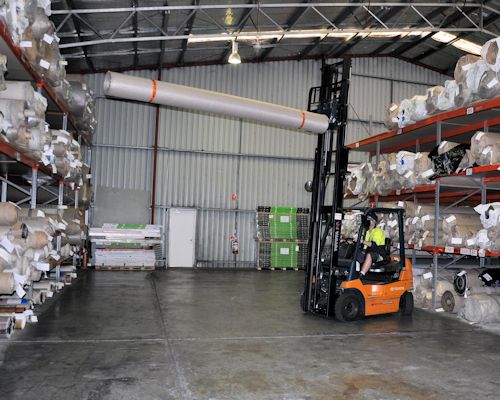
So far, we've discussed the three major areas of expenses - materials, labour and overheads. But if your quotation price only covered these costs, your company would do all this work for the client and only just cut even. So we need to add a profit mark-up to make the whole job worthwhile.
 Audio for slide 154 (mp3)
The profit mark-up is what makes a business viable. It is used to improve and grow the company, and to give the owners a return on their investment and hard work. The mark-up is generally expressed as a percentage of the total price, and will vary from one business to another, depending on the type of work being done and the amount of competition there is in the marketplace. In wholesale supply-only companies, it could be as small as 10%. In installation businesses that specialise in complex or difficult projects, it could be as high as 100%.
 Audio for slide 155 (mp3)
Goods and services tax (GST) Once all the costs are accounted for, there is one more amount that has to be built into the final price. This is the GST that the company must collect from the client and pay to the Tax Office. The government has set this tax rate at 10% of the value of the goods or services provided. GST can be a complicated matter if you're working with different prices and some of them already have GST added. A simple way to avoid adding it twice to an item is to make sure all the prices that go into your calculations are GST exclusive. This lets you add a general 10% to the total figure at the end. Suppliers are required to make it clear whether a particular price shown against an item is GST inclusive or exclusive. So you will often see the following abbreviations in brackets after a price: (inc. GST) - includes GST (exc. GST) - excludes GST.
 Audio for slide 156 (mp3)
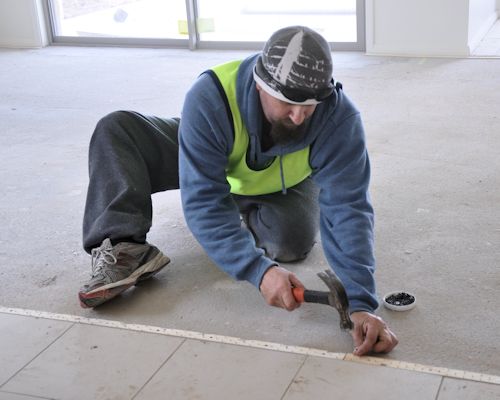
Adding up a final quotation price Below is a summary of all the cost categories that go into the final calculation of a quotation price. The figures used are carried over from the materials and labour calculations in the earlier lessons of this section.
 Audio for slide 158 (mp3)
Installers who work for a flooring distributor or large building company often get paid under a contract arrangement, rather than by the hour. This means that their pay is determined by the size of the project and the type of work they're doing, as opposed to how long the job takes to complete. The advantage of a contract rate to the installer is that they can work very hard and earn good money - because the more efficient they are, the more jobs they'll complete each week.
 Audio for slide 159 (mp3)
The advantage to the supplier is that they can rely on a set price for the job, without having to build in allowances for hold-ups or slow workers. The main caution is that they need to be sure the contractors will maintain a high quality of workmanship, and not take shortcuts to finish jobs quickly.
 Audio for slide 160 (mp3)
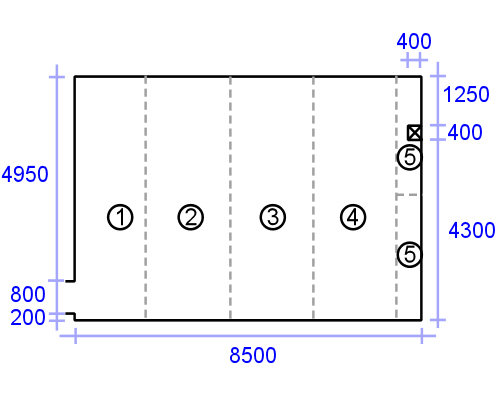
Example of a quotation using contract rates Let's say you've asked a contractor to lay sheet vinyl on a concrete subfloor with the specifications shown below. Room size: 5950 x 8500 Vinyl floor covering: 2 metre wide roll Underlayment: smoothing compound skim coat. The installer will be paid at the following rates:
The cost of the vinyl flooring is $50 per metre, and the delivery price is $70. Your profit mark-up is 30%. What will your quotation price be? Have a look at the calculations below.
| Lay and weld sheet vinyl: | $8.00 per square metre (including cost of weld rod and vinyl adhesive) |
| Install skim coat underlayment: | $6.00 per square metre (including cost of smoothing compound) |


